
Showing real customer feedback on your Shopify store matters: visitors trust other shoppers, and visible feedback turns curiosity into conversions. But if you’re like most store owners, you want to make sure your reviews look good, update on their own, and fit seamlessly into your website, without spending hours on tricky code or extra costs.
That’s where the Google Reviews Widget comes in. It pulls your latest customer reviews and displays them right on your Shopify pages, automatically keeping everything fresh and relevant. You get a polished, professional look that matches your brand, and your visitors see social proof that builds their confidence in purchasing — all with minimal setup.
- Straightforward setup. Step-by-step directions to add Google Reviews without touching code.
- Customization options. Adjust layout, colors, and display settings to match reviews to your style.
- Alternative methods. Compare native and third-praty solutions to see what works best.
- Troubleshooting tips. Quick fixes for common issues with displaying reviews.
We’ve split this guide into two parts for convenience: a short, no-fuss setup so you can show Google reviews on your Shopify website right away, and a full step-by-step section with tips for customizing and optimizing the widget for best results.
Get Your Reviews Live in Minutes
To embed Google Reviews on Shopify right away, follow these simple steps:
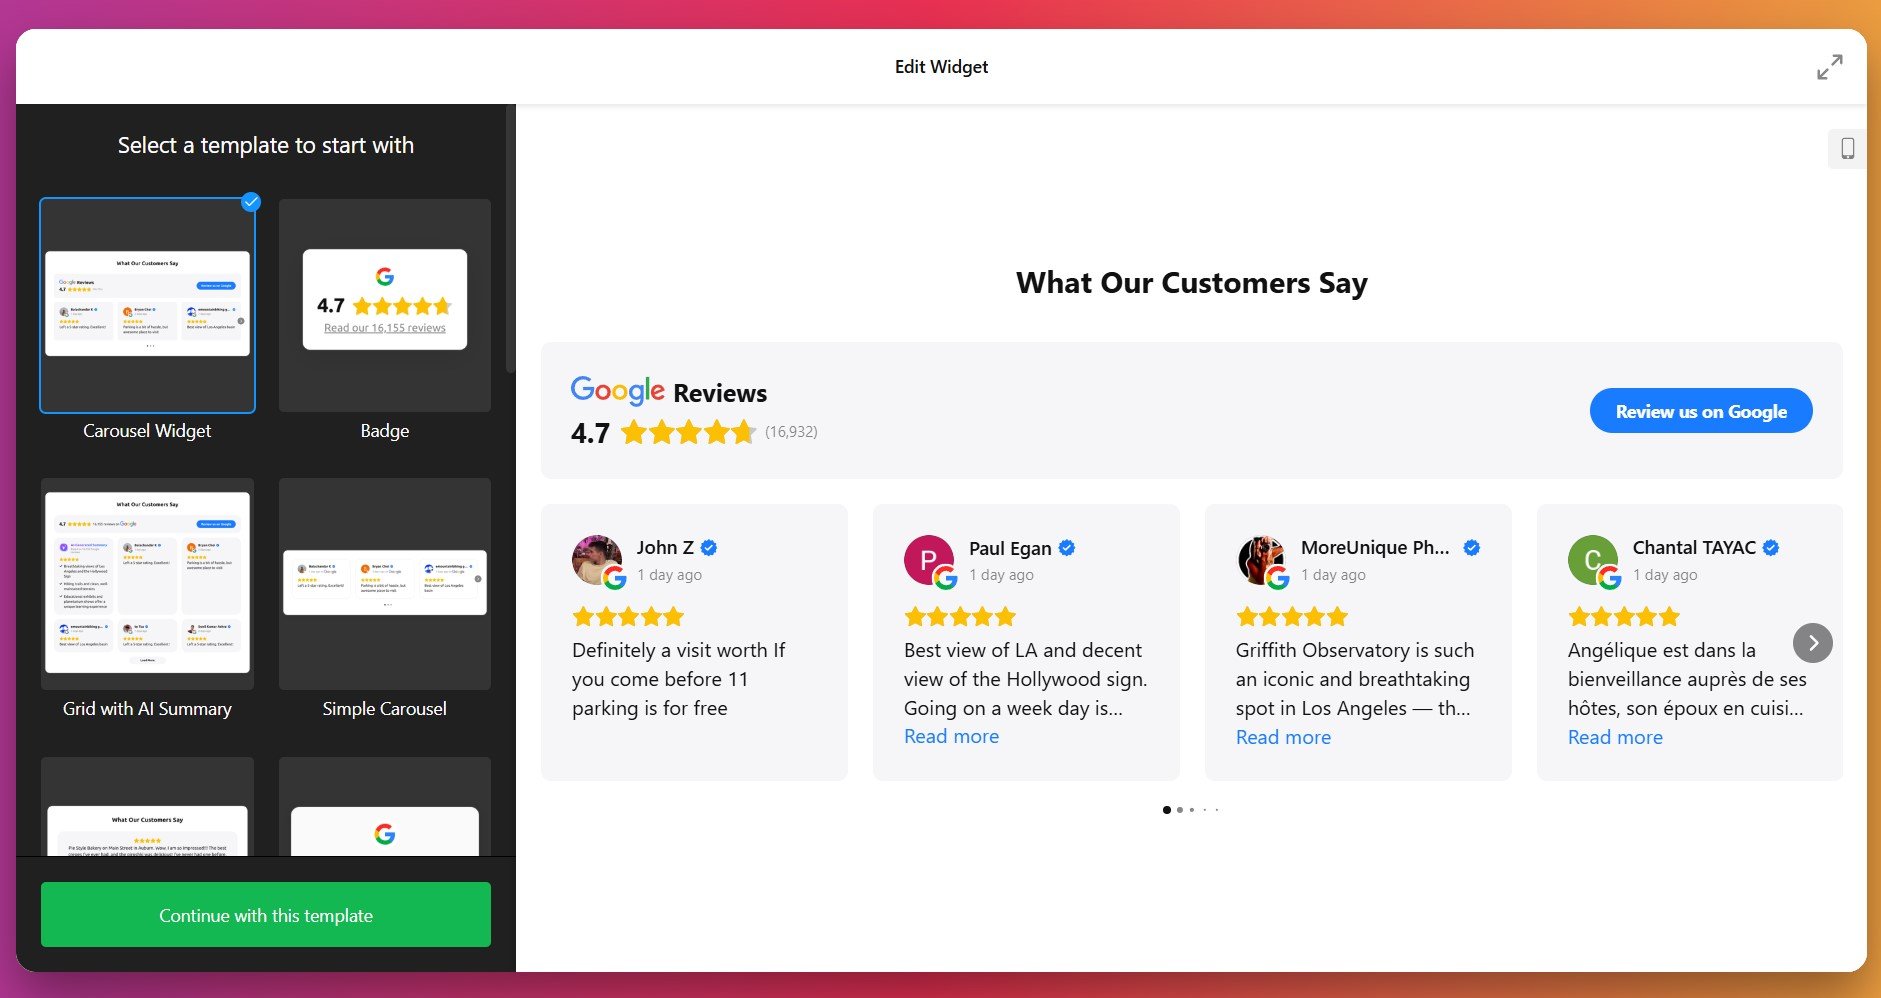
- Open Elfsight’s editor and select a suitable template.
- Customize your Google Reviews widget.
- Click ‘Add to website for free’ and copy the code.
- Paste it into your Shopify website’s backend.
Try the live demo and see how it looks on your Shopify store!
Explore the Key Widget Features
You’ve seen how easy it is to add Google Reviews to Shopify. Now let’s look at the main features that help customer feedback work for your business:
| Key Feature | Why it Matters |
|---|---|
| Live Google reviews with author details | Visitors see authentic feedback, including author photos and direct links, which builds confidence in your business. |
| Write a review button for instant feedback | Makes it simple for customers to add their own review on your Google page, helping you collect fresh testimonials. |
| Automatic review updates | Your website always shows the latest customer feedback without any manual updates. |
| Smart filters by rating and keywords | You control which reviews appear, so only the most relevant or positive comments are displayed. |
| Custom layouts and styles | Every detail, from fonts to colors, can match your branding for a seamless look. |
These features are only part of what google reviews can do for you. For all the options, visit the google reviews features page. Next up, let’s walk through how to add the widget to your own website.
Your Complete Walkthrough to Adding Google Reviews to Shopify
If you want more control over how your Google Reviews look and behave on Shopify, follow this detailed setup. You’ll connect your business, fine-tune display settings, and choose exactly where the reviews appear on your website – all without writing a single line of code.
1. Choose a Template
You begin in the widget editor by selecting one of the ready-made templates. Each offers a different visual style: Classic (Google’s original layout), Bubble (author info below the review text), or Spotlight (centered elements with more emphasis on the review content).
Pick one you like and click “Continue with this template” to move to the next part.
2. Connect Your Google Profile & Select Reviews
Your next step is to link the widget to your Google Business Profile. Once authorized, the widget can fetch reviews from your source automatically.
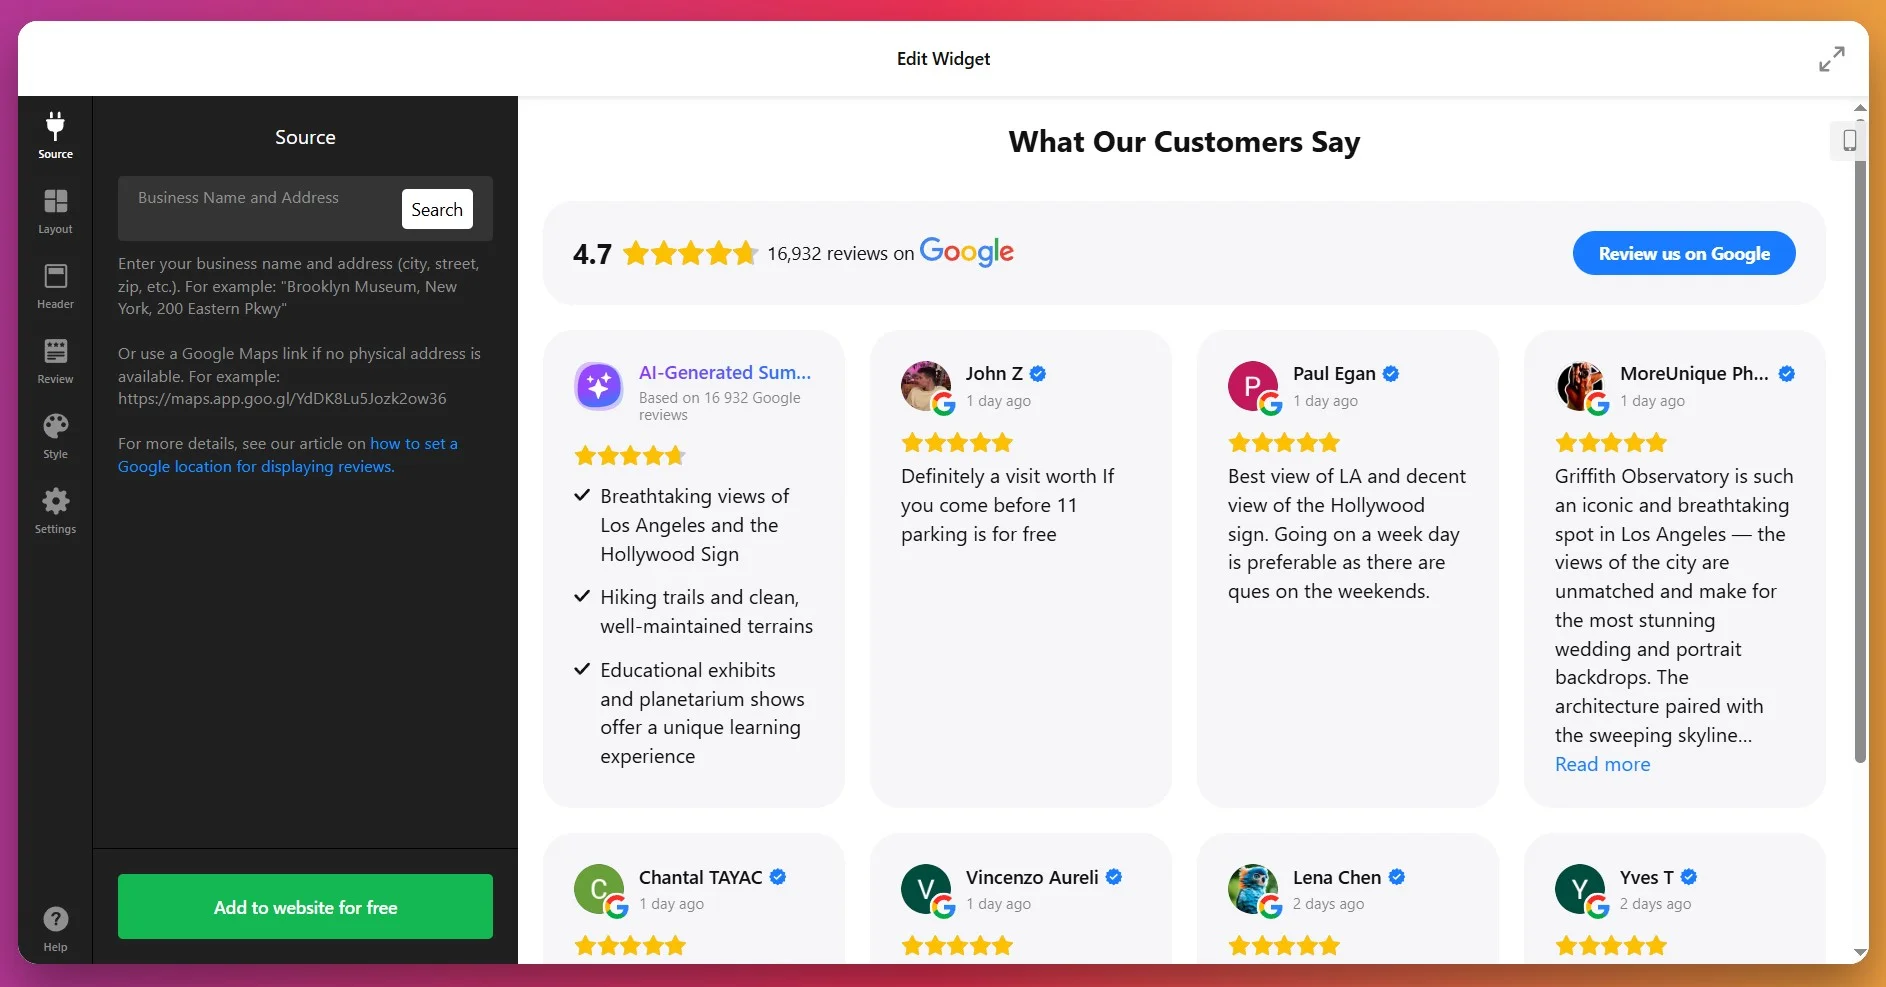
Then, you decide which feedback to display using filters: show only positive ones, exclude feedback with certain keywords, or limit the number of reviews.
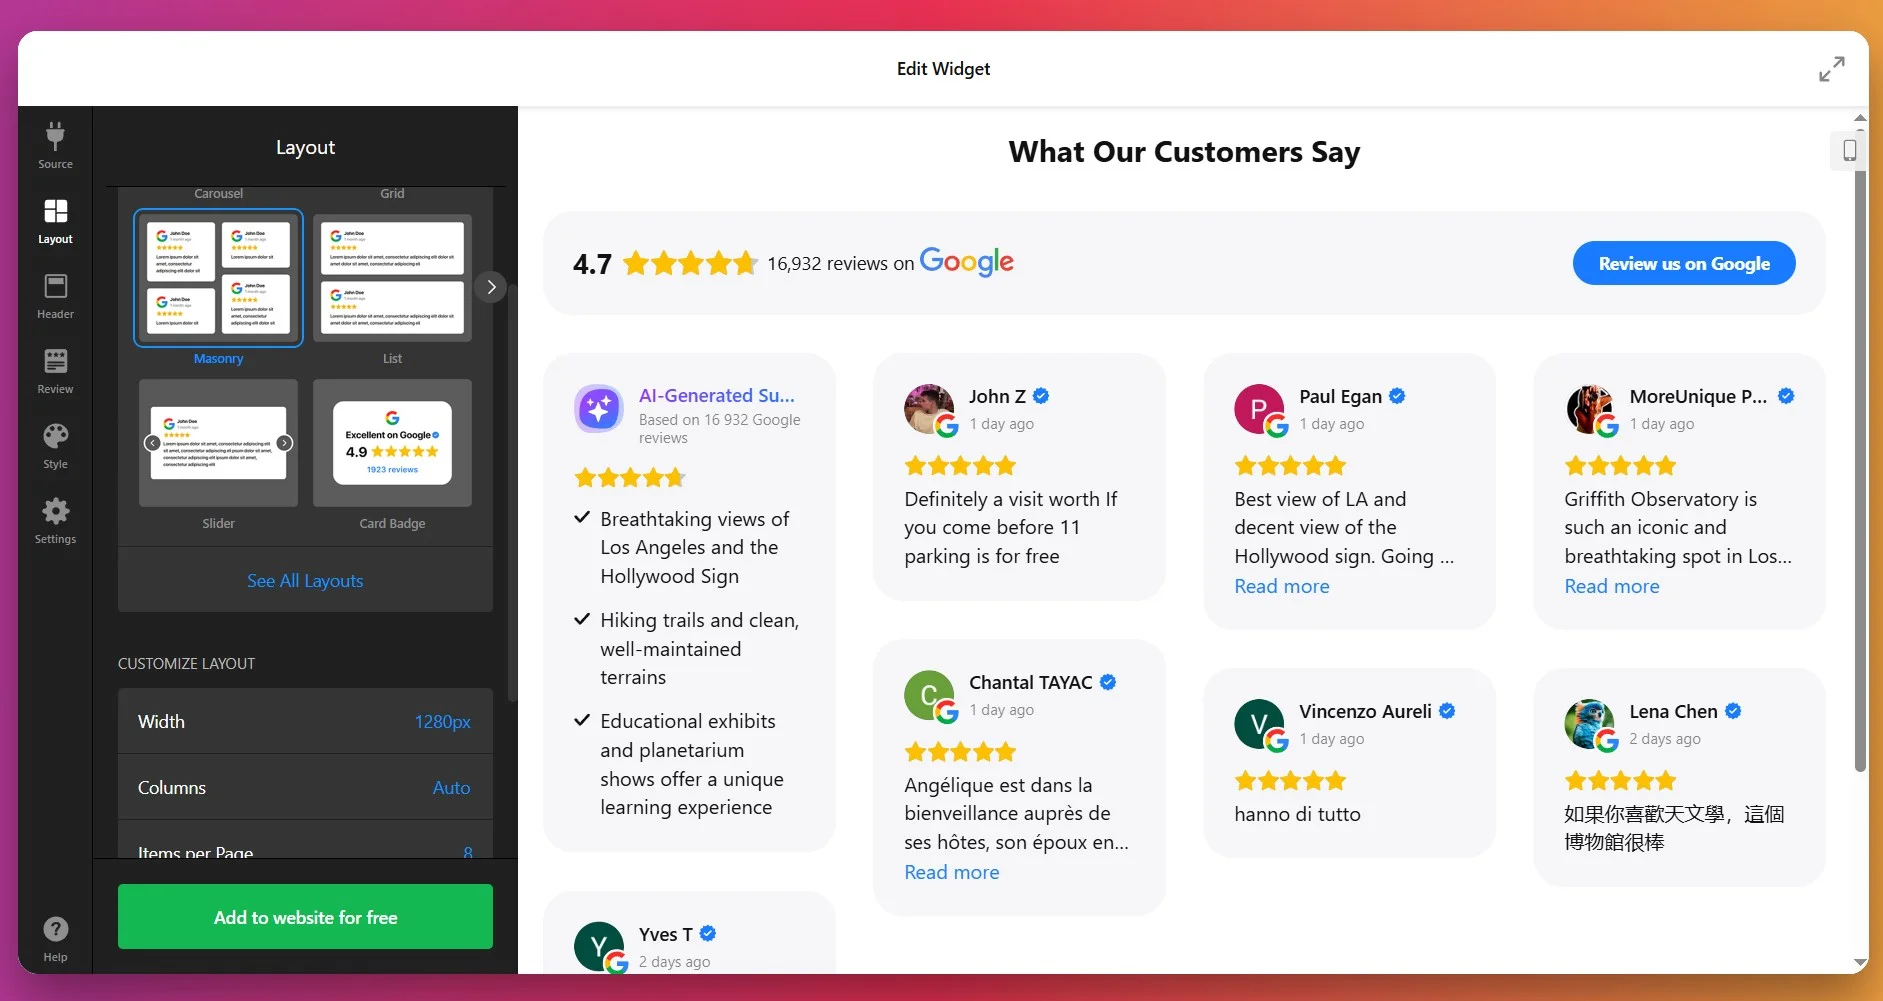
3. Pick a Layout
In the Layout settings, you can choose how your reviews will appear. There are several options:
- List: Reviews in a vertical stack, one after the other.
- Grid: Multiple reviews shown in a grid format.
- Slider/Carousel: Reviews scroll or slide through with arrows or swipe.
- Masonry: A dynamic layout that adjusts reviews based on available vertical space.
- Floating Badge: A small badge that floats on screen as user scrolls.
- Embeddable Badge: A compact version integrated neatly into your content.
At this stage, you can also set how many reviews show per page, choose pagination or infinite scroll, and determine different layout settings for mobile vs desktop.
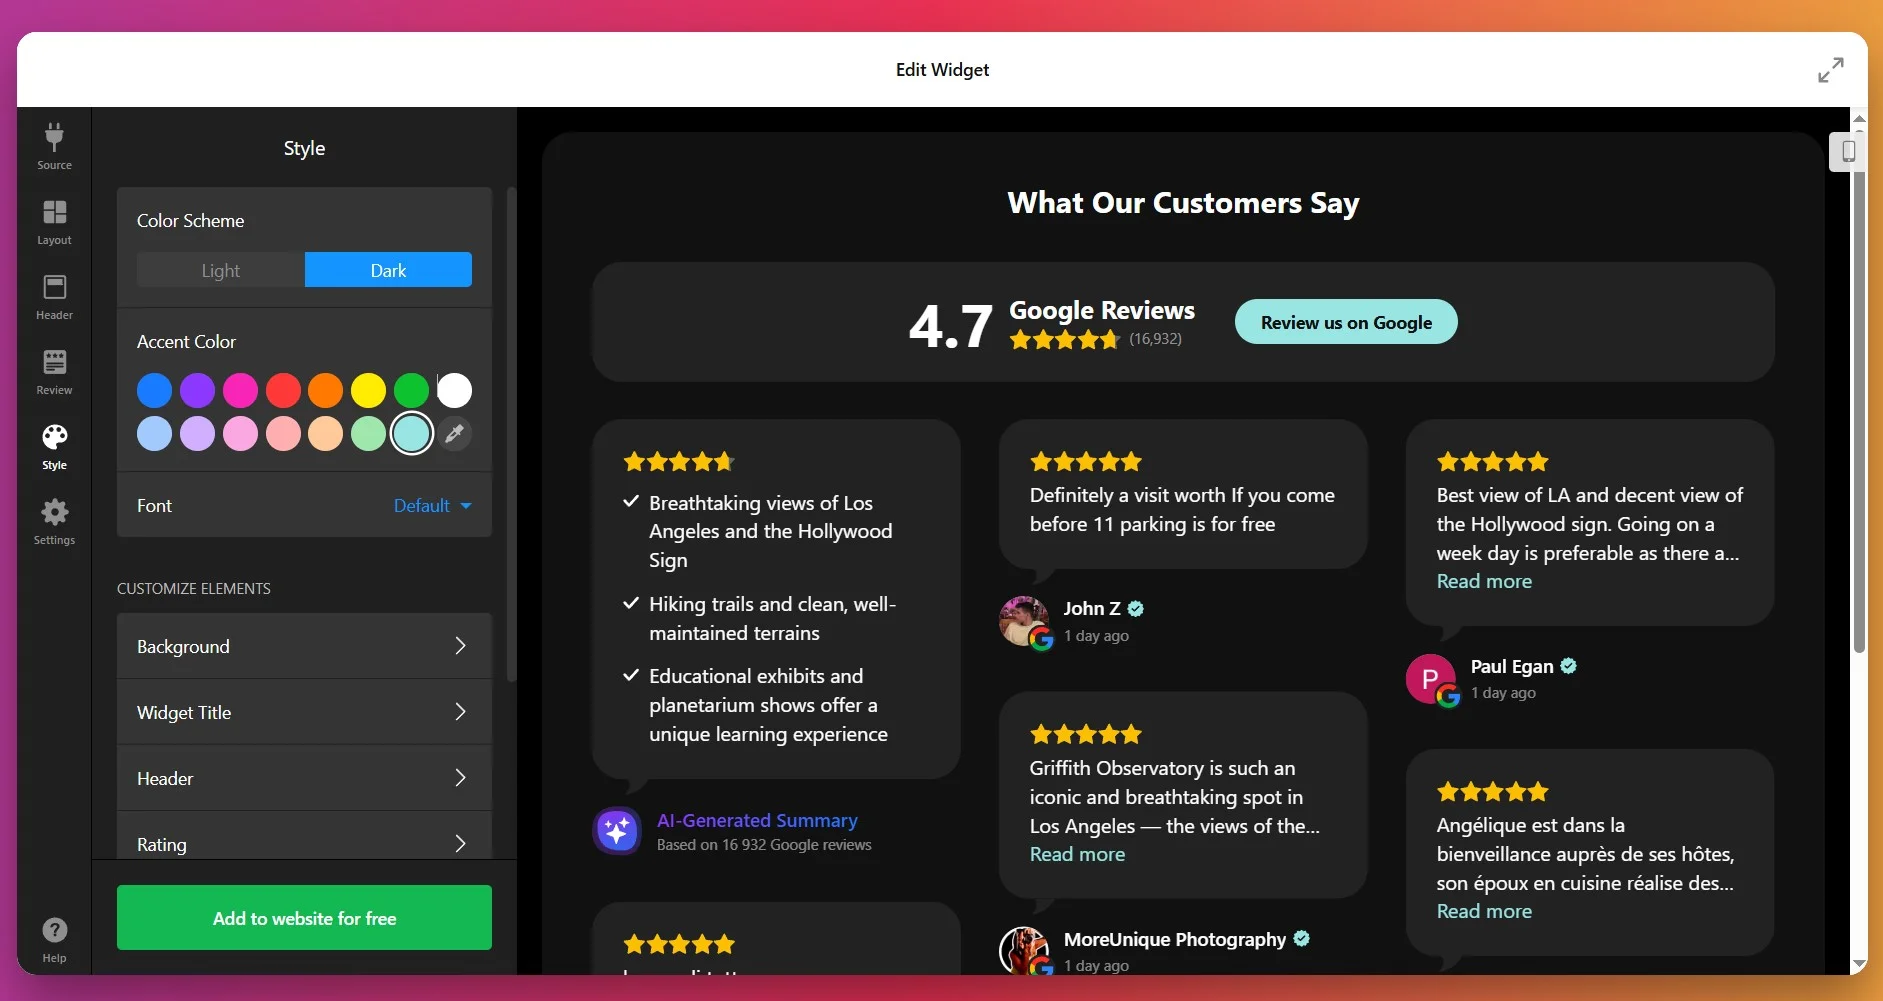
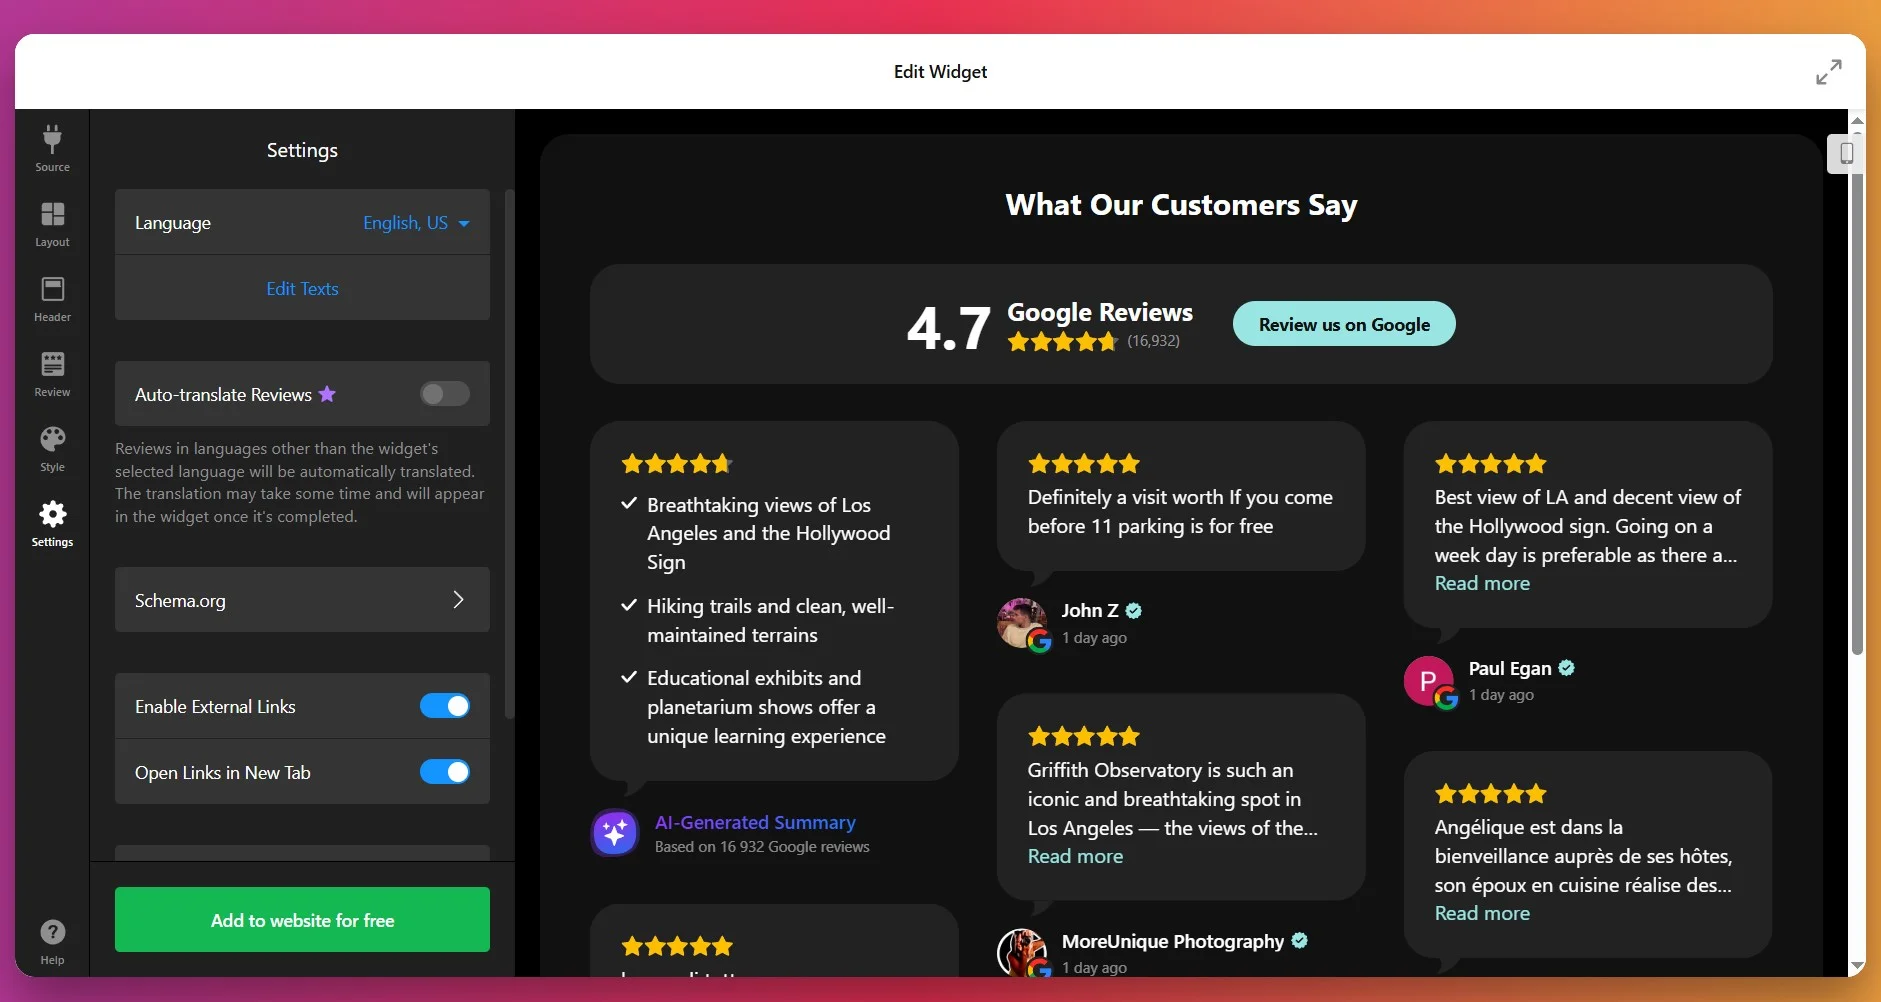
4. Style Review Details
In the Style tab, you customize visual elements so the widget blends with your site design. You can adjust:
- Fonts: sizes, weight (regular or bold), for title vs review text.
- Colors: five main elements can each have custom color—review text, background of review cards, links, star ratings, and the “Write a review” button.
- Review card spacing & padding.
- Optionally toggle on/off author picture, date, number rating, and review icons.
5. Configure Behavior & Settings
Under “Settings”, you can adjust how the widget behaves. Choose its header options: show/hide the overall star rating, number of reviewers, and photo of the latest reviewer. Customize the “Write a review” button – its label, “Yes/No” actions, or a redirect to your Google page.
Set width/height (in pixels or percentage) so it fits nicely in your layout. Make sure the widget is responsive, so it looks good on mobile, tablet, and desktop.
6. Get the Installation Code
Once you’re satisfied with how everything looks and behaves, click “Add to website for free.” The editor will generate your unique embed snippet. Copy that code – you’ll use it on your website to display the widget.
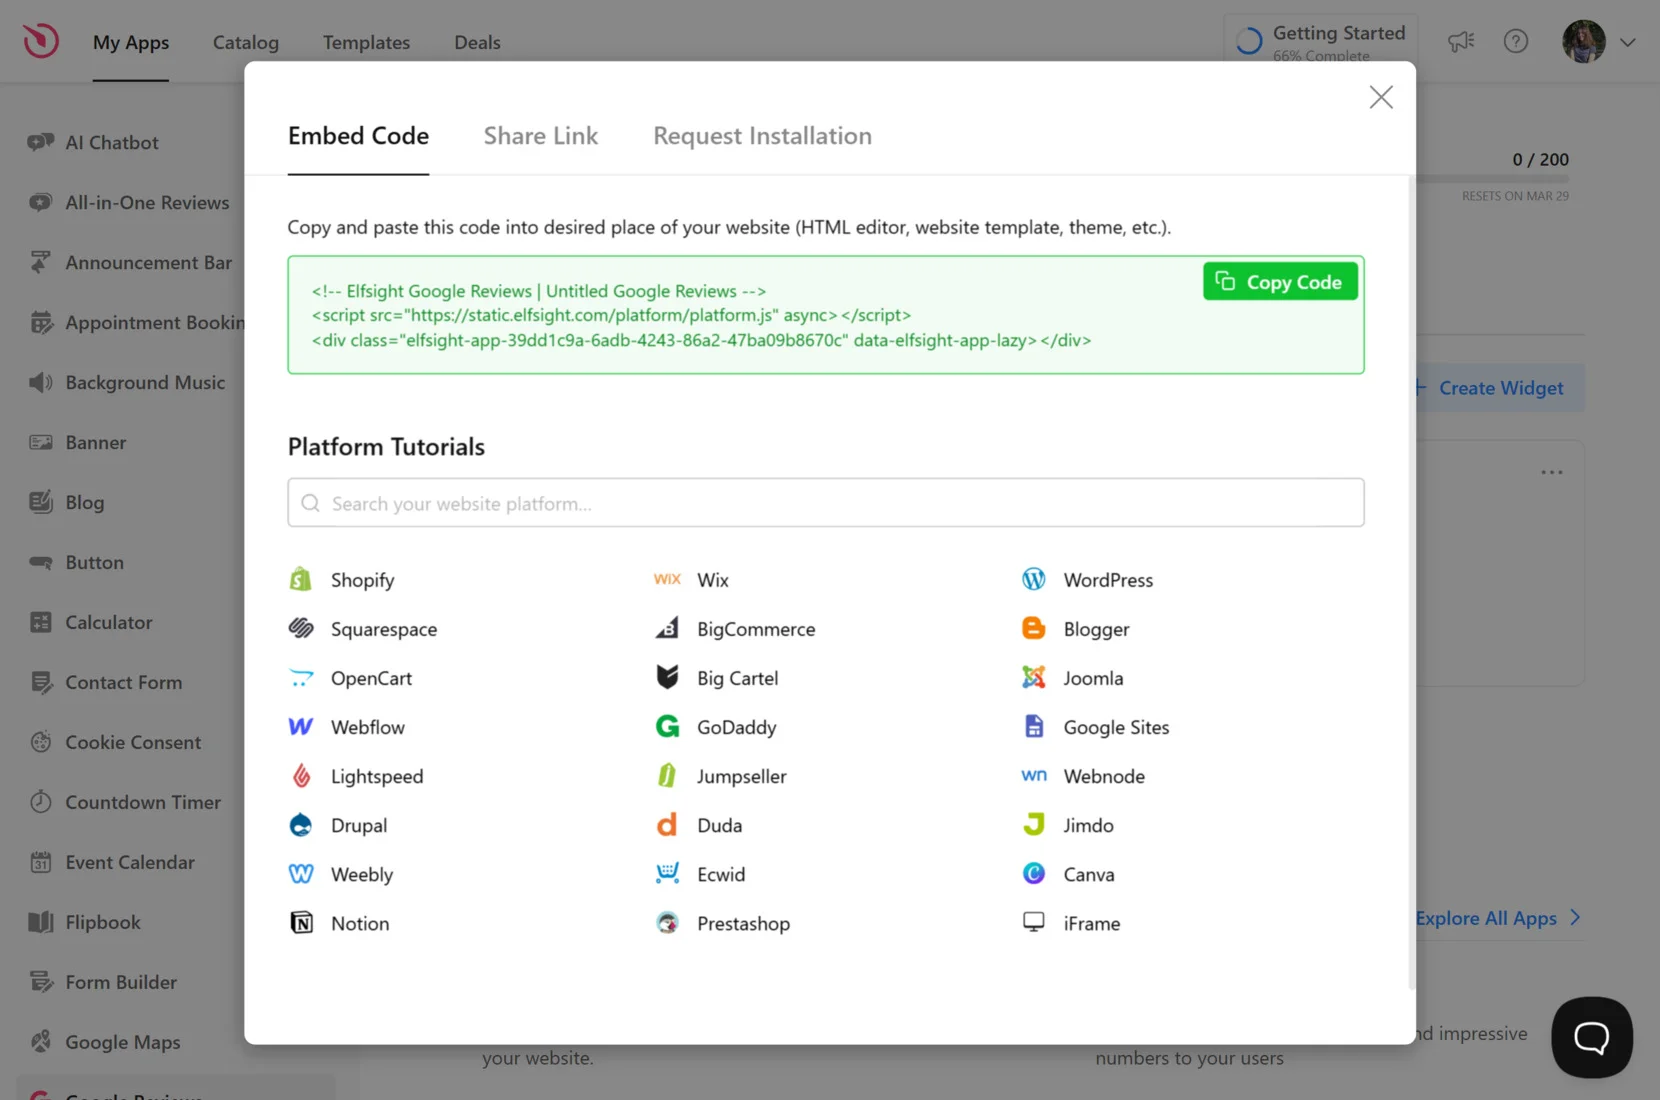
7. Add Google Reviews to Shopify
With your widget fully configured and the installation snippet copied, the final step is to embed it on your Shopify store. Below are the three most common installation methods:
Specific page — Online Store 2.0
- In Shopify admin go to Sales Channels → Online Store → Themes and click Customize.
- Select the target page from the dropdown at the top of the visual editor.
- Click Add section and choose Custom Liquid.
- Paste your snippet into the Custom Liquid field and click Save.
Specific page — Vintage themes
- In Shopify admin go to Online Store → Themes → Customize.
- Select the page to edit from the top dropdown.
- Click Add section → Custom Content. Inside the Custom Content block use Add block → Custom HTML if required.
- Paste your Elfsight embed code into the HTML field, set container width to 100% if needed, and click Save.
All pages (site-wide)
- In Shopify admin click the … menu and choose Edit code.
- Open
Layout → theme.liquid - Paste your Elfsight snippet before the closing tag and click Save.
Product pages
Adding to product description
- Go to Products and open the product to edit.
- Click
</>icon to open the HTML editor, paste your code, and click Save.
Adding to all product pages
- In Shopify admin go to Online Store → Themes → Actions → Edit code.
- Open
Sections → main-product.liquid - Paste your Elfsight code where you want it to appear and click Save.
If you want flexibility or prefer a different setup method, you can also add the Google Reviews widget directly to your Shopify website using alternative methods.
Other Ways to Add Google Reviews to Shopify
There are a few native and official methods for adding Google reviews to a Shopify website, though each comes with its own limitations.
Shopify’s Built-In Product Reviews App
Shopify’s own Product Reviews app allows you to collect and display store reviews directly on your website.
- Install the App. Search for Product Reviews in the Shopify App Store and add it to your website.
- Enable Reviews Section. Activate the reviews section in your product template through the theme editor.
- Customize Display. Adjust settings to change how reviews appear on product pages.
- Collect Reviews. Invite customers to leave reviews after purchase.
- Moderate Reviews. Approve or hide reviews as needed from the admin panel.
This app does not import reviews from Google automatically.
More details are available in the Shopify App Store documentation.
Manual Embedding with Google Maps
You can manually embed individual Google reviews by using Google Maps’ embed feature.
- Find Your Business on Google Maps. Search for your business profile.
- Select Review. Open the review you want to feature.
- Copy Embed Code. Click the options menu and copy the HTML embed code.
- Edit Shopify Page. Open your Shopify theme editor and choose the page for the review.
- Paste Embed Code. Insert the embed code where you want the review to appear.
You must manually repeat this process for each new review you want to show.
More details are explained in Google Maps Help.
Adding Reviews via Google API Integration
Shopify allows advanced users to display Google reviews by integrating Google’s Places API.
- Create a Google Cloud Project. Sign up at Google Cloud Platform and enable Places API.
- Generate API Key. Get your API key from the dashboard.
- Edit Shopify Theme Code. Go to your theme editor and add API calls in your desired sections.
- Fetch Reviews with API. Use code snippets to pull reviews from Google and display them.
- Save and Test. Save your changes and check the live review display.
This method needs custom development, maintenance, and Google API fees.
More details can be found in Google Cloud documentation.
How Do These Methods of Adding Google Reviews Compare?
| Method | Major Pro 👍 | Major Con 👎 |
|---|---|---|
| Elfsight Widget | Instantly syncs and displays Google reviews automatically. | Monthly fee and limited styling in basic plans. |
| Shopify Product Reviews App | Easy to install and manage reviews from customers. | Does not import or sync Google reviews directly. |
| Manual Embedding with Google Maps | Free and simple for one-off reviews. | Requires manual updates for each new review. |
| Google API Integration | Real-time syncing with advanced customization. | Needs coding, API management, and may incur extra costs. |
If you want practical tips for making your Google reviews look polished and run reliably on your Shopify website, check out the next block for hands-on advice.
Essential Checklist for Google Reviews Widget
From the Elfsight team’s experience helping users embed Google Reviews, we’ve seen that a few strategic tweaks make a big difference in how visitors perceive your business. Here are the top tips we recommend for a smooth and impactful widget setup.
- Connect to your verified Google account. Make sure the widget links directly to your official Google My Business profile so only genuine reviews appear.
- Choose a layout that fits your content. Test grid, list, or carousel formats to see which displays reviews and author pictures most clearly on your website.
- Filter reviews by rating or keywords. Set filters to highlight your best feedback or hide irrelevant comments, keeping the focus on what matters to potential customers.
- Enable the Write a review button. Place the review prompt in a visible spot so visitors can easily add new feedback without confusion.
- Customize colors and fonts for consistency. Match the widget’s style to your brand’s palette and typography for a seamless visual blend.
- Display AI-powered summaries where possible. Use sentiment highlights to give visitors a quick sense of common praise and themes from your customers.
- Check real-time updates are active. Confirm the widget is set to auto-refresh, so your latest reviews always show without manual updates.
- Test on all devices and platforms. Preview the widget on desktop, tablet, and mobile to avoid formatting issues with images or text.
- Position reviews for maximum impact. Place the widget near calls to action or contact forms so visitors see positive feedback at decision points.
Now that you have a proven checklist for setting up the Google Reviews Widget, let’s look at how real businesses use it to boost trust and drive engagement on their websites.
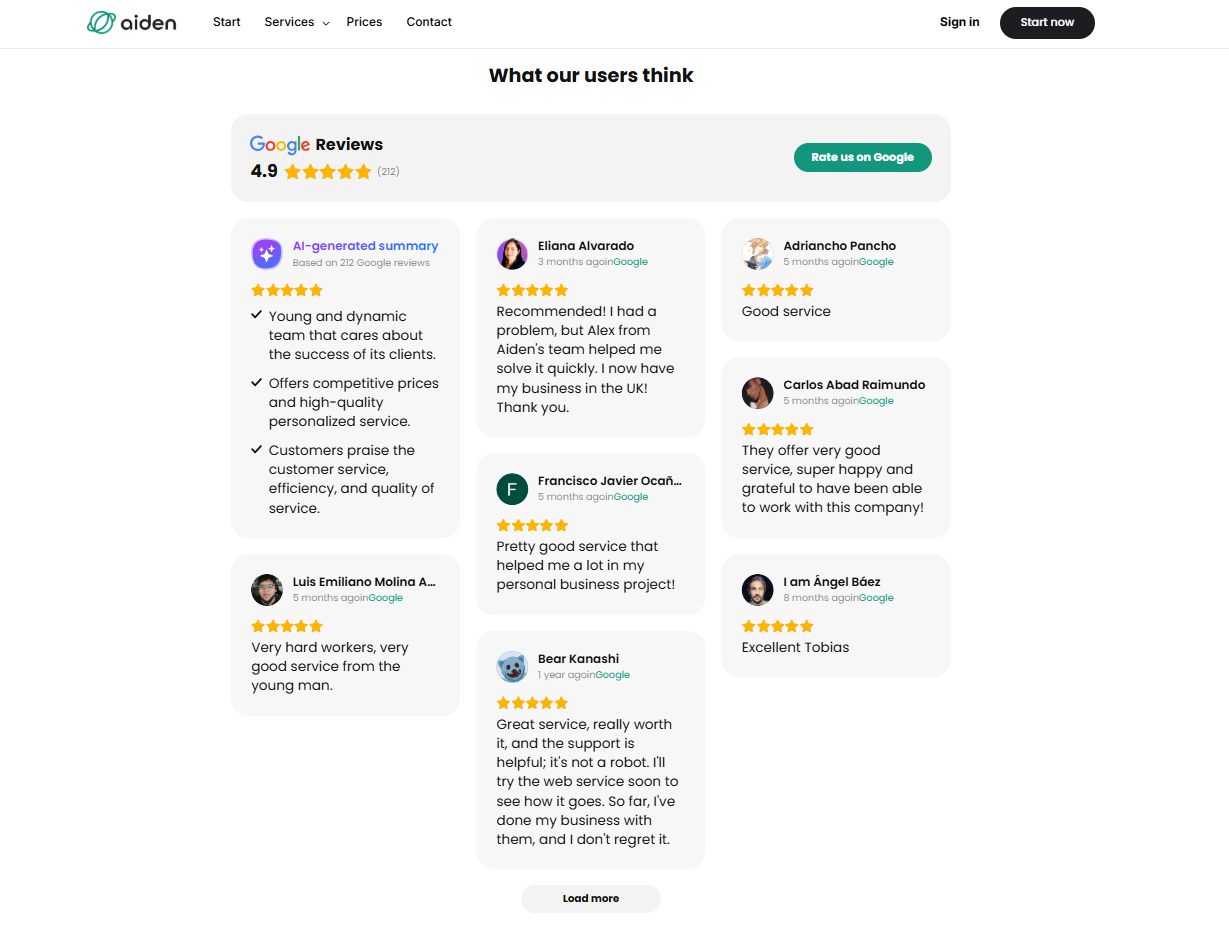
Google Reviews at Work: Accounting Business
An independent accounting firm turned to Elfsight to strengthen their online presence and build credibility. By showcasing authentic Google Reviews directly on their website, the team managed to establish trust with new visitors and drive more client inquiries without heavy reliance on paid ads.
Before using Elfsight
The firm’s website was professional but static. Potential clients had no way to verify the quality of service apart from word of mouth. This lack of social proof meant missed opportunities to convert casual visitors into paying customers.
- No visible client feedback on the website
- Difficulty building trust with first-time visitors
- Lower-than-expected conversion rate from website traffic
With Google Reviews
“We’ve seen better engagement on landing pages, smoother mobile experiences, and an increase in lead conversions.”
Alejandro, Aiden Startup
By embedding the Google Reviews widget, the firm could automatically display up-to-date client feedback from their Google Business Profile. Positive reviews now appear directly on their service pages, helping potential clients see real, verified experiences without leaving the website. This authentic social proof made the website more persuasive and client-focused.
Results
After implementing Google Reviews, the firm reported a clear boost in conversions. Visitors were not only spending more time on the website but were also more likely to book a consultation after reading positive testimonials. The widget helped reduce hesitation and provided the credibility boost needed to stand out in a competitive niche.
Other widgets in use
Alongside Google Reviews, the firm also uses Contact Form to capture leads, FAQ to answer common client questions, and Cookie Consent to ensure compliance. Together, these integrations create a client-friendly website that feels transparent, professional, and easy to navigate.
What’s more, the team customized the look of their widgets to fit seamlessly with their brand identity, showcasing just how flexible and impactful Elfsight solutions can be when applied creatively to any industry.
Google Reviews bring authenticity and trust to a website, turning positive client feedback into a powerful tool for driving conversions, especially for service-based businesses.
Google Reviews Issues & Fixes
Adding Google Reviews to a Shopify website can be a powerful way to build trust and boost sales. However, users often encounter issues during the integration process. Let’s see how to fix the most common ones:
Why aren’t my Google Reviews showing up on my Shopify website?
How do I fix a slow-loading website after adding Google Reviews?
What if my Google Reviews widget isn’t updating?
How do I troubleshoot issues with manually embedded Google Reviews code?
Can I customize the layout of my Google Reviews widget?
If you still encounter issues after checking these basics, you can explore further resources and support options to help resolve your Google Reviews integration challenges.
Need a Hand?
We hope this guide gives you a clear path to add Google reviews to your Shopify website and helps you build trust with your visitors. Drop us a line anytime—your feedback helps us make things better for everyone. For more tips and updates, connect with the Elfsight team on X, Facebook, and LinkedIn. Let’s keep the conversation going.