An email form is a simple yet essential tool that lets visitors send you messages directly from your HTML website. Whether you want to collect inquiries, feedback, or email subscriptions, embedding an email form in HTML provides a smooth and professional way to communicate with your audience.
If you’re looking for a fast, reliable, and customizable solution, an email form is exactly what your website needs. It improves communication, helps build trust, and enhances user interaction without relying on third-party platforms or complex code.
- Direct communication with visitors. Users can contact you instantly through a structured form without copying and pasting your email address.
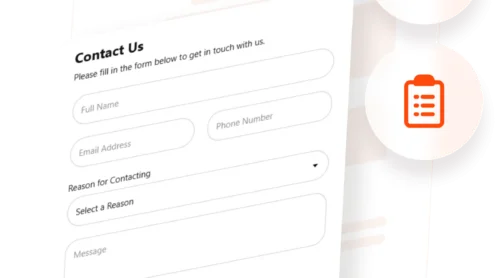
- Improved user experience. A built-in website contact box looks more professional and provides a smoother interaction than email links.
- Better data collection and filtering. With predefined fields, you receive cleaner, more relevant messages and reduce spam.
- Higher engagement and conversion rates. Strategically placed forms can capture leads and encourage inquiries, growing your customer base.
- Streamlined message management. Integrating your email form with your inbox or CRM keeps everything organized and trackable.
Now that you know why an email form is a must-have, let’s explore how you can set one up in just a few clicks using Elfsight.
Add an Email Form to HTML Website: Quick Way
Embedding an email form doesn’t have to be complicated. With Elfsight, you can create an email form in HTML without writing a single line of code. The process is fast, intuitive, and fully customizable for any website.
- Open the Elfsight editor and select the Email Form widget template that fits your needs.
- Adjust the layout, field order, and design settings to match your website’s style and structure.
- Customize colors, fonts, and field labels for a seamless email capture layout.
- Click “Add to website for free“, copy the provided custom form builder script, and paste it into your website’s HTML.
This quick method is ideal for anyone who wants to get a fully functional form up and running with minimal effort. You don’t need any coding skills — just configure, copy, and paste.
Ready to try the widget? Build your own Email Form in 1-2-3!
Features of the Elfsight Form Builder
Now that you’ve seen how easy it is to get started, let’s take a closer look at what makes Elfsight a great choice for adding an email form to your website. This solution is packed with features designed to improve both functionality and user experience.
- Fully customizable design. Adjust colors, fonts, spacing, and layout to create a responsive email form styling that matches your website branding perfectly.
- Drag-and-drop field management. Add, remove, or rearrange fields with ease — no coding required.
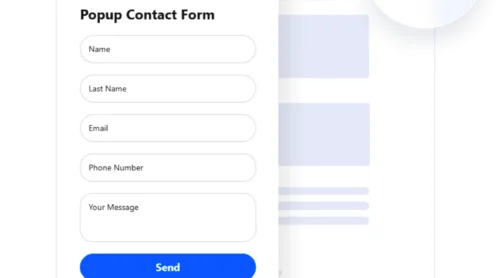
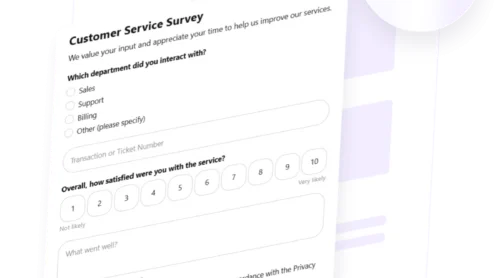
- Flexible form types. Choose from contact forms, newsletter signups, feedback requests, and more — all from a single widget.
- Smart form submission handling. Automatically send form entries to your email or integrate with platforms like Mailchimp and Google Sheets.
- Built-in spam protection. Use CAPTCHA and field validation to reduce spam without hurting usability.
- Mobile-ready and responsive. Your form will look and work great on desktops, tablets, and smartphones alike.
With these features, Elfsight gives you everything you need to build a professional, high-converting email form. Next, we’ll walk through the full setup process so you can get the form running on your website from start to finish.
Embed HTML Email Form: Step-by-Step Guide
Once you’ve explored the features, it’s time to set up your email form using Elfsight’s intuitive editor. Below is a detailed guide that walks you through every step — from choosing a template to embedding the HTML code on your website.
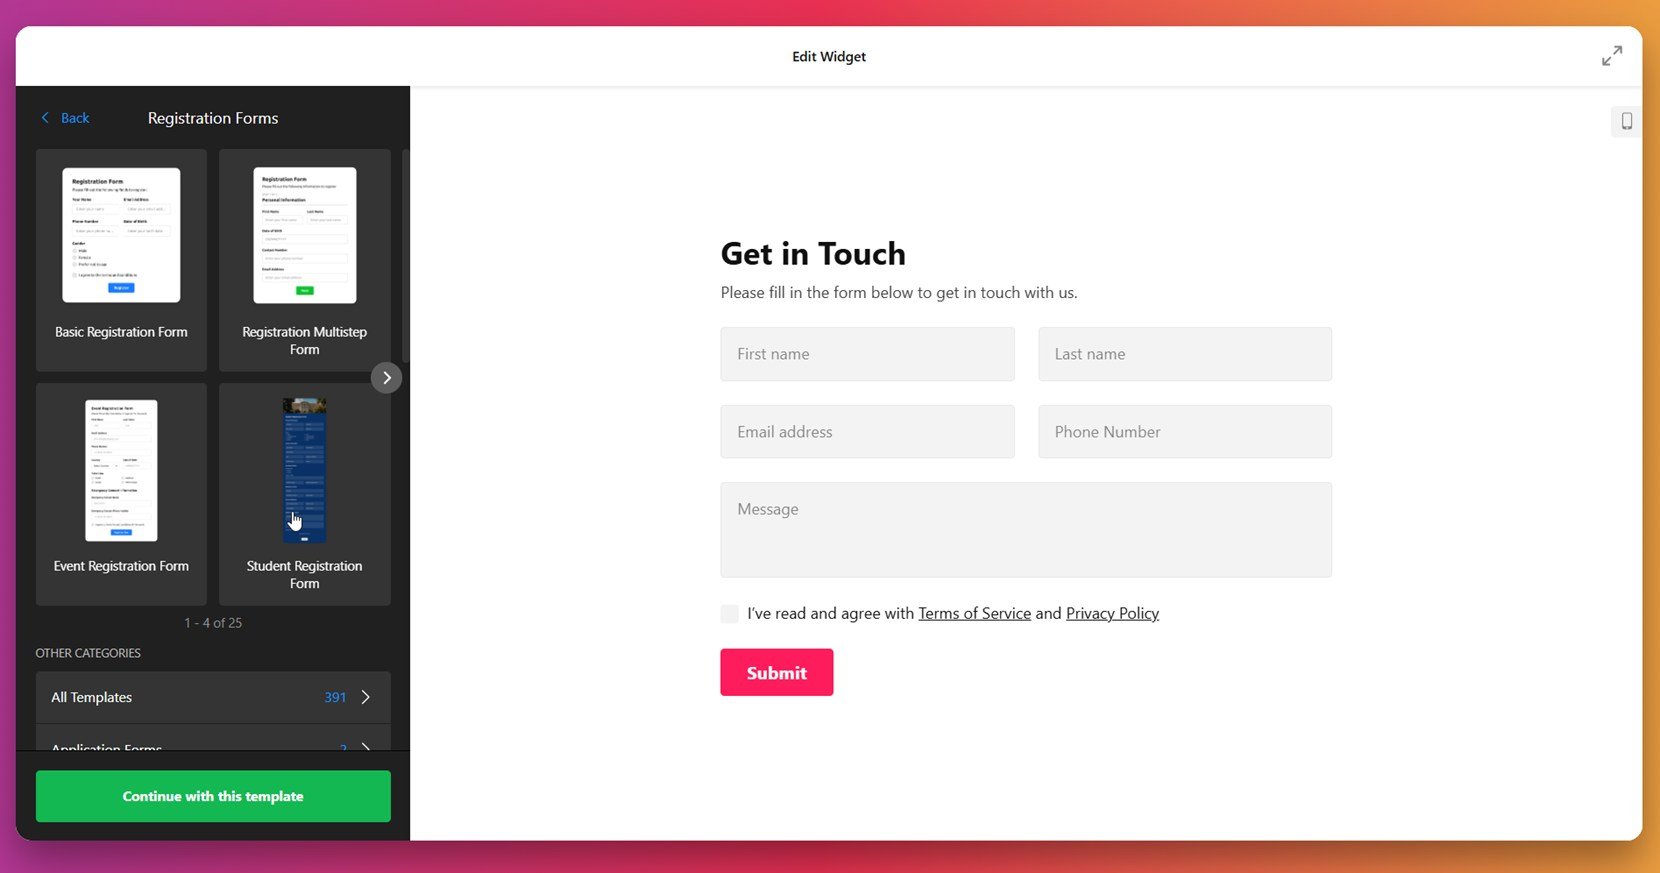
- Choose a Template. In the widget editor, go to the “Email Forms” category or search templates. Pick the one that fits your goal — like a basic form or a multistep version — and click “Continue with this template”.

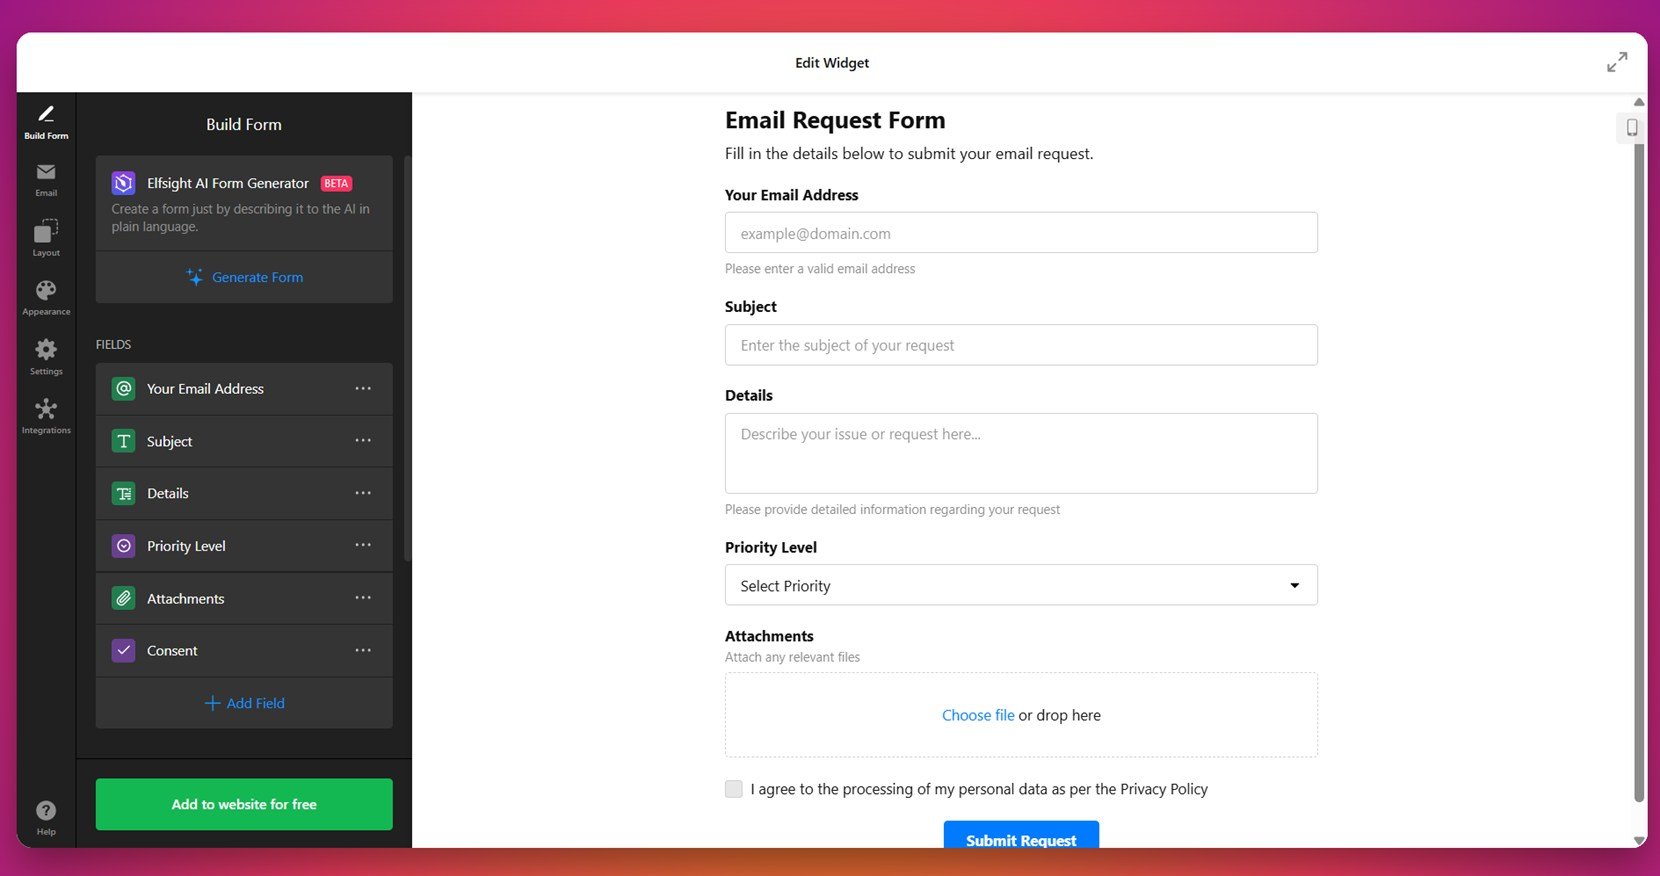
- Build Your Form. In the “Build Form” section, add the fields you need such as Email, Name, Subject, Message, and Priority. You can also use the AI Form Generator to create the layout automatically based on your description.

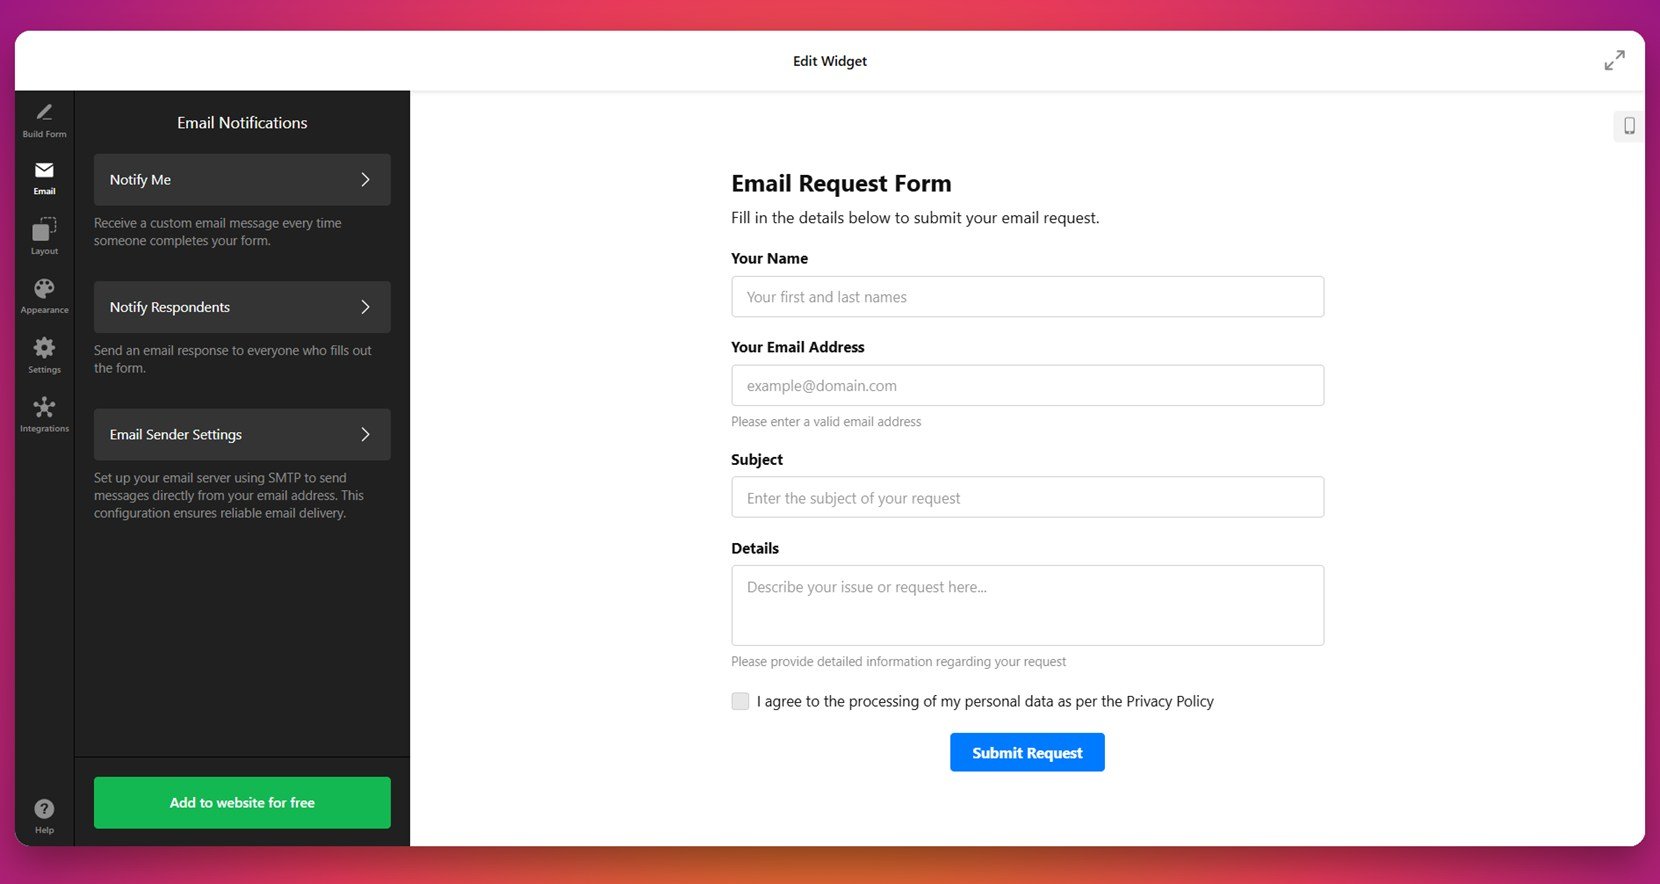
- Configure Email Notifications. Head to the “Email” tab to enable notifications. Set up alerts for yourself and automated confirmation messages for users. Configure the sender email for reliable delivery.

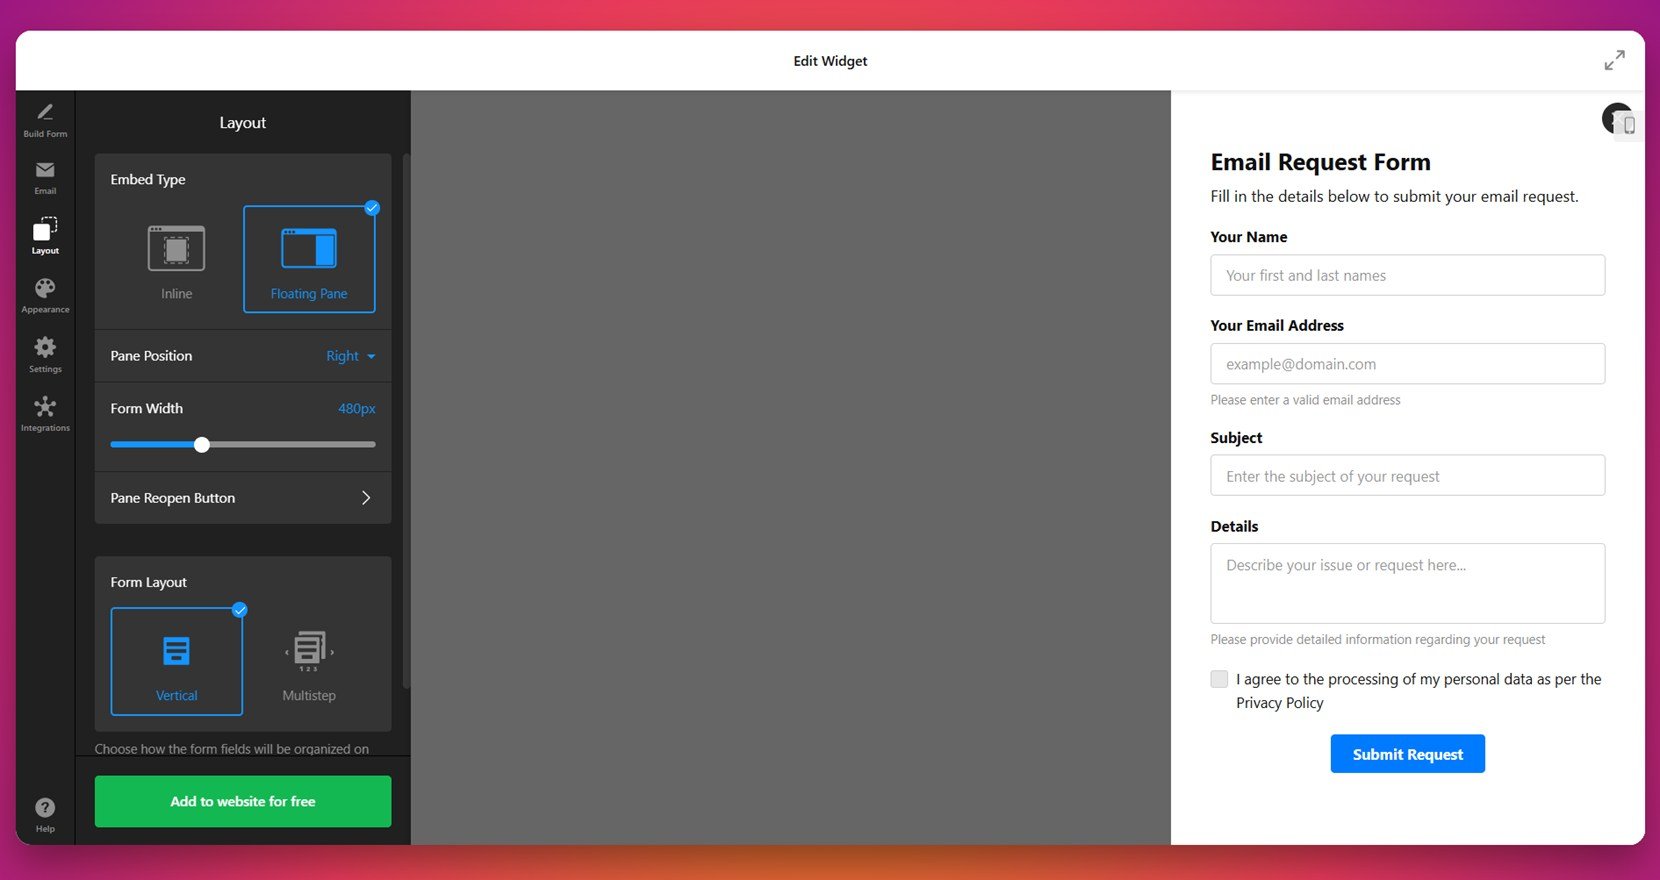
- Adjust the Layout. Open the “Layout” tab and select how your form appears — inline or as a floating pane. Choose the position, form width, and whether to use a vertical or multistep layout.

- Style the Appearance. Go to the “Appearance” panel to select a light or dark theme. Choose your accent color, adjust font styles, and modify individual elements like buttons, backgrounds, and input fields.

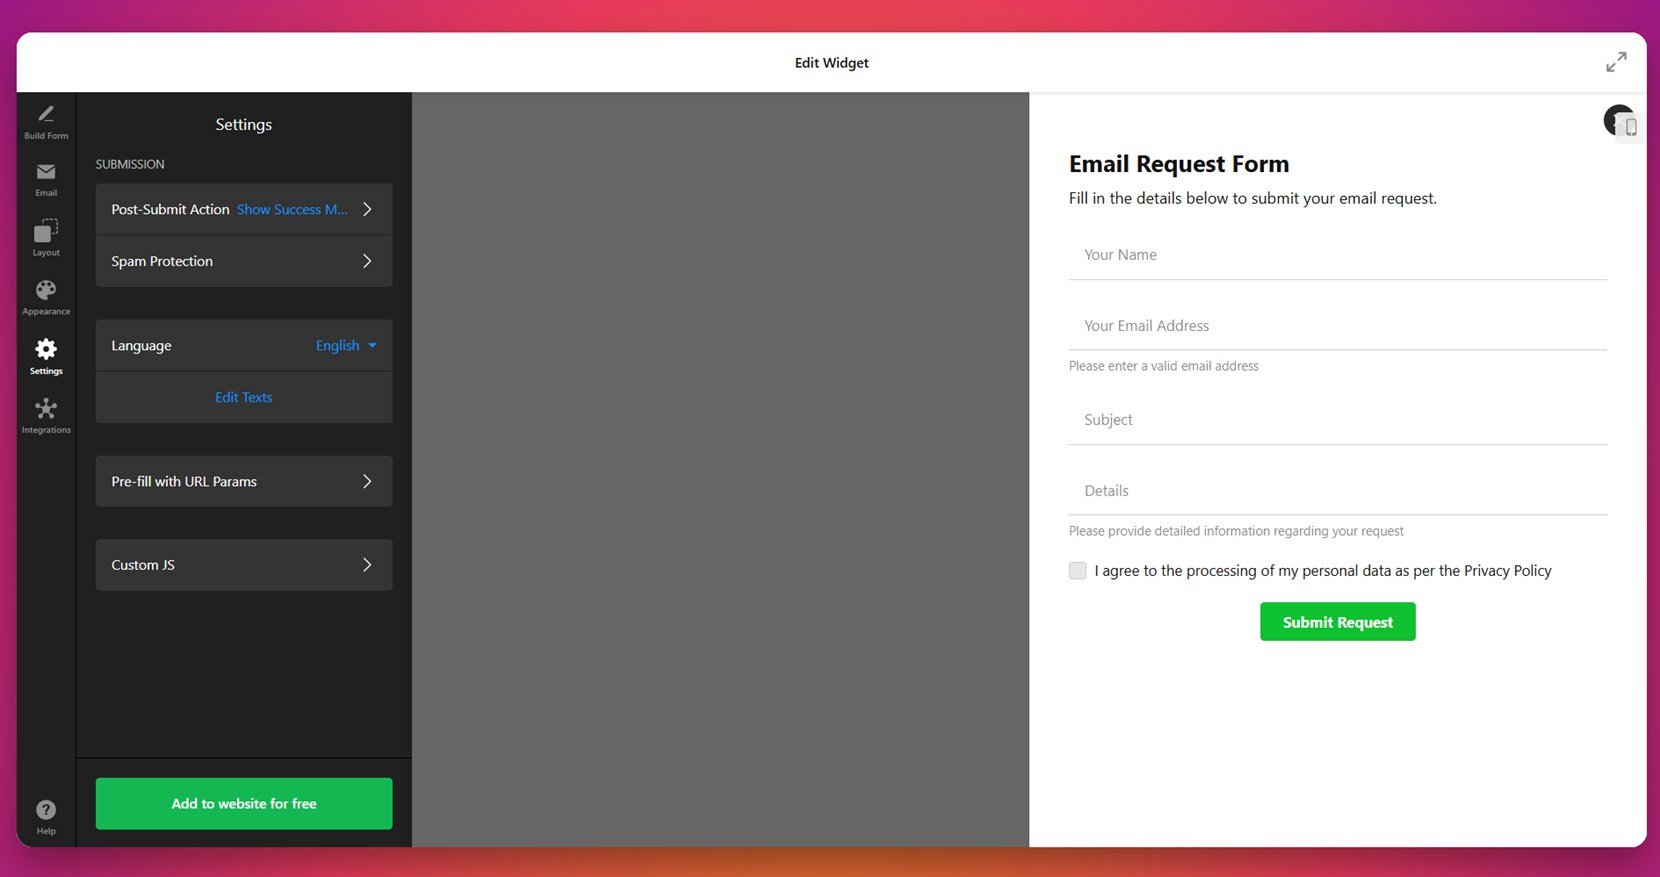
- Set Form Behavior and Language. In the “Settings” tab, define what happens after submission (e.g., success message or redirect). Enable spam protection, select the form language, and edit placeholder texts if needed.

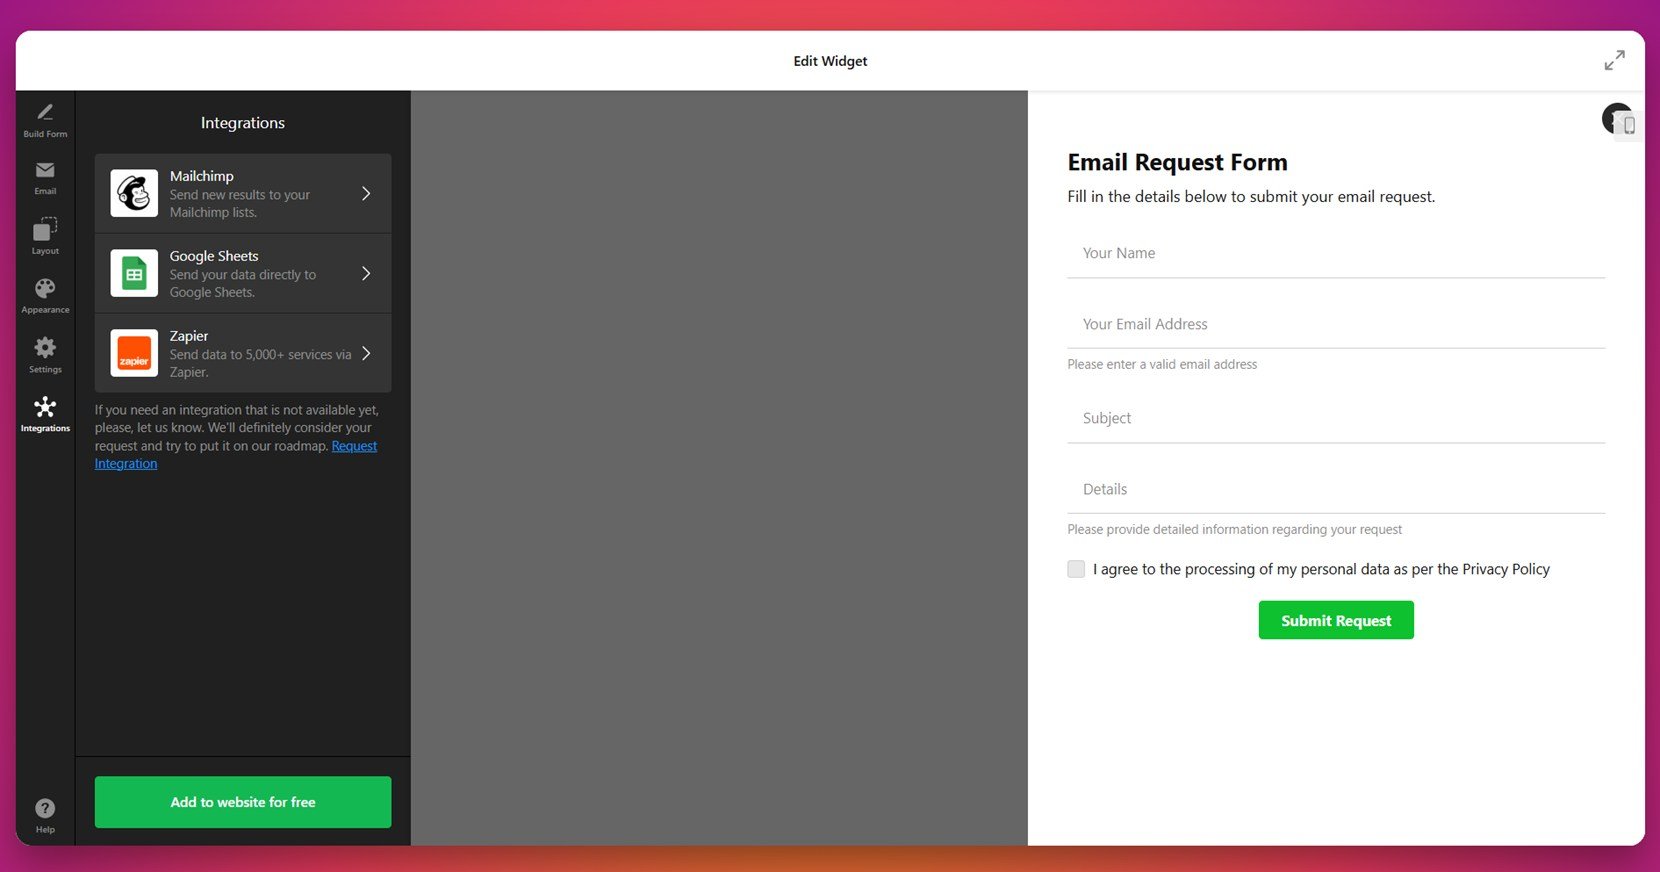
- Connect Integrations. If you use tools like Mailchimp, Google Sheets, or Zapier, link them via the “Integrations” panel. This makes your form part of a larger workflow, capturing and storing data automatically.

- Add to Website. Click “Add to website for free” and copy the generated HTML code.


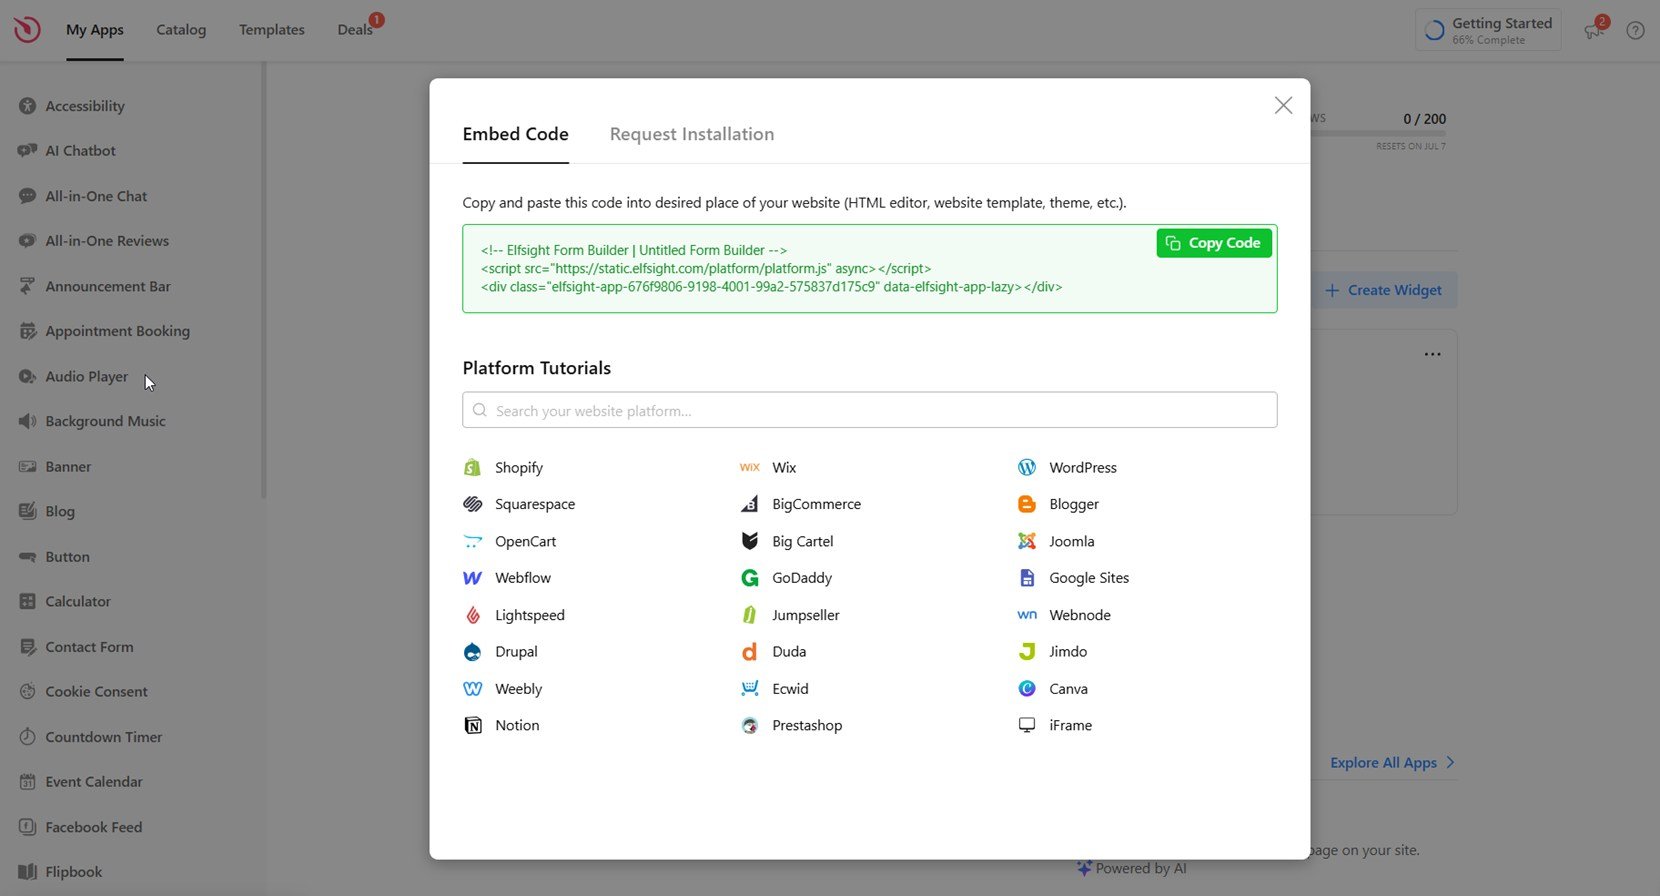
Since you’re working with a custom HTML website, embedding the widget is straightforward. After customizing your email form in Elfsight, all you need to do is copy the generated embed code and paste it directly into your HTML file. You can insert it inside the <body> tag wherever you want the form to appear — typically in a contact section or footer.
If you’re using a CMS or template-based HTML editor, make sure to switch to “Code View” or “HTML mode” to paste the snippet correctly. Save your changes, refresh the page, and the email form will be live instantly.
With the setup complete, your email form is now live and fully functional. Visitors can reach out directly, and you can manage responses effortlessly. In the next section, we’ll look at other popular ways to create an email form for your HTML website and compare them with the Elfsight approach.
Other Ways to Create Email Form for HTML Website
If you prefer building forms manually or want to explore other available options, there are alternative methods beyond using Elfsight. These include traditional HTML + backend scripting or embedding cloud-based forms like Google Forms. Below we explain each method in detail and how to implement it directly on your HTML website.
1. Native HTML + Backend Script
This method involves building your form using plain HTML and handling the submissions on your own server using a backend language like PHP. It’s widely used by developers who want complete control over the form’s design and processing logic. You will need access to your server and basic knowledge of how to write and deploy backend scripts.
- Write your form markup in HTML. Create an HTML file (e.g., form.html) and structure your form using standard fields. Use a <form> element with method=”POST” and an action that points to your backend file. Include fields for name, email, subject, message, and a submit button:
<form action="send.php" method="POST"> <label>Name:</label><br> <input type="text" name="name" required><br><br> <label>Email:</label><br> <input type="email" name="email" required><br><br> <label>Subject:</label><br> <input type="text" name="subject"><br><br> <label>Message:</label><br> <textarea name="message" rows="6" required></textarea><br><br> <input type="submit" value="Send Message"> </form> - Create a PHP (or other backend) file. In the same directory, create a file called send.php. This script should collect the data from the form using $_POST, sanitize it, and send it to your email using the mail() function:
<?php if ($_SERVER["REQUEST_METHOD"] == "POST") { $name = htmlspecialchars(trim($_POST["name"])); $email = filter_var(trim($_POST["email"]), FILTER_SANITIZE_EMAIL); $subject = htmlspecialchars(trim($_POST["subject"])); $message = htmlspecialchars(trim($_POST["message"])); $to = "your-email@example.com"; $headers = "From: $email\r\nReply-To: $email\r\n"; $fullMessage = "Name: $name\nEmail: $email\nSubject: $subject\n\nMessage:\n$message"; if (mail($to, $subject, $fullMessage, $headers)) { echo "Message sent successfully!"; } else { echo "There was a problem sending your message."; } } ?> - Set the form’s action to your PHP file. In the <form> tag of your HTML file, make sure the action attribute points to your PHP file — usually action=”send.php”. This ensures the form data is submitted to the backend processor.
- Upload both files to your server. Use FTP, cPanel, or your hosting provider’s file manager to upload both form.html and send.php to the same directory on your server. Then, open form.html in your browser, fill out the form, and test it to confirm the message arrives in your inbox.
This approach is flexible and enables you to define exactly how the form behaves, what happens on submit, and how data is stored or forwarded.
2. Using Google Forms
Google Forms offers a simple, no-code solution for collecting email messages. While it lacks deep customization, it’s a free and fast alternative for small-scale websites that need a basic contact or inquiry form. It works via iframe embedding, meaning you won’t need to set up a server.
- Create a new Google Form. Visit forms.google.com while signed into your Google account. Click on the “Blank” form to start from scratch, or choose a pre-designed contact form template from the gallery. Once opened, give your form a title like “Contact Us” and optionally add a form description to guide users.
- Add and customize form fields. Click the “+” button on the sidebar to add new fields. Include essential fields such as Name, Email Address, and Message using the appropriate field types (Short Answer for Name and Email, Paragraph for Message). Use the toggle switch to mark fields as “Required,” click the three dots menu on each question to add descriptions, and drag-and-drop the fields to rearrange their order. You can also click the paint palette icon at the top to choose a theme color and add a custom header image that aligns with your website branding.
- Click the “Send” button and get embed code. Once your form is ready, click the “Send” button at the top-right of the screen. In the popup window, switch to the “< >” embed tab. Google will generate an iframe embed code. Copy it by clicking the “Copy” icon. You can optionally adjust the iframe’s default width and height before copying, or modify those values later within your HTML code.
- Paste the iframe code into your HTML file. Open the HTML file of your website using a code editor. Switch to code view or source mode, and place the iframe snippet exactly where you want the form to appear — such as in the main content or contact section. Save the file and upload it to your server. Once published, visit your website in a browser to verify the form is embedded and functioning correctly.
This method is suitable for quick setups, internal use, or personal websites where design is not a primary concern.
Comparison of Methods: Elfsight vs Others
Below is a comparison table to help you quickly evaluate which solution suits your needs best. It highlights the key strength and primary limitation of each option.
| Method | Pros | Cons |
|---|---|---|
| Elfsight Widget | Offers a fully customizable, code-free builder with built-in integrations and responsive layout for all devices. | Requires creating an account and embedding a JavaScript snippet on your website. |
| Native HTML + Backend Script | Provides full control over appearance, logic, and server-side email handling. | Requires coding knowledge, server setup, and SMTP configuration for proper delivery. |
| Google Forms | Free and extremely easy to set up, with no hosting or coding required. | Limited customization and lacks integration with the visual style of your website. |
Each method has its strengths, depending on your technical background and project goals. In the next section, we’ll explore tips and best practices to help you maximize form performance, no matter which method you use.
Tips to Improve Email Form Performance
Now that you know the different ways to embed an email form in HTML, it’s important to follow a few best practices to ensure the form performs reliably, loads smoothly, and encourages user interaction across all devices. These tips are universal and apply to any widget or custom code you may use on your website.
- Place the code at the right position. Embed your email form’s code near the bottom of your HTML body or where you want it to appear visually. This helps maintain the correct loading order and ensures it doesn’t block other elements.
- Always test the form after embedding. Open your live website and submit a test message to confirm it works. Check if the email is received and that form validations behave correctly. Use different devices and browsers to spot layout issues early.
- Use mobile-friendly styling. Make sure your form adjusts automatically for smaller screens. Use flexible widths (like 100%) and avoid fixed pixel sizes so the layout can adapt responsively across phones and tablets.
- Secure user input. Whether you’re using JavaScript, a backend, or third-party platforms, validate and sanitize all incoming data to protect from injection attacks and spam.
- Set clear field labels and error messages. Help users understand what’s expected by providing concise labels and showing errors immediately when a field is incomplete or incorrectly filled out.
- Minimize distractions around the form. Avoid cluttered layouts or excessive design elements near your email form. A clean layout helps guide the user’s focus and increases the chance of completion.
- Check form submission handling settings. If you’re using integrations (like email forwarding or CRMs), make sure they’re properly connected and tested before publishing your changes.
With these best practices in mind, you’re ready to explore how email forms are used across various industries and which types of businesses benefit most from embedding them.
Who Benefits from HTML Email Forms: Use Cases
Email forms are versatile and can be embedded into nearly any type of business website. From lead generation to customer service and content subscription, they support communication and engagement across multiple industries. Below are some of the most common sectors using email forms and how they benefit from them.
Application in eCommerce 💰
Online stores use email forms to manage inquiries, provide order support, and collect newsletter subscriptions. A well-placed email form near product pages or checkout areas allows customers to ask questions before purchase or get help afterward — reducing cart abandonment and building buyer confidence.
Application in Education and Online Courses 🎓
Educational platforms and coaching businesses use email forms for course inquiries, application submissions, and lead nurturing. Whether it’s a university department or a solo instructor, these forms provide a consistent and easy way to collect details from prospective students or clients.
Application in Healthcare and Wellness 💉
Medical professionals, wellness coaches, and clinics embed email forms to handle appointment requests, consultation queries, and patient intake. This simplifies the booking process while keeping communication secure and private. Forms can also include consent checkboxes and preferred contact options.
These examples show that email forms are not one-size-fits-all. With the right layout and positioning, they can enhance visitor interaction in any industry. In the next section, we’ll review common issues you may face and how to solve them quickly.
Fixing Common Issues
While adding an email form to your HTML website is usually straightforward, you may encounter technical issues or unexpected behavior. Below are common problems users face and practical answers to help you resolve them quickly.
Why is my form not sending emails?
Why doesn’t my form appear on the page?
How can I stop receiving spam through my contact form?
Why does my form work on desktop but break on mobile?
Why aren’t submitted messages reaching my inbox?
Can I redirect users after they submit the form?
With these solutions in hand, you can troubleshoot and fine-tune your form to function exactly as expected.
Conclusion
Embedding an email form in your HTML website is one of the most efficient ways to improve communication, capture leads, and streamline user interaction. Whether you’re using a manual HTML/PHP setup, Google Forms, or an intuitive solution like Elfsight, your contact process becomes more accessible and reliable when implemented correctly.
We’ve explored multiple methods, covered common issues, and highlighted practical tips for embedding and styling email forms across industries. No matter your technical background, there’s a form solution available that can match your workflow and scale with your needs.
Need More Help?
We hope this walkthrough has been clear and helpful. If you’re ready to bring your email form vision to life, feel free to reach out — we’re here to help. At Elfsight, our goal is to make powerful widgets simple and accessible for every kind of business website, with zero coding required.
We also invite you to join our Community to share feedback, find answers, and exchange ideas. Got a feature in mind? Add it to our Wishlist and help shape what comes next!