What is Google Calendar API
It lets you display, create and work with Calendar events and deal with other calendar-related objects, for example, access controls. Now we are going to review a few ideas of how you can start working with the Google Calendar API developer key.
How you can work with it
There are several ways you can apply the Calendar API v3. Here are some of them.
- Create events. Google Calendar is a great tool to help users stay organized. Using it, you can, for example, add a hiking route as a calendar event and remind each participant of it so that they could stay prepared without stress.
- Recurring Events. Some events happen multiple times – daily meetings, birthdays or holidays. Usually, they are identical and have the same start and end time.
- Synchronize Resources. You can keep data for all the calendar collections in sync, saving the bandwidth.
- Apply push notifications. There’s a possibility to use push notifications that inform your application when a resource changes.
- Synchronize resources. Google Calendar API can help you keep data for all calendar collections in sync while saving bandwidth.
Google Calendar also uses the following resources to work with:
- Event – a feature on the calendar containing a title, start and end times, and attendees.
- Calendar – a collection of events.
- Calendar list – a list of all the calendars in the Calendar UI
- Setting – a preference from the Calendar UI such as the users’ time zone.
- ACL – an access control rule which grants a user a special level of access to a calendar.
- Color – a color presented in the Calendar UI
- Free/busy – times, when a calendar has events scheduled “busy” or has no events and considered “free”.
Use the Calendar API
Every request your application sends to Calendar API v3. needs an authorization token. This token also identifies the application for Google. The application must use the OAuth 2.0 to authorize requests – other authorization protocols are not supported.
Keep in mind that all requests to the Google Calendar API must be authorized by an authenticated user. The authorization process varies depending on the type of application you have. The following process suits for almost all application types:
- When creating the application, register it with the help of Google Calendar API Console. Google will provide you with a client ID and a client secret. You’ll need this information later.
- Activate the Google Calendar API in the API Console. If it isn’t listed there, skip this step.
- When your application requires access to user data, it asks Google for a particular scope of access.
- Then Google demonstrates a consent screen to the user, asking him to authorize your application to request some of their info.
- If the user grants approval, Google gives your application a short-lived access token.
- Then your application requests user data and attaches the token to the request.
- In case Google determines your request and token as valid, it returns the requested data.
Sometimes you might need additional steps, for example, using the refresh tokens in order to get new access tokens. You can check the processes for different types of applications here.
If you will be lucky enough and get approved, you’ll receive access to the Calendar API documentation so you can start the development of your integrated software.
In case you need a simple and fast way of adding a Calendar to your website, consider using the Event Calendar by Elfsight. It gives you an opportunity to reveal your events in Google SERP without any effort.
Calendar API: examples
Google Calendar API create event
In order to create an event, you need to call the events.insert() method providing at least these parameters:
- calendarId – it’s the calendar identifier which can either be an email address of the calendar on which you are to create an event or a special keyword ‘primary’ that will use the primary calendar of the logged in user.
- event is the event to create with all the needed information such as start and end. The only two required fields here are the start and end times.
The following example demonstrates the process of creating an event and setting its metadata:
Example: the process of creating an event
// Refer to the JavaScript quickstart on how to setup the environment:

// https://developers.google.com/calendar/quickstart/js

// Change the scope to 'https://www.googleapis.com/auth/calendar' and delete any

// stored credentials.


var event = {

  'summary': 'Google I/O 2015',

  'location': '800 Howard St., San Francisco, CA 94103',

  'description': 'A chance to hear more about Google\'s developer products.',

  'start': {

    'dateTime': '2015-05-28T09:00:00-07:00',

    'timeZone': 'America/Los_Angeles'

  },

  'end': {

    'dateTime': '2015-05-28T17:00:00-07:00',

    'timeZone': 'America/Los_Angeles'

  },

  'recurrence': [

    'RRULE:FREQ=DAILY;COUNT=2'

  ],

  'attendees': [

    {'email': 'lpage@example.com'},

    {'email': 'sbrin@example.com'}

  ],

  'reminders': {

    'useDefault': false,

    'overrides': [

      {'method': 'email', 'minutes': 24 * 60},

      {'method': 'popup', 'minutes': 10}

    ]

  }

};


var request = gapi.client.calendar.events.insert({

  'calendarId': 'primary',

  'resource': event

});


request.execute(function(event) {

  appendPre('Event created: ' + event.htmlLink);

});
Recurring events API
These events occur multiple times on a regular schedule, for example, they can be daily meetings, birthdays or holidays. Here’s an example of an event happening from 6am until 7am every Tuesday and Friday starting from September 15th, 2015 and stopping after the fifth occurrence on September 29th:
Example: recurring events
...
"start": {

 "dateTime": "2015-09-15T06:00:00+02:00",

 "timeZone": "Europe/Zurich"

},

"end": {

 "dateTime": "2015-09-15T07:00:00+02:00",

 "timeZone": "Europe/Zurich"

},

"recurrence": [

 "RRULE:FREQ=WEEKLY;COUNT=5;BYDAY=TU,FR"

],

…
And here we can see an all-day event which starts on June 1st, 2015 and repeating every 3 days throughout the month, excluding June 10th but including June 9th and 11th:
Example: all-day recurring event
…

"start": {


 "date": "2015-06-01"


},


"end": {


 "date": "2015-06-02"


},


"recurrence": [


 "EXDATE;VALUE=DATE:20150610",


 "RDATE;VALUE=DATE:20150609,20150611",


 "RRULE:FREQ=DAILY;UNTIL=20150628;INTERVAL=3"


],


…
Synchronize Resources
This method helps you keep data for all calendar collections in sync. The incremental synchronization consists of two stages:
- Initial full sync is done once in the beginning to fully synchronize the client’s state and the server’s state.
- Incremental sync is performed repeatedly, updating the client with all the changes that happened since the previous update.
Here’s an example of sync token:
Example: sync token
// Refer to the JavaScript quickstart on how to setup the environment:

// https://developers.google.com/calendar/quickstart/js

// Change the scope to 'https://www.googleapis.com/auth/calendar' and delete any

// stored credentials.


var event = {

  'summary': 'Google I/O 2015',

  'location': '800 Howard St., San Francisco, CA 94103',

  'description': 'A chance to hear more about Google\'s developer products.',

  'start': {

    'dateTime': '2015-05-28T09:00:00-07:00',

    'timeZone': 'America/Los_Angeles'

  },

  'end': {

    'dateTime': '2015-05-28T17:00:00-07:00',

    'timeZone': 'America/Los_Angeles'

  },

  'recurrence': [

    'RRULE:FREQ=DAILY;COUNT=2'

  ],

  'attendees': [

    {'email': 'lpage@example.com'},

    {'email': 'sbrin@example.com'}

  ],

  'reminders': {

    'useDefault': false,

    'overrides': [

      {'method': 'email', 'minutes': 24 * 60},

      {'method': 'popup', 'minutes': 10}

    ]

  }

};


var request = gapi.client.calendar.events.insert({

  'calendarId': 'primary',

  'resource': event

});


request.execute(function(event) {

  appendPre('Event created: ' + event.htmlLink);

});
Push Notifications
Google Calendar API v3 gives you an opportunity to get push notifications that allow you to watch for changes for resources. This feature can be used to improve your application.
You need three things to start using push notifications:
- Register the domain of your receiving URL.
- Set up your receiving URL or “Webhook” callback receiver.
- Set up a notification channel for each resource endpoint you are to watch.
The example below demonstrates how you can start watching for changes to a collection of events:
Example: watching for changes to a collection of events
POST https://www.googleapis.com/calendar/v3/calendars/my_calendar@gmail.com/events/watch

Authorization: Bearer auth_token_for_current_user

Content-Type: application/json


{


  "id": "01234567-89ab-cdef-0123456789ab", // Your channel ID.

  "type": "web_hook",

  "address": "https://mydomain.com/notifications", // Your receiving URL.

  ...


  "token": "target=myApp-myCalendarChannelDest", // (Optional) Your channel token.

  "expiration": 1426325213000 // (Optional) Your requested channel expiration time.

}
Calendar API limits
The Calendar API has a limit of 1,000,000 queries per day. If you want to change your usage limits or increase your quota, take the following steps:
- Create a billing account if you haven’t got one.
- Go to the Enabled APIs page of the API library in the Google Console and choose an API from the list.
- Select Quotas to view and change quota-related settings.
You can also observe your usage statistics in the Usage section.
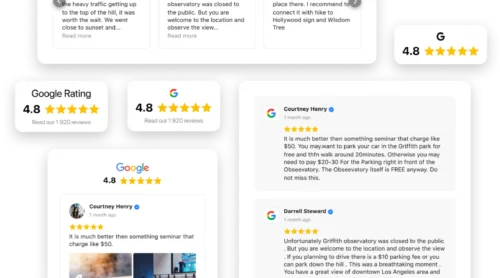
There are other widgets that help you use data from the platform. One of the most beneficial for any business is Google Reviews widget. It has a super wide functionality, and lets not only embed Google reviews, but also creates rich snippets for search results.
FAQ
Is Google Calendar API free?
Yes, the use of Google Calendar API is free of charge. Although, there are some limits.
How can I create an event with the help of Calendar API?
You need to call the events.insert() method, providing the calendarId and event parameters. You also need to set your OAuth scope to https://www.googleapis.com/auth/calendar and make sure the authenticated user has write access to the calendar with the calendarId you provided.
How can I get data from Google Calendar?
Open your Calendar, then click “My calendars” section. Then choose the calendar you want to export and click “More”. Under the Calendar settings, click “Export Calendar”. Then the ICS with your events will start to download.
Can I automatically backup my Calendar?
Sure. To do it, you need to open the Calendar tab, then click the “More” button and select “Run backup” from the drop-down list and the backup will start automatically.
How can I find my Google Calendar API?
Go to Google Developer Console and create a new project. In the project, go to APIs & auth > APIs on the sidebar. Then find the Calendar API in the list.
Conclusion
As you see, it’s not that hard to work with Google Calendar API – you simply need to take a few easy steps. And now we want to see your experience of using this tool – share your use cases and helpful tips in comments!