What is Instagram Access Token?
An Instagram Access Token is a unique key that allows external applications to securely access Instagram’s data on behalf of a user. It is typically used to integrate Instagram features, such as fetching media, photos, and profile information, into third-party platforms or services. The token is generated when a user authorizes an app to access their Instagram account, giving the app temporary permission to interact with Instagram’s API. It ensures that data is accessed securely and only with the user’s consent. However, tokens can expire and may need to be refreshed periodically for continued access.
Step-by-Step Guide for Getting Instagram Access Token
In the beginning, make sure you’ve got the following:
- A Facebook Developer Account.
- An Instagram account with media.
- A public website that you own. It can be a generic free one like a Github Page or Heroku web app, or your actual website.
- A command-line tool such as Terminal or an app like Postman that can perform cURL requests.
Then proceed to the first step.
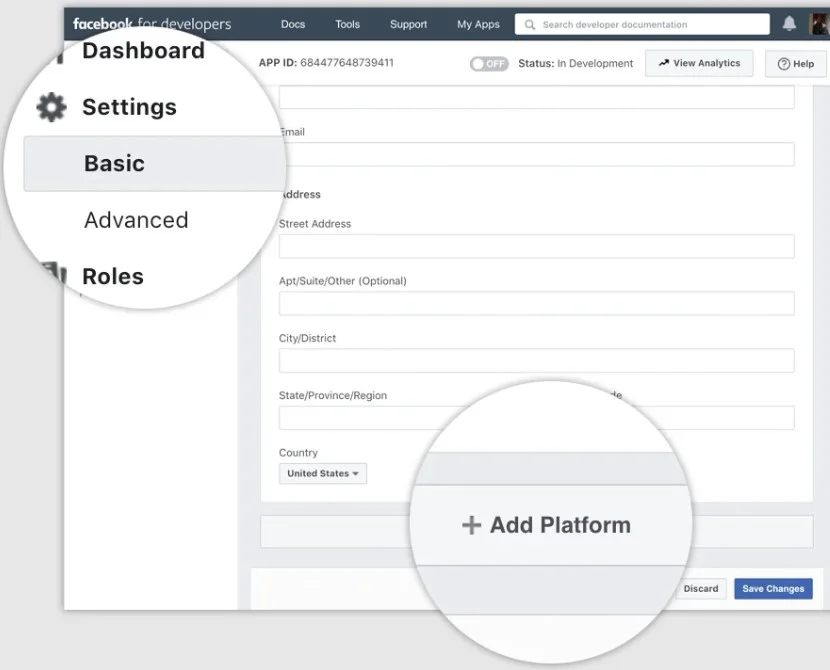
- Сreate your Facebook App
You need to go to developers.facebook.com, then click My Apps, and create a new app. After the app is created, click Settings > Basic, scroll the bottom of page, and select Add Platform.
Then choose website, add its URL, and save the changes. Keep in mind that the platform can be changed later in case you need. - Build Instagram Basic Display
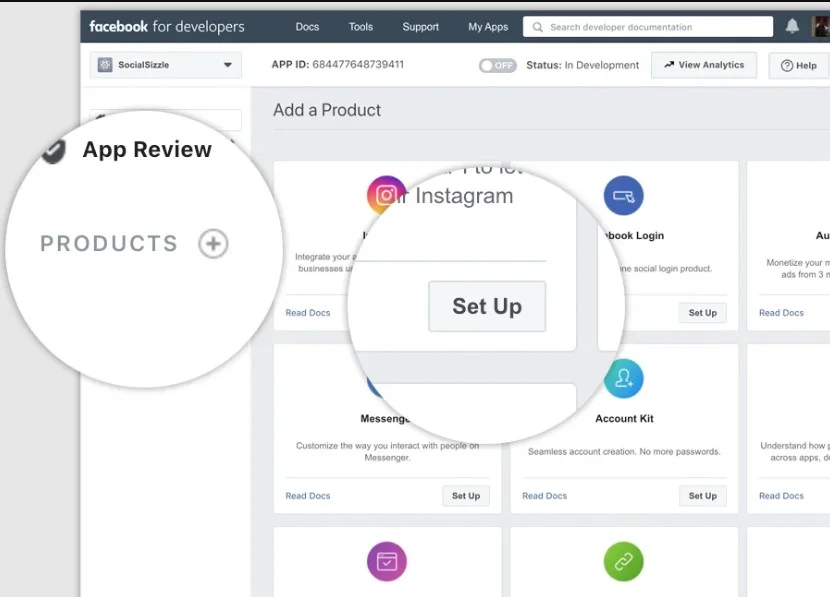
To do it, click the Products button, locate the Instagram product, and click Set Up to add it to your app. Complete every section in the appeared form, using the following guidelines:
Display Name. Here you need to enter the name of the Facebook app you’ve just created.
Valid OAuth Redirect URIs. Add your website URL, save your changes and check the URL again.
Deauthorize Callback URL. Enter your URL again. Eventually you will have change this to a URL that can handle deauthorization notifications.
Data Deletion Request Callback URL. Enter your website’s URL once again. Just like the Deauthorize Callback URL, you will eventually have shift this to a URL that can handle data deletion requests.
App Review. You can skip this step since you will not be switching the app to Live Mode during the set up.
Now you can proceed to the next step. - Add an Instagram test user
Go to Roles > Roles and scroll down to the Instagram Testers section. Then click Add Instagram Testers and enter your Instagram account’s username and send the invitation. After that, you’ll need to open a new browser, go to www.instagram.com and sign into your Instagram account that you just invited. There navigate to Edit Profile > Apps and Websites > Tester Invites and accept the invitation.
Now your Instagram account is eligible to be accessed by your Facebook app while it is in Development Mode. - Authenticate the Test User
Build the Authorization Window URL below, replacing app-id with your Instagram app’s ID (which can be found here: App Dashboard > Products > Instagram > Basic Display > Instagram App ID) and redirect-url with your website URL that you’ve provided before in step 2. Remember that the URL must be exactly the same.https://api.instagram.com/oauth/authorize ?client_id=684477648739411 &redirect_uri=https://socialsizzle.herokuapp.com/auth/ &scope=user_profile,user_media &response_type=code
Then you’ll need to open the browser window and load the Authorization Window URL. It should appear and display your Instagram user’s name, the app’s name, and a description of the permissions your app is requesting. To authenticate your Instagram test user you’ll need to sign into the Authorization Window, then click Authorize to grant your app access to your profile data. This page will redirect you to to the redirect URI you included in the previous step and append an Authorization Code.
Remember that authorization codes are only valid for 1 hour. - Exchange your code for Instagram access token
Here you’ll need to open your command line tool or any other app supporting cURL requests and send the following POST request to the API.curl -X POST \ https://api.instagram.com/oauth/access_token \ -F client_id={app-id} \ -F client_secret={app-secret} \ -F grant_type=authorization_code \ -F redirect_uri={redirect-uri} \ -F code={code}
Replace {app-id}, {app-secret}, {redirect-uri}, and {code} with your Instagram app ID, Instagram app secret, your redirect URI, and the code sent to you buy Facebook. Make sure your redirect URL exactly matches the one from the previous step.
After that, the API will return a JSON encoded object containing a short-lived Instagram User Access Token, valid for 1 hour, and your Instagram test user’s ID.
You’ll simply need to copy the access token and user ID so that they could be used in the next step. - Query the User Node
All is left now is to query the User node for your user ID and username. Simply replace {user-id} and {access-token} with the ID and access token you received in the last step, like it’s shown in the example below.curl -X GET \ 'https://graph.instagram.com/{user-id}?fields=id,username&access_token={access-token}'
Then the API will respond with your Instagram user ID and username.
 Complete every section in the appeared form, using the following guidelines:
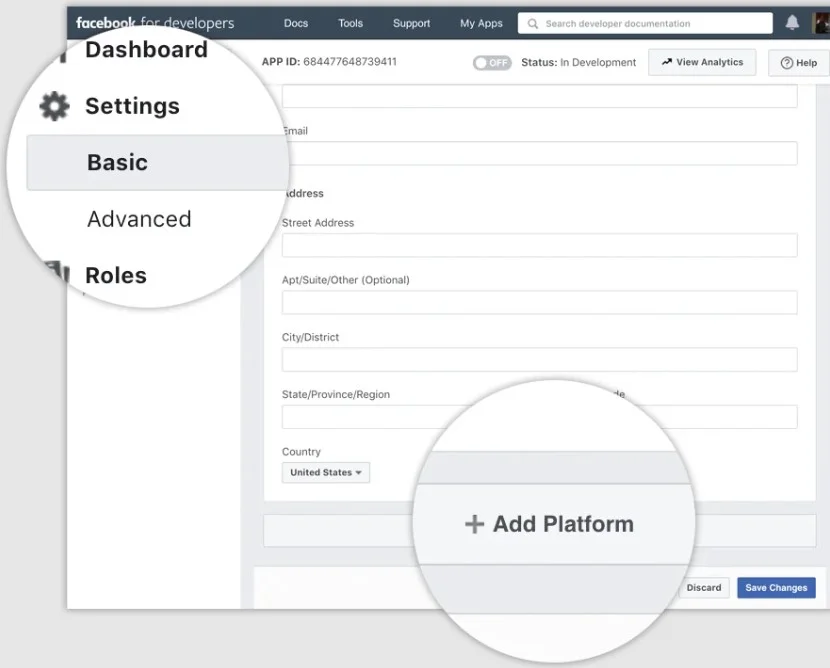
Now you know how to get the Instagram access token and perform a basic query.
Create your Instagram Feed widget in a couple of minutes!
With Elfsight Instagram Feed widget, you can easily embed your feed in just a few clicks—no coding or token generation required. In just a couple of minutes, you’ll have a fully customizable Instagram widget up and running, displaying your photos beautifully on your site without any hassle. Let’s take a look at how simple it is to get started!
You Don’t Feel Secure?
If you embed Instagram to your site, you might have another question about your newly achieved Instagram plugin and its security: “What if someone will get my Access Token?”. Simply – nothing terrible. Here’s why.
If someone gets your Access Token then don’t worry.
You can’t do anything with Instagram Access Token except browsing photos. This token doesn’t give any access to your personal data. Moreover, it doesn’t allow making any action from your name.
Keep going and embed your Instagram feed on the website!
Still Have Questions?
Feel free to contact us by submitting a ticket in Elfsight Support Center. We are ready to help you with any emergent issue. By the way, stay tuned to our blog and get more useful articles and plugins’ guides!
Join our vibrant Community, where ideas and expertise are shared, and add your suggestions for improvements to our Wishlist.