jQuery AI Chatbot plugin
Create a powerful AI Assistant on your jQuery website, trained specifically on your data to automate customer support, capture leads, and deliver answers – 24/7.
Create Widget for Free
No credit card needed
Trusted by over 3,000,000 small business, agencies and top global brands worldwide
Create your AI Chatbot plugin
Configure the AI Chatbot and add it to your jQuery website for free!
Why People Love Elfsight
Our AI Chatbot for jQuery is like having a friendly digital assistant that never clocks out. It greets your visitors, answers common questions, and keeps the conversation flowing – all while you focus on your business. Setup takes just a few minutes, and you don’t have to be a developer to make it work.Did you know? According to Salesforce, 69% of consumers prefer chatbots for quick communication with brands. That means more happy visitors and fewer repetitive messages for you to handle.Try it now – free up your time while giving visitors the answers they want, instantly.
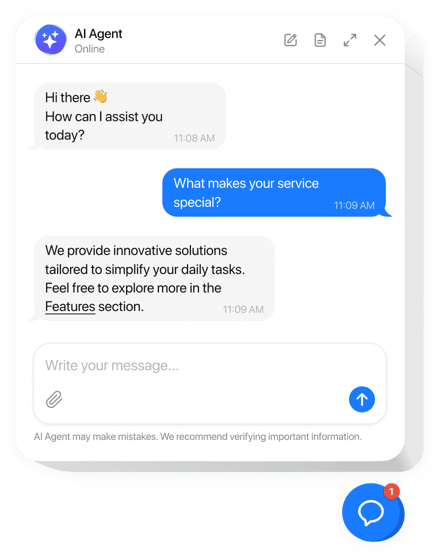
Key Features of the AI Chatbot
- 24/7 support – The chatbot is always on, so customers never have to wait for business hours.
- Personalized voice – Set the chatbot’s tone to match your brand: professional, casual, or playful.
- Zero coding needed – Installing feels like snapping a LEGO piece into place. Copy, paste, done.
- Lead collection – Gather emails, feedback, and customer details automatically during chats.
- Flexible display – Embed it directly on a page or have it float as a chat bubble across all pages.
- Conversation analytics – See what visitors ask most and adjust your content or offers accordingly.
How to Add the AI Chatbot to jQuery
Adding the chatbot to your jQuery website is quick and beginner-friendly. Here’s how you can set it up: Method 1: Inline Chatbot- Step 1. Go to the AI Chatbot widget page and click “Create Widget.”
- Step 2. Pick a template, customize its look, and set up chatbot behavior in the visual editor.
- Step 3. Click “Add to Website for Free” and copy the HTML embed code.
- Step 4. Paste this code into the section of your jQuery page where you’d like the chatbot to appear.
- Step 5. Save and refresh – your chatbot will now show up inline on the page.
- Step 1. In the Elfsight editor, switch to a floating layout so the chatbot appears as a bubble in the corner.
- Step 2. Customize bubble size, color, and position (choose the left or right corner).
- Step 3. Copy the generated script snippet.
- Step 4. Paste it into your website’s footer code so it loads on every page.
- Step 5. Save and publish. Now the chatbot will follow visitors across all pages.
FAQ
Does the AI Chatbot work with any jQuery website?
Yes, it works with any website that uses jQuery. Just paste the code where needed, and you’re good to go.
Can I style the chatbot to match my website?
Of course. You can tweak colors, fonts, bubble size, and even the chatbot’s tone of voice.
Do I need to know JavaScript or coding?
Nope. It’s as simple as copy-paste. The visual editor handles all the setup for you.
Is there a way to try it for free first?
Yes – you can experiment in the live editor and even publish it to your website before deciding on an upgrade.
Where do I go if I need help?
You can dive into the Help Center, connect with the community in the Forum, suggest features in the Wishlist, or track updates in the Changelog.
Pricing
14-day money back guarantee. Risk-free, you can cancel at anytime.
Elfsight Apps
Multi-platform software that works on any website
from $0 / month
start with a free plan
Unlimited websites
Professional customer support
Charge-free installation service
Fully customizable
