According to Meta, the Facebook Like and Comment plugins will stop rendering on February 10, 2026, ending a 16-year era of external Facebook integration.
If you’ve been using Facebook Comments on your website, you’ve likely received the news: Meta is discontinuing both the Facebook Like button and Facebook Comments plugin for external websites on February 10, 2026. This affects millions of websites that relied on Facebook’s social plugins to enable visitor discussions. The plugins will degrade gracefully, rendering as invisible elements rather than breaking your website, but they’ll no longer function.
This guide explains what happened, why it matters, and which alternative commenting solutions you can implement to maintain discussions on your website. Whether you’re running a blog, news website, or e-commerce store, you’ll find practical options to replace Facebook Comments for website and keep your community engaged.
- Why Meta discontinued the Facebook Comments plugin and what it means for your website
- Key features to look for when choosing a replacement commenting system
- Step-by-step setup instructions for alternative commenting platforms
- A comparison of third-party solutions, native options, and custom implementations
- Best practices for moderating and optimizing website discussions
Once you understand your options, you can implement a commenting system that fits your website’s needs and keeps conversations flowing.
What Happened to Facebook Comments
According to Meta’s developer announcement, the decision to discontinue their Social Plugins reflects “a commitment to maintaining a modern, efficient platform that serves developers’ current needs.” The company characterized these plugins as features from “an earlier era of web development” whose usage has naturally declined as the digital landscape evolved.
🔜 What this means for your website
After February 10, 2026, the Facebook Comments plugin will render as a 0x0 pixel (invisible element) rather than displaying the familiar comment interface. Existing comments will not be accessible on your website, and visitors will no longer be able to post new comments through Facebook. Importantly, Meta has engineered this transition to avoid broken layouts or error messages – the element will simply disappear.
💬 Your existing comments
Comments posted through Facebook’s plugin are stored within Facebook’s ecosystem, not on your website’s database. After the discontinuation date, these comments will remain accessible on Facebook itself (if users posted them publicly), but they will no longer display on your website. There is no official Meta tool to export these comments for migration to another platform.
Alternative Solutions for Website Comments
If you were looking to embed Facebook comments on website pages, here are the practical replacements available. Each approach has distinct advantages and limitations.
1. Elfsight Comments
The Comments widget provides a customizable commenting system with built-in moderation, spam protection, and social login options. If you’re looking for a no-code commenting solution that combines ease of use with robust features and doesn’t rely on Facebook’s infrastructure – this widget is for you.
The setup is simple:
- Open the configurator and select a template.
- Configure & customize your comments widget.
- Click “Add to Website” to get the embed code.
- Paste the code into your website’s backend and publish.
🚀 Create your interactive comment section now in the live editor!
Key features
- Guest posting and social logins for frictionless participation
- Two-level threaded replies with emoji reactions, likes/dislikes, and @mentions
- Built-in admin moderation tools and automated spam protection
- SEO-friendly markup with direct link sharing for individual comments
- Mobile-responsive design with light/dark themes and 76 language options
- Unlimited users, comments, and pages with no artificial caps
For complete feature details, see the Elfsight Comments features page.
2. Disqus
Disqus is another third-party option – one of the most widely adopted commenting platforms, used by millions of websites worldwide. It offers robust social features including the ability for users to build profiles across all Disqus-enabled websites, creating a sense of cross-site community
- Create a free account at disqus.com and register your website
- Install the Disqus plugin for your CMS (WordPress, Wix, etc.) or add the embed code manually
- Configure moderation settings, appearance, and notification preferences
- Existing comments remain in Disqus’s database; you can export them if you switch platforms later
3. Hyvor Talk
Hyvor Talk offers a privacy-focused commenting system without ads, designed for publishers and bloggers. Hyvor Talk includes real-time commenting capabilities, allowing visitors to see new comments appear instantly without refreshing the page.
- Register at talk.hyvor.com and create your website
- Install via plugin (WordPress, Ghost, etc.) or embed code
- Customize appearance, moderation workflows, and user authentication options
- Manage all comments through the Hyvor dashboard
4. WordPress Native Comments
WordPress has included a native commenting system since its inception, offering basic but functional discussion capabilities. Comments are stored directly in your WordPress database, therefore you maintain complete ownership and control over the data without relying on external services.
- Navigate to Settings → Discussion in the WordPress admin panel
- Enable “Allow people to submit comments on new posts”
- Configure moderation rules, notification settings, and spam filtering (via Akismet plugin)
- Comments appear below each post automatically; styling is controlled by your theme
5. Wix Comments
Wix offers a built-in comments app that integrates directly with the Wix editor. The system synchronizes with Wix’s member area, allowing logged-in users to comment automatically without separate authentication.
- In the Wix editor, click Add → Community → Comments
- Drag the Comments element to your desired location on the page
- Customize appearance, moderation settings, and notification preferences
- Publish the page; comments are stored in your Wix website database
6. Custom Implementation with HTML and JavaScript
Developers can build custom commenting systems using server-side languages (PHP, Node.js, Python) and databases to store comments directly on their infrastructure.
- Design a database schema to store comments (user name, email, message, timestamp, parent comment ID for threading)
- Create frontend HTML forms for comment submission
- Write server-side code to validate, sanitize, and store comments
- Implement moderation interfaces for admins to approve, delete, or edit comments
- Add spam protection (CAPTCHA, rate limiting, content filters)
Comparison: Which Comments Solution Is Right for You
Here’s how the major alternatives compare across the features that matter most for replacing Facebook Comments:
| Feature | Disqus | Hyvor Talk | Elfsight Comments | WordPress Native | Wix Native | Custom Build |
|---|---|---|---|---|---|---|
| Free tier available | Yes (with ads) | No | Yes | Yes | Plan-dependent | Yes (DIY) |
| Guest posting | Yes | Yes | Yes | Yes | Yes | If coded |
| Threaded replies | Yes | Yes | Yes (2 levels) | Yes | No | If coded |
| Social login | Yes | Yes | Yes | Via plugin | No | If coded |
| Spam protection | Yes | Yes | Yes | Via Akismet | Basic | If coded |
| No third-party dependency | No | No | No | Yes | Yes | Yes |
| Advanced moderation | Yes | Yes | Yes | Limited | Limited | If coded |
| Mobile-responsive | Yes | Yes | Yes | Theme-dependent | Yes | If coded |
| SEO-friendly markup | Yes | Yes | Yes | Yes | Yes | If coded |
Decision framework
- Budget-conscious with low traffic: WordPress or Wix native comments provide basic functionality at no extra cost, Elfsight (free or basic tier $0-5/mo)
- Need advanced features with high traffic: Elfsight Comments, Disqus (accept ads), Hyvor Talk, depending on your feature priorities
- Privacy-first approach: Hyvor Talk or custom build for complete data control
- No technical resources: Any third-party platform (Disqus, Hyvor, Elfsight) offers easier setup and maintenance than native or custom solutions
Most website owners will find third-party platforms offer the best balance of features, ease of implementation, and ongoing support—though each has trade-offs in cost, privacy, or customization.
Setting Up Your Comment Section Right Away
Understanding the implementation process helps you evaluate whether a platform fits your technical comfort level. Here’s a step-by-step breakdown of setting up Elfsight Comments, which demonstrates the configuration depth available in visual-editor-based solutions.
Step 1: Select Your Comment Layout Template
Navigate to the Elfsight editor and choose a visual theme for your Comments widget: Light or Dark.
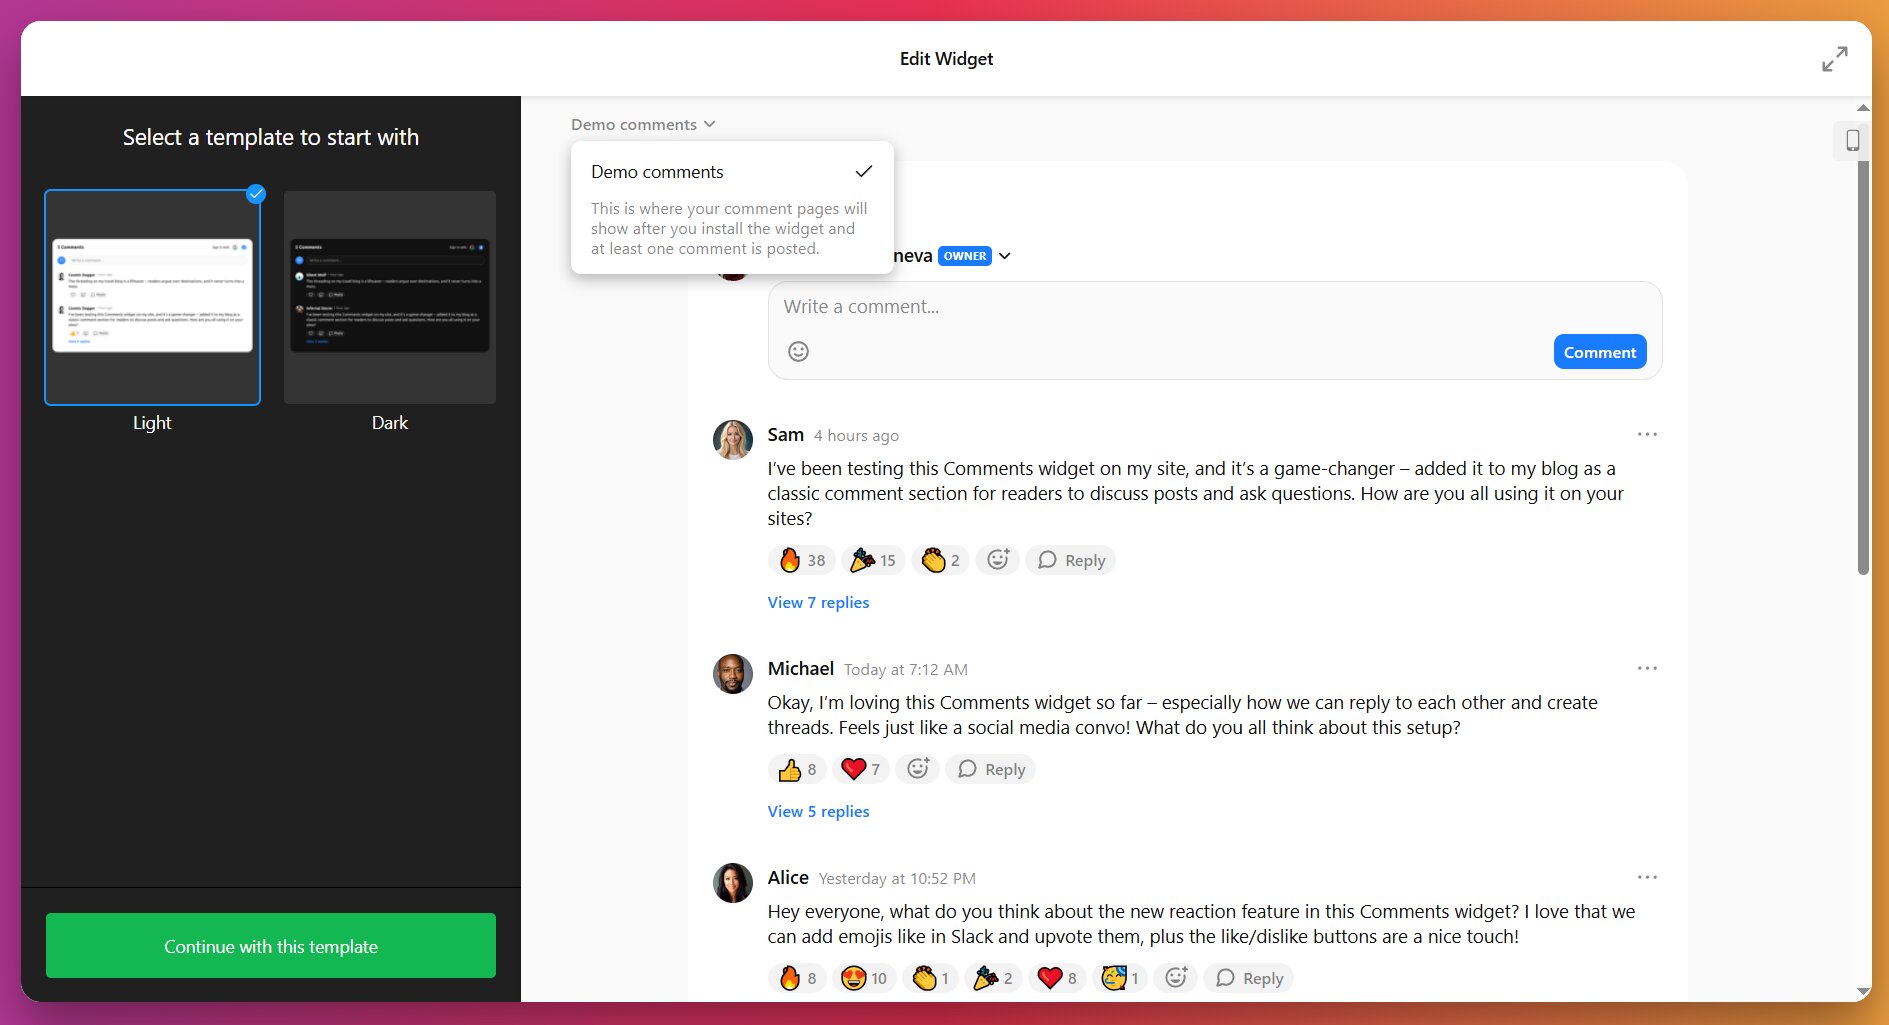
Pick one that aligns with your website’s design language. You can preview each option in real-time before committing. Once selected, click “Continue with this template” to advance to configuration.
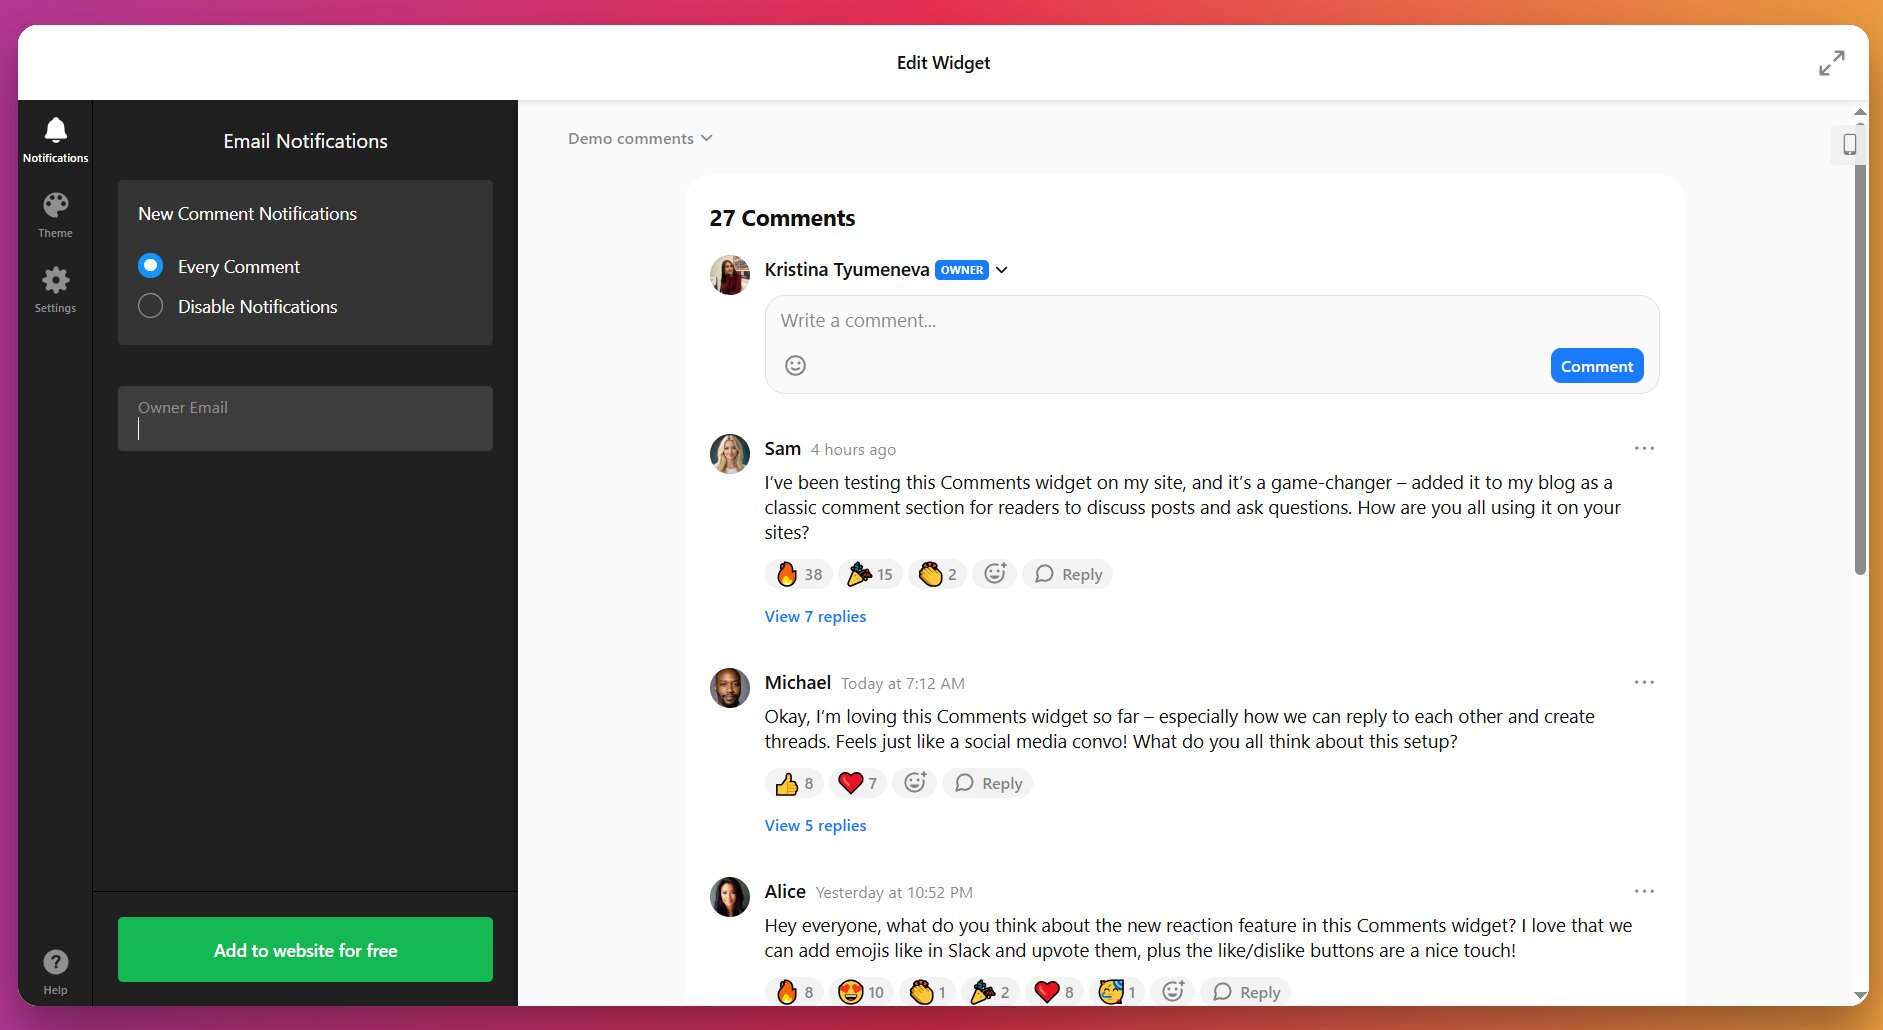
Step 2: Set Up Email Alerts
Under “Notifications”, enable or disable email alerts to get notified instantly whenever someone joins the discussion.
Step 3: Customize Your Comment Section
Switch to the “Theme” tab to adjust your widget colors and fonts. If undecided earlier, pick Light mode for cleaner backgrounds or Dark theme for modern bold aesthetics.
- Apply your brand color to buttons, links, and interactive elements for visual cohesion
- Select a font from our library to match your website’s typographic system
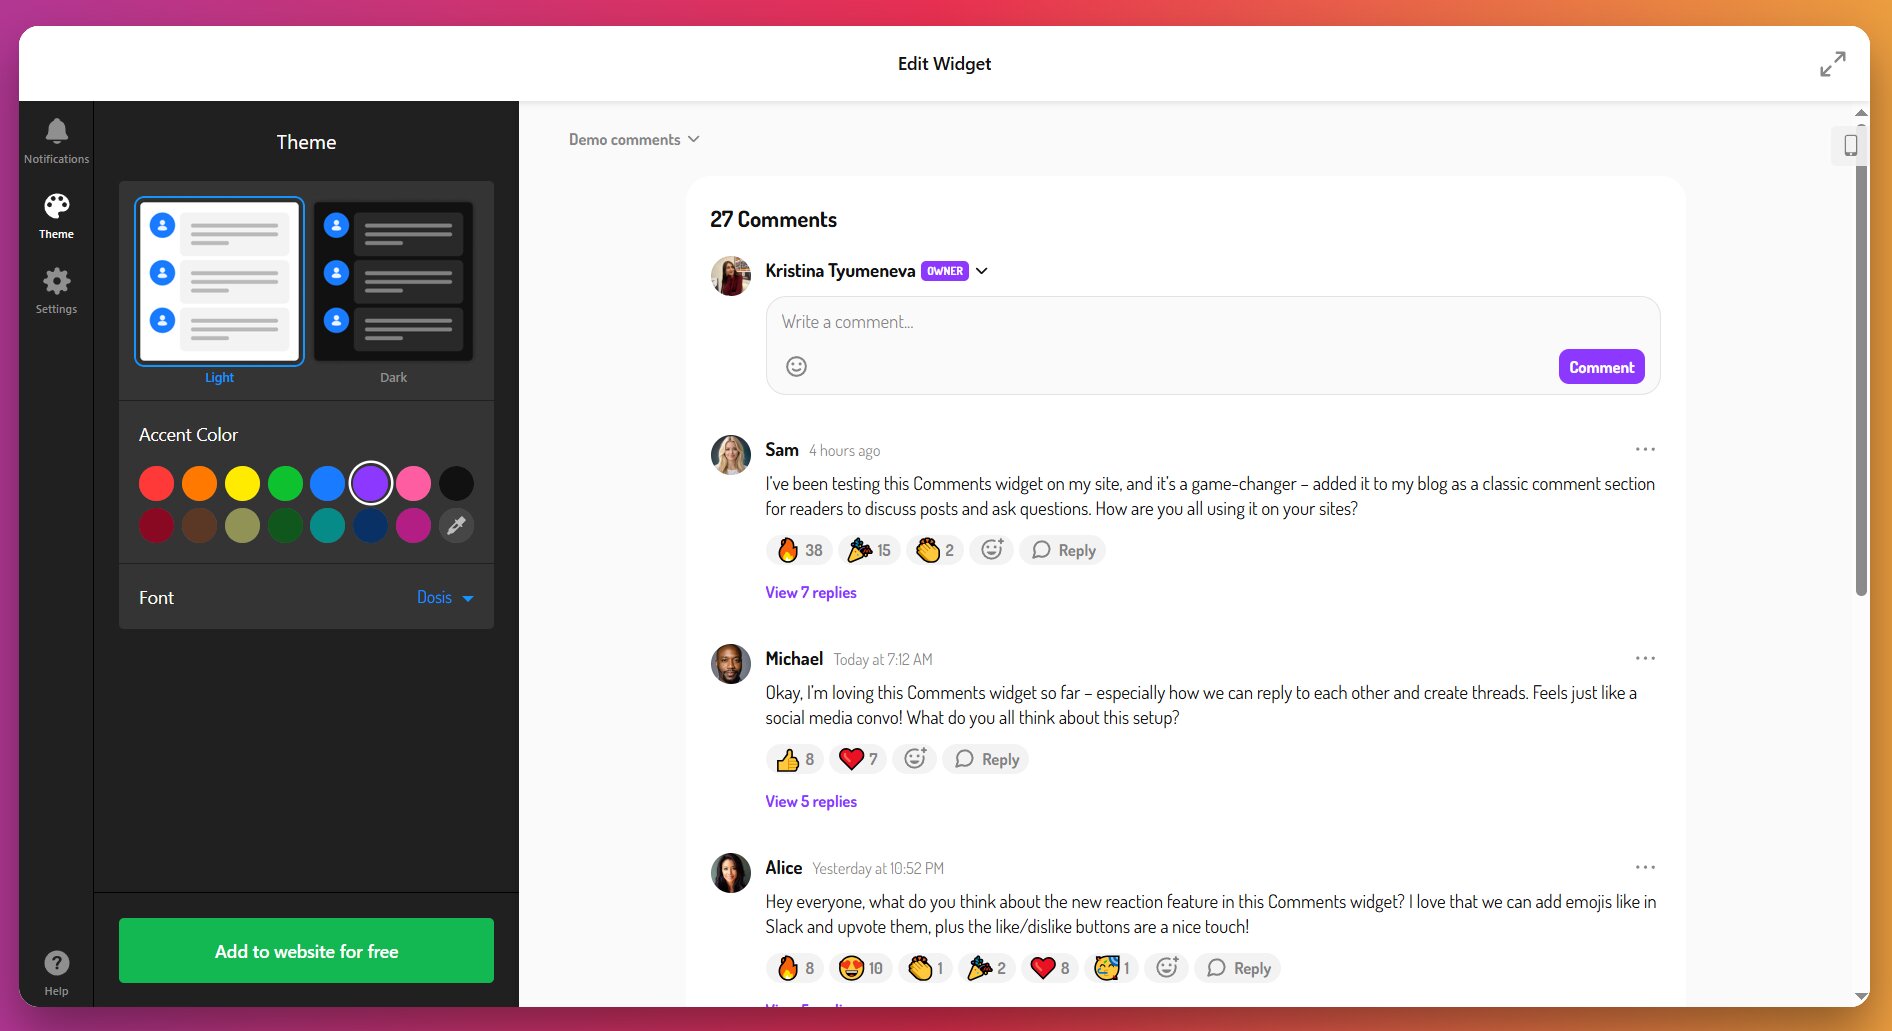
For brand consistency, extract exact hex color codes from your website’s design system and apply them to your comment widget’s accent color. This pixel-perfect matching communicates professional attention to detail and strengthens brand recognition throughout the user experience.
Step 4: Configure Widget Settings
Navigate to the “Settings” tab to control exactly how comments appear and organize within your section:
- Reaction type – Pick emojis or traditional ‘like’ and ‘dislike’ reactions for interactivity
- Sort order – Display newest comments first (chronological) or most popular first (engagement-based sorting)
- Admin label – Specify how your own comments will appear (“owner”, “admin”, etc.).
- Primary Language – Set the widget language to connect with your target audience
- Default Texts – Adjust preconfigured text elements (“Add reaction”, “Hide replies”, “Read more”, etc.)
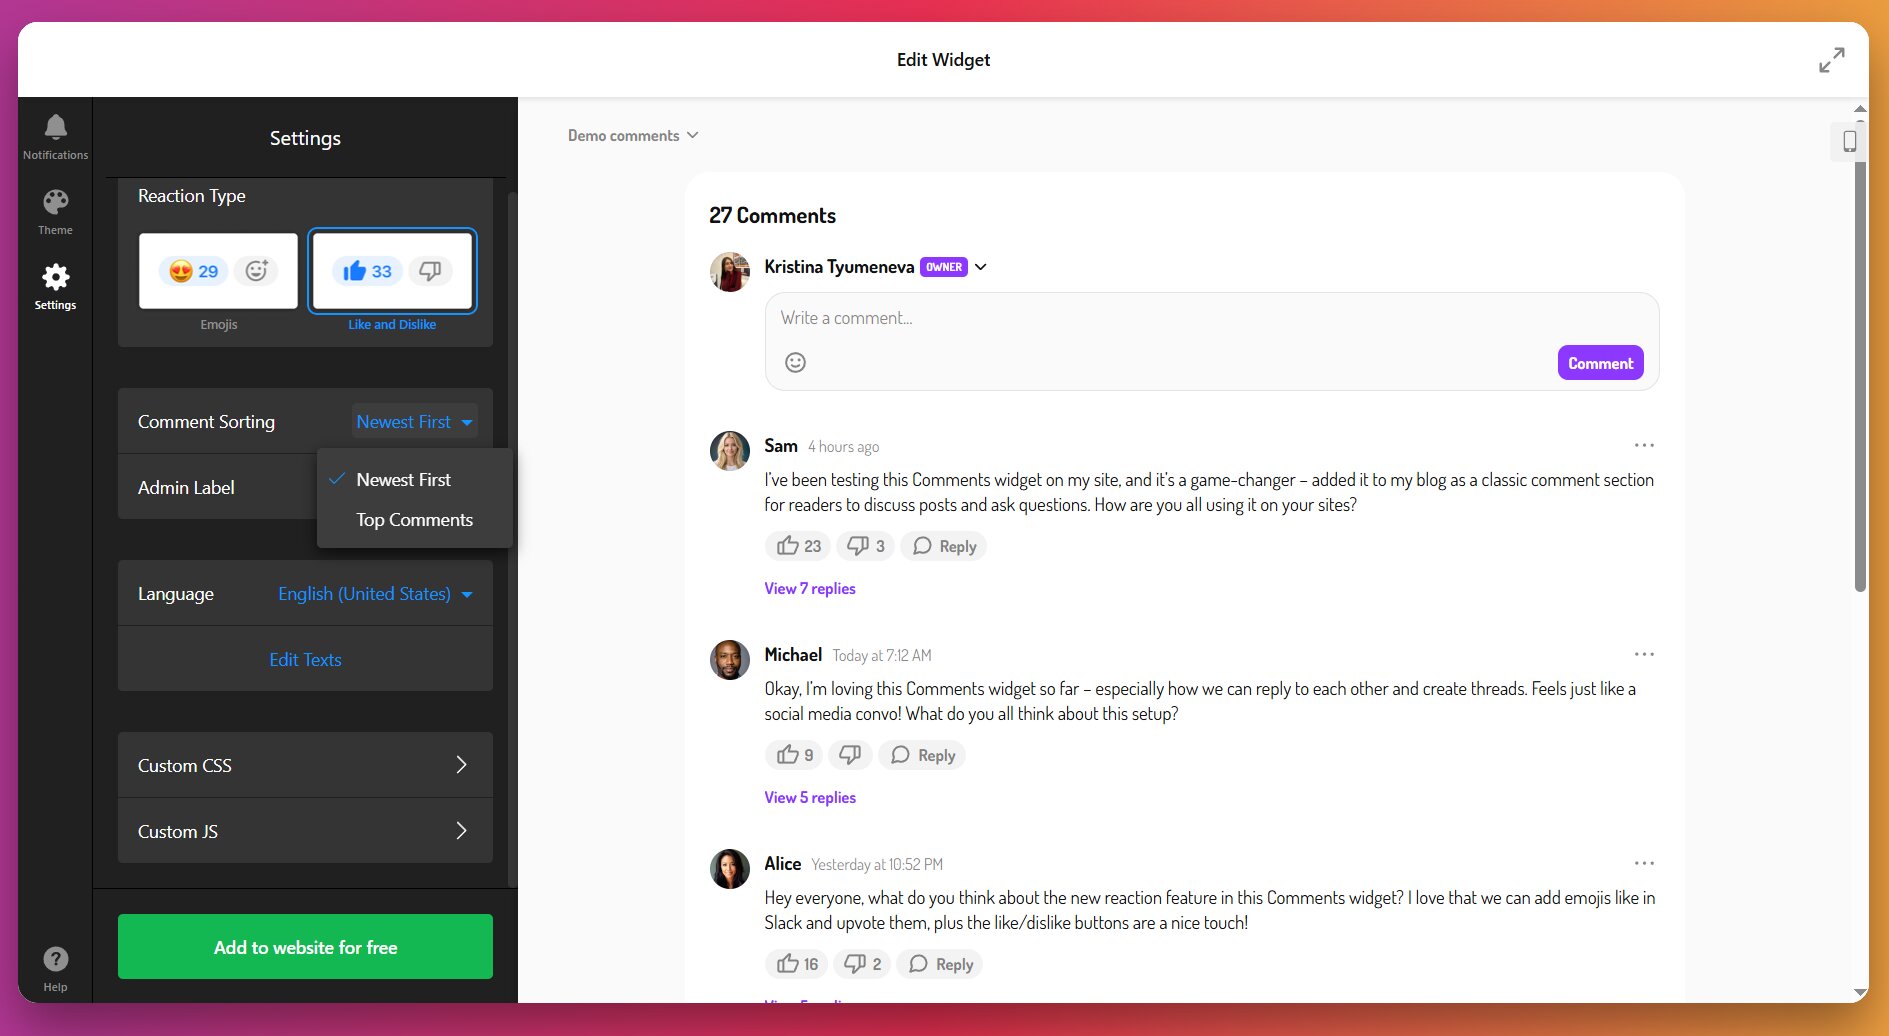
For advanced users or those who need more control, Custom CSS and JS fields are available.
Step 5: Obtain Your Installation Code
Once your comment section is fully configured and previewing correctly in the editor, click “Add to Website” to reveal your unique installation code. Copy this entire snippet to your clipboard without modifications or trimming.

Step 6: Embed Your Comment Section on Your Website
With your installation code ready, choose from these methods to add it to your website. The instructions below cover WordPress as the primary example, with notes about universal compatibility:
Method 1: Add to Specific Pages or Posts (WordPress)
Best for: Blog posts, product pages, or specific landing pages where you want strategic comment placement.
- Log in to the WordPress backend, go to Pages, and open the target page for editing.
- In the Block Editor, click the + icon to add a new block.
- Search for and select Custom HTML.
- Paste the full Elfsight installation code into the block.
- Click Publish or Update.
Your comment section now appears live on that specific page. Strategic placement matters significantly –position comments near the conclusion of your content, where readers naturally finish consuming it and feel prepared to share reactions.
Method 2: Display Comment Widget Site-Wide (WordPress)
Best for: Website-wide community features you want appearing consistently across multiple pages.
- Go to Appearance → Widgets in the dashboard.
- Select the target widget area (Header, Sidebar, Footer, etc.).
- Open Custom HTML from the Available Widgets list, choose the desired area, and click Add Widget.
- Paste the installation code and click Save.
This approach maintains visible community engagement opportunities across your entire website without repeating setup work on each page.
🔧 Troubleshooting quick check
- Comments not appearing: Verify you used a Custom HTML block, not a standard paragraph block. Ensure the code wasn’t trimmed during paste. Clear the browser cache completely.
- Authentication buttons not working: Check that you haven’t disabled third-party cookies in browser settings, as Facebook and Google login require cookie access.
- Comments showing but looking broken: Confirm no conflicting CSS from your theme is affecting widget styling. Try adding the widget to a clean test page to isolate theme conflicts.
- Spam comments appearing despite filters: Increase spam filter sensitivity in the Moderation settings. Consider switching to “approve first comment” mode for new users.
Optimization Tips for Comment Sections
Once your comment section is live, these best practices will help you maximize engagement while maintaining excellent conversation quality:
- Set clear community guidelines. Post visible rules about acceptable behavior, prohibited content, and consequences for violations. Users behave better when expectations are explicit.
- Respond within the first 24 hours. Your initial response to new comments sets the tone for community engagement. Fast replies signal that discussions are active and valued, encouraging others to participate. Aim to respond to at least the first few comments on new content within one day.
- Ask specific questions in your content. Posts ending with direct questions (“What’s your experience with X?” or “Which approach works better for you?”) receive 60% more comments than posts without clear prompts. Make it easy for readers to know exactly what you’re asking.
- Enable all authentication methods initially. Don’t limit commenting to Facebook-only or Google-only until you understand your audience preferences. Some users refuse to use certain platforms for privacy reasons. Offering guest commenting alongside social logins maximizes participation across different comfort levels.
- Review moderation settings monthly. As your community grows, spam patterns change. Check your spam filter’s false positive rate and adjust sensitivity accordingly. What works for a new website might need refinement after six months of active commenting.
- Use comment insights to inform content strategy. Frequently discussed topics in your comment sections reveal what genuinely interests your audience. Mine these discussions for content ideas, FAQ topics, and clarification opportunities that address real user confusion or curiosity.
Frequently Asked Questions
Can I migrate existing Facebook Comments to another platform?
What's the best way to add Facebook comments to website now?
How do I display Facebook comments on website using a comments widget?
Do I need a paid plan to add a Facebook comments widget replacement?
How do I prevent spam when I embed Facebook comments alternatives?
What happens to my website when Facebook Comments plugin stops working?
Conclusion
The discontinuation of Facebook Comments on February 10, 2026, closes a significant chapter in web integration history, but commenting systems remain essential for engagement, SEO, and community building. Whether you choose a customizable widget like Elfsight Comments, or native tools built into your CMS, the key is implementing a replacement that matches your moderation capacity and feature requirements.
Don’t wait until the deadline to act. Transitioning early gives your community time to adapt to the new system, preserves continuity in ongoing discussions, and prevents the jarring experience of suddenly losing all comment functionality. Evaluate the options outlined in this guide, test your chosen solution thoroughly, and communicate the change clearly to your audience. With the right commenting platform in place, you’ll maintain, and potentially strengthen, the discussions that make your website a destination rather than just a content source.