There are four ways to train a chatbot on your own data, and the main difference between them is the level of effort required from your side. We tried the three no-code methods with the same store’s content, and in all three, a wrong answer meant the bot was missing a fact or an instruction, never that it needed a new model.
You want a chatbot that answers customers like someone who knows your business. Out of the box, it knows nothing about your products or policies, and it doesn’t always admit it: in our tests, one bot passed off a generic cleaning tip as the store’s own advice, and another just made up its first answer.
Training a chatbot for your business most often means feeding the bot your content, so it can look things up in a knowledge base before it responds, and telling it how to behave. The simplest tools already do the retrieval part for you, so most small businesses don’t need to look beyond website chatbots.
The four approaches differ in what they ask of you: how much you set up initially and what level of maintenance is required in the long run. We tested the three no-code routes hands-on with the same 12-page store. The fourth is for developer teams, and we describe it from documentation and builders’ accounts.
- A ready-made AI chatbot is enough for most businesses: you give it your website, then add what’s missing.
- Workflow builders also start from your website, and suit you if the bot must follow multi-step procedures you design.
- A RAG pipeline you assemble needs no code, but you connect, fix and update every part yourself.
- Your own stack or model is for developer teams that need full control; fine-tuning changes how a model answers more than what it knows.
- Whatever you pick, check what the bot actually read and how it picks up changed pages before you go live.
Four ways to train a chatbot on your own data, compared
Think of it this way: starting from a simple URL-paste, each following approach adds to what’s required from you to set it up. Below are the four methods and what you need to start with each:
| Method | What you need | Example tools | Starting price (monthly) | Time to a first working answer |
|---|---|---|---|---|
| Ready-made AI chatbot | Your website and documents | Elfsight AI Chatbot, Chatbase, Tidio Lyro | $6 (Elfsight Basic) | About 20 seconds to a preview |
| Workflow builder | The above, plus a clear list of the situations the bot must handle | Botpress, Voiceflow | $60 (Voiceflow Pro) | Under 3 minutes of onboarding steps |
| RAG pipeline you assemble | The above, plus a basic grasp of APIs, AI models and retrieval | n8n, Dify, OpenAI file search | $24 (n8n Cloud Starter) + model use | About an hour for a beginner |
| Your own stack or model | The above, plus developer skills and your own servers or GPUs | LlamaIndex + Pinecone; Hugging Face TRL, Unsloth | About $10–$25 to run a small setup | Weeks of developer time |
Some tools technically sit between two rows. For example, the AI agents built into helpdesks, such as Intercom Fin or Zendesk AI agents, learn from your help center the way a ready-made chatbot learns from your website, and several website chatbots now add step-by-step workflows too.
1. Ready-made AI chatbot: load your content, then fill the gaps
For a small business, this is often the whole job: you paste your website URL, and the tool stores your pages into a database it runs for you. Training it means making sure the right content got in, adding what’s missing, and keeping it up-to-date. No advanced knowledge of AI models is needed, and no developer.
The process below works similarly in any website chatbot or helpdesk AI, only the button names change. We show it in Elfsight AI Chatbot (that’s us), plus describe what we saw while testing six other tools given the same content: a 12-page test store, 10 test questions, one run per tool.
Step 1. Create the chatbot from your sitemap
From a single URL, the chatbot builder drafts a name, role and tone of voice for you to edit, and starts reading your pages (it can take in up to 200). Our initial preview was ready in about 20 seconds.
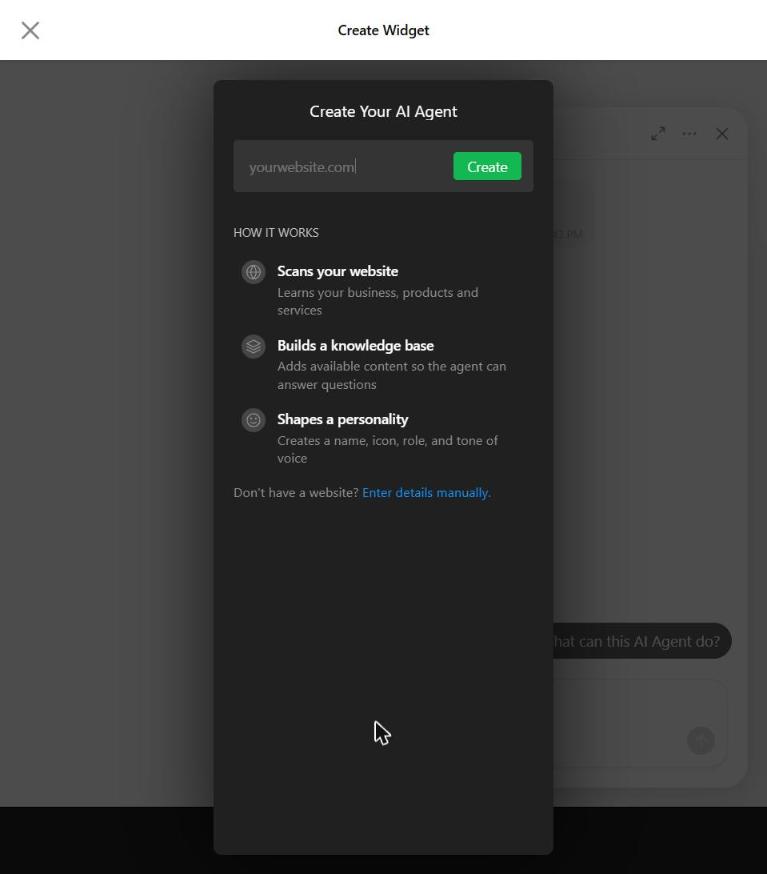
Open Web Pages and use View Content to see what the bot read. Watch for typos: a mistyped URL was accepted without a warning, and the bot learned the 404 page.
Step 2: Ask the questions your customers ask
Ask your most common customer questions, each in a fresh chat, and check every answer against your pages. In our test, a wrong or missing answer almost always meant a page the bot hadn’t synced.
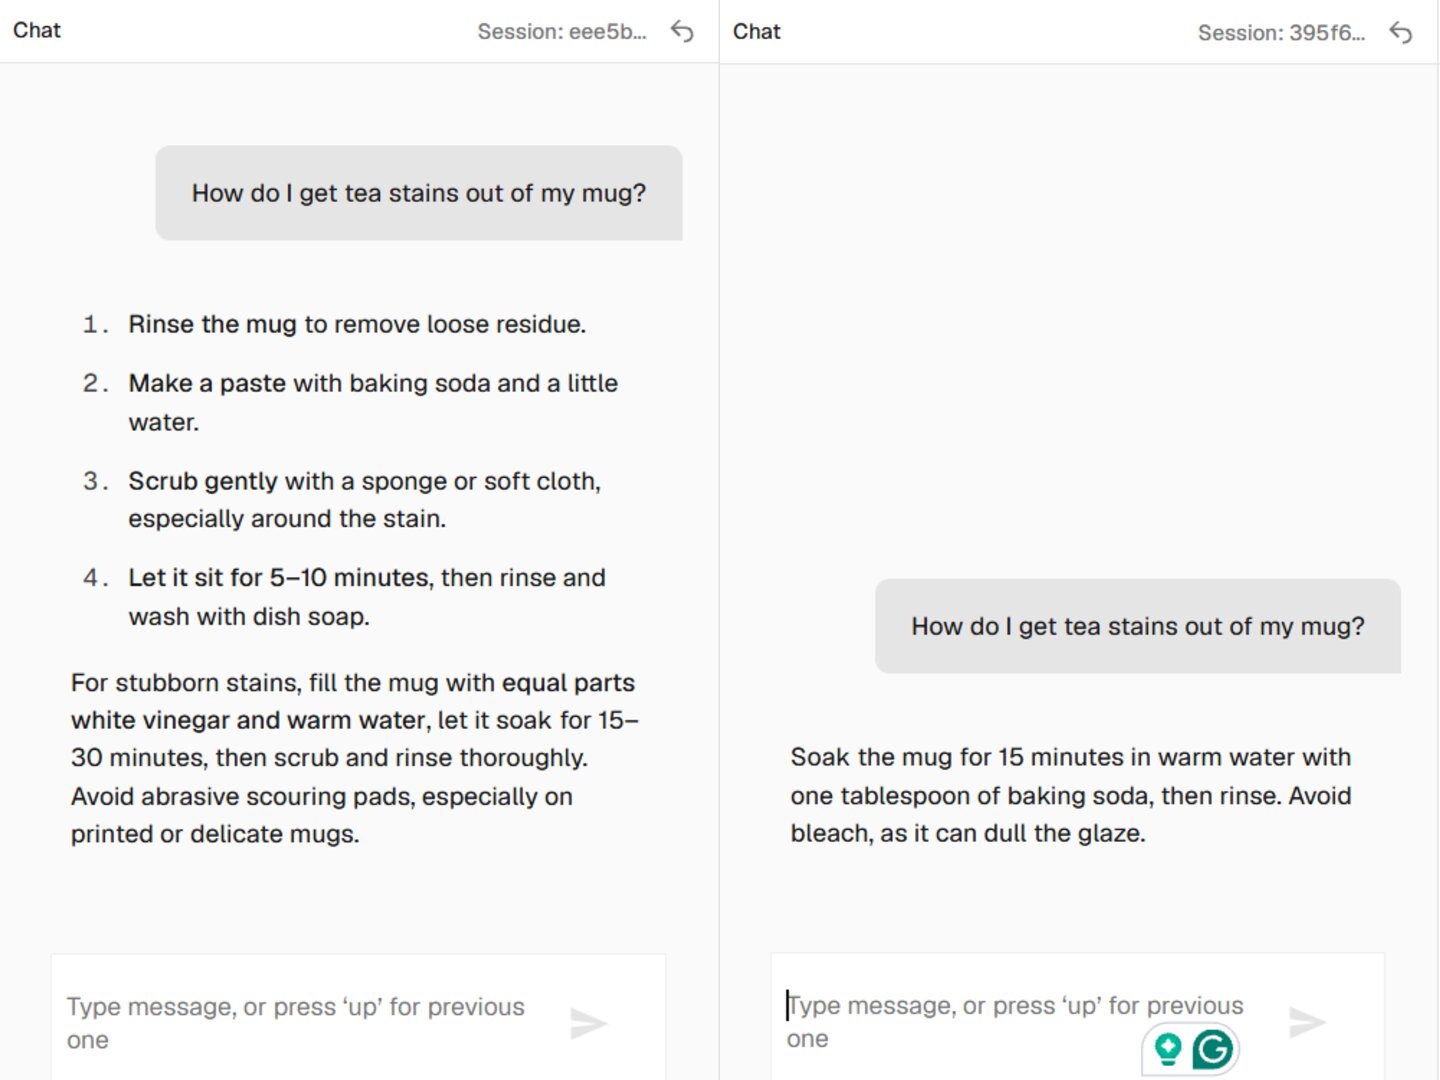
Include questions on topics your content only touches. All seven bots said “I don’t know” when a fact was clearly missing, like whether the store’s glazes were lead-free. But when a topic sounded familiar, a bot could fill the gap with general knowledge: asked about tea stains, ours passed off a generic baking-soda method as the store’s own advice.
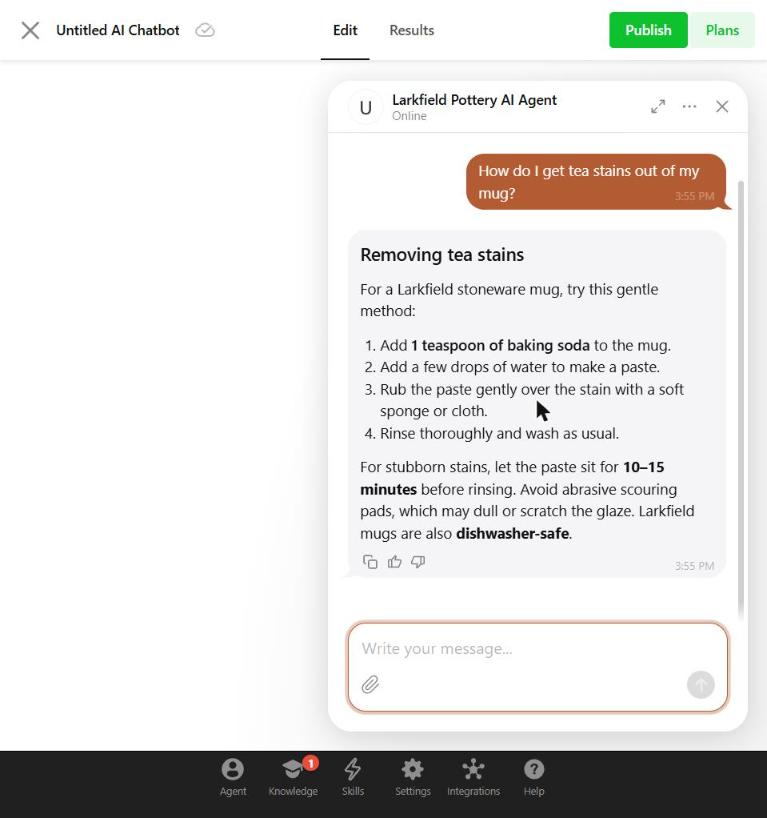
If you have customers who write in other languages, ask in those too. With default settings, Zendesk’s agent replied “I don’t speak your language” to a question in Spanish, and Freddy replied in English (both have language settings you can change).
Step 3. Add what your pages don’t say
Fill each gap with the right kind of content:
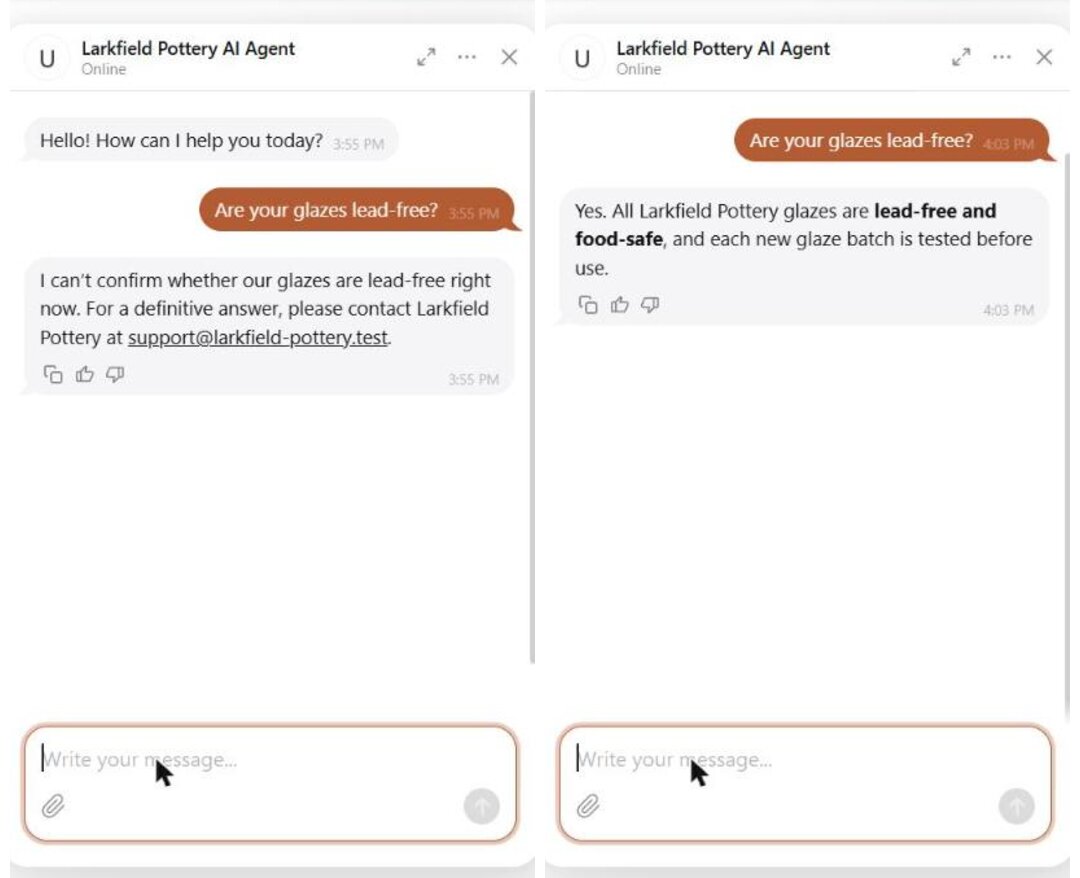
- A Q&A for a one-line fact. “Can’t confirm” on our product-safety question became a direct answer.
- A file for a longer guide. A short care guide replaced the bot’s improvised tea-stain advice.
- A text block for something temporary. It gave the bot the holiday closure dates it didn’t have.
Step 4. Write rules for behavior, not fact-checking
Rules tell the chatbot how to act in a situation: what to ask, what it may promise, when to send the customer to you; keep the facts in the knowledge base.
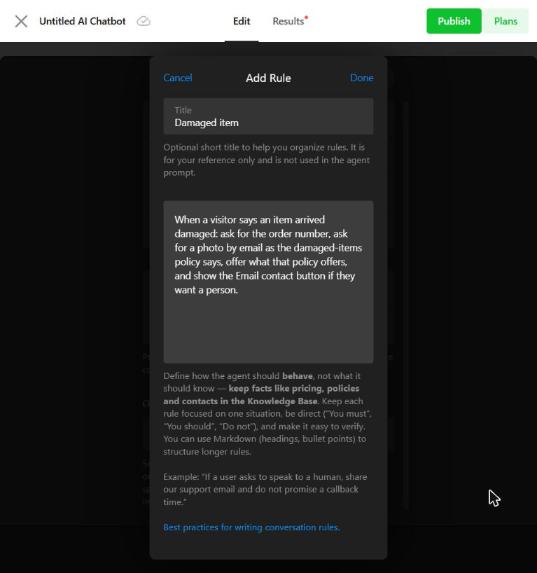
Elfsight chatbot answered a cracked-bowl question correctly from the policy page but didn’t ask for the order number. One Conversation Rule later, it asked for the number first, and still took the facts from the page.
Step 5. Review what the bot couldn’t answer
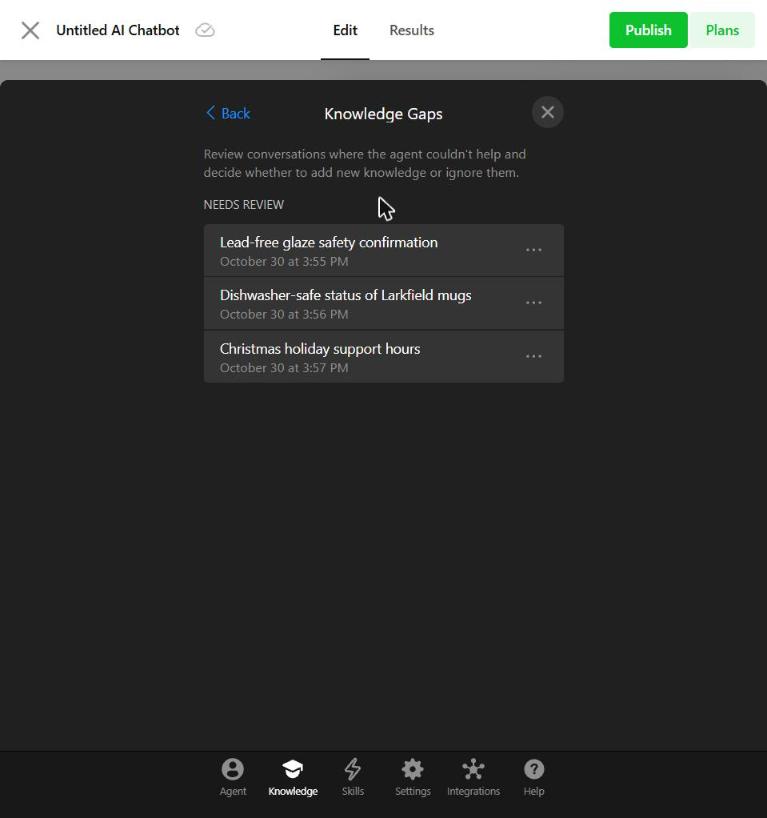
Most tools collect the questions the bot couldn’t answer. In Elfsight it’s Knowledge Gaps: each one shows a summary, the transcript, and three actions (Add Knowledge, Mark as Resolved, Ignore). Our three unanswered questions all appeared there, but treat the list as a starting point, not a verdict:
- Read the transcript, not just the summary. One summary described our tea-stain question as a dishwasher question.
- Close gaps yourself. They don’t close on their own after you add content, and a correct answer after a fix opened a new gap anyway.
- Keep testing. A question the bot answered partly wrong never appeared in the list.
Step 6. Retrain a page after you change it
Training isn’t finished when the bot answers well. When a policy changes on your website, most tools keep answering from the old text until you act. We changed the store’s return window from 30 to 45 days: every tool gave the new number on the first question after its update step, but the step differed.
| Tool | What you do after a change | Automatic update by default |
|---|---|---|
| Elfsight AI Chatbot | Click Retrain on the changed page | None |
| Intercom Fin | Re-sync, one click | Weekly |
| Chatbase | Resync now, two clicks | Weekly, but switched off by default |
| Zendesk AI agents | Sync now, one click | Set to “Never” |
| Tidio Lyro | Re-sync the page; this replaces your edits to its Q&As | None; locked for about 22 hours after the last sync |
| Freddy AI Agent | Resync and relearn the whole source | None; once every 24 hours at most |
| HubSpot’s customer agent | Remove the file and upload the new version | Web pages weekly; files never |
Find this setting on day one, and make the update step part of changing a page on your website.
You can try steps 1 to 3 on your own content right here. Paste your website’s address into the editor below, open the list of pages to see what it read, then ask the question your customers ask most and add what’s missing.
Train your AI chatbot in the live editor ↓
Training the AI agent in your helpdesk
If your team already answers customers in a helpdesk, its AI agent learns mainly from your help center. The steps above still apply, with one difference: your help center articles are the training. Fix an answer by fixing the article, then check how the agent picks up the change.
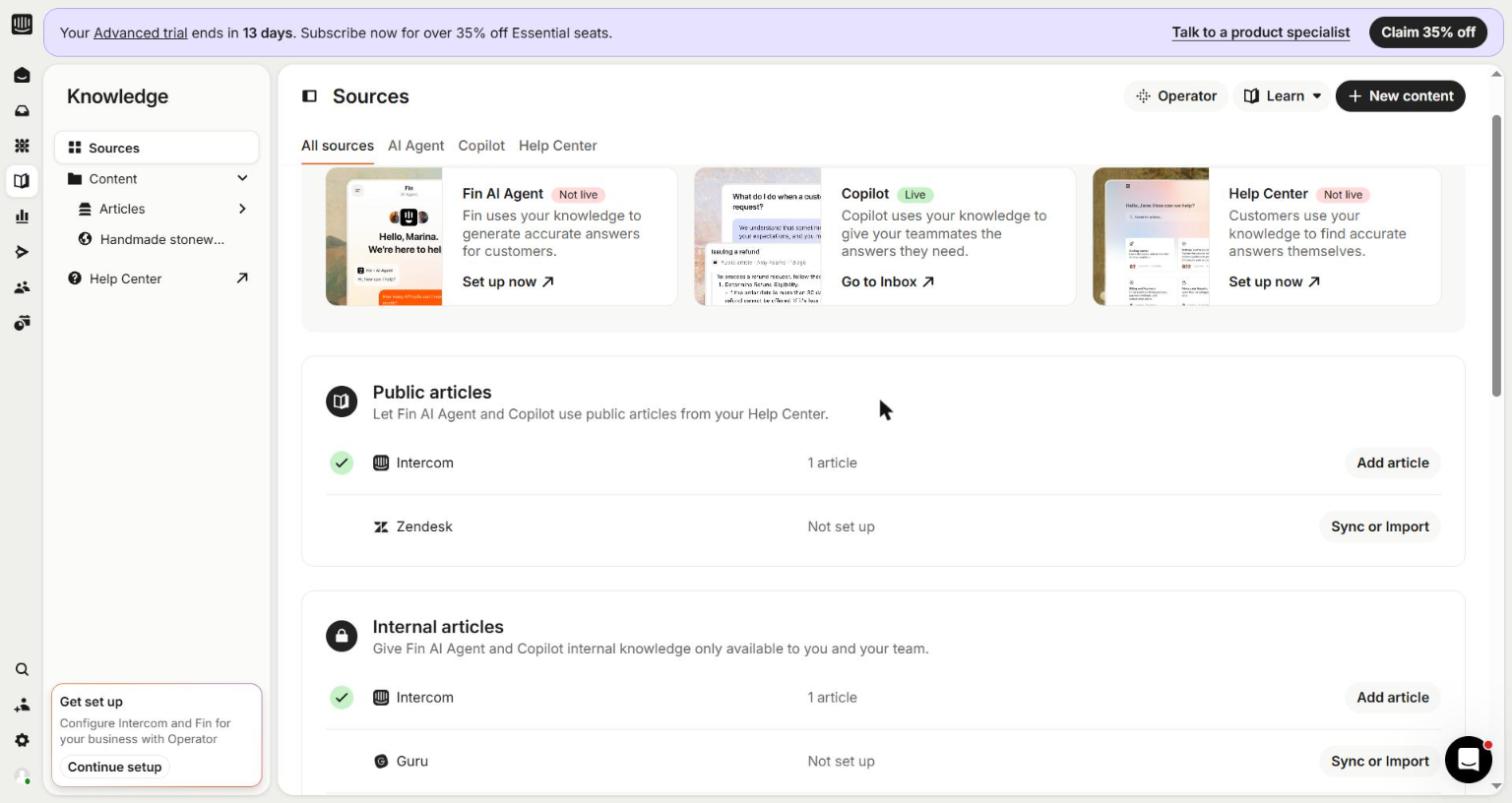
Intercom Fin re-syncs weekly, Zendesk’s web crawler is set to “Never” by default, and Freddy relearns a source at most once a day.
When you’ll outgrow it
A ready-made chatbot is built to answer questions. When the bot must carry out multi-step work, like walking a customer through a refund with checks along the way, you need to design that flow yourself. Some tools now cover part of it: Chatbase includes procedures, Tidio Lyro calls your apps through Actions, and Intercom Fin’s Procedures handle claims like a damaged order. Check yours first.
2. Workflow builder: design how the bot handles each situation
A workflow builder starts the same way: you give it your website and files, and the vendor runs the knowledge base. Training goes further. You decide which situations the bot must handle, and design a playbook for each: the steps to follow, the tools to call, and when to hand over to a person. That takes a clear picture of your support cases, but no code.
We trained Botpress and Voiceflow with the same store’s website and files, on free plans and in preview only. Microsoft Copilot Studio and Google’s Conversational Agents (formerly Dialogflow CX) work the same way, and the steps below apply to them too.
Step 1: Give it your website and files
Enter your website, pick the bot’s job, and upload what the website doesn’t cover, such as a returns FAQ. Then check that the pages you need got in, as in the first approach. In Voiceflow, our broken-item question got only a pointer to the policy while the homepage was the bot’s only page. Once we added the damaged-items page, the answer gave the full steps.
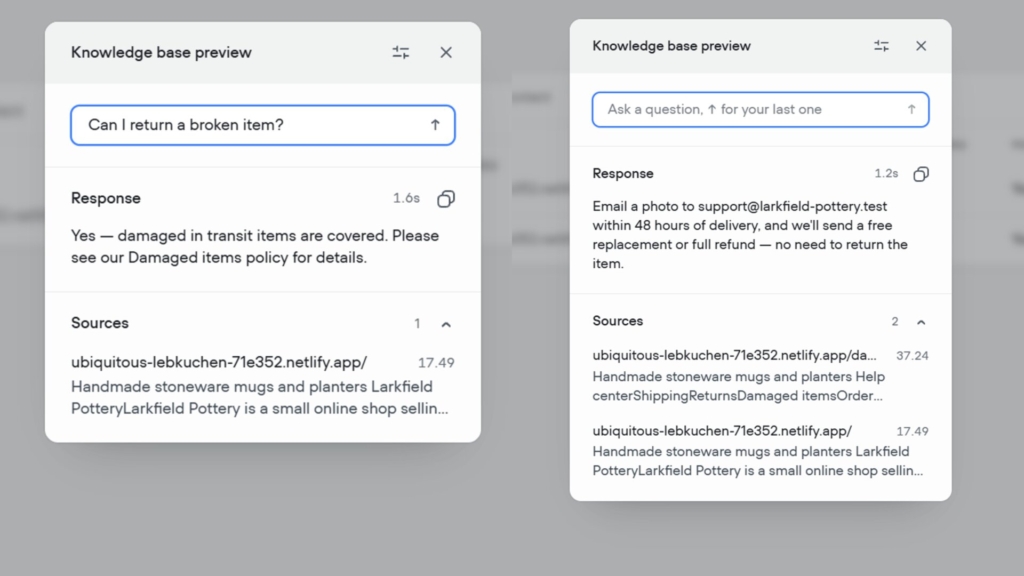
In Copilot Studio, give each knowledge source a detailed name and description: Microsoft’s docs say the description helps the agent decide which source to use.
Step 2: Read what setup wrote about your business
These tools write the bot’s instructions for you from your website: the instructions in Botpress, the global prompt in Voiceflow. Read them before anything else, because that text shapes every answer.
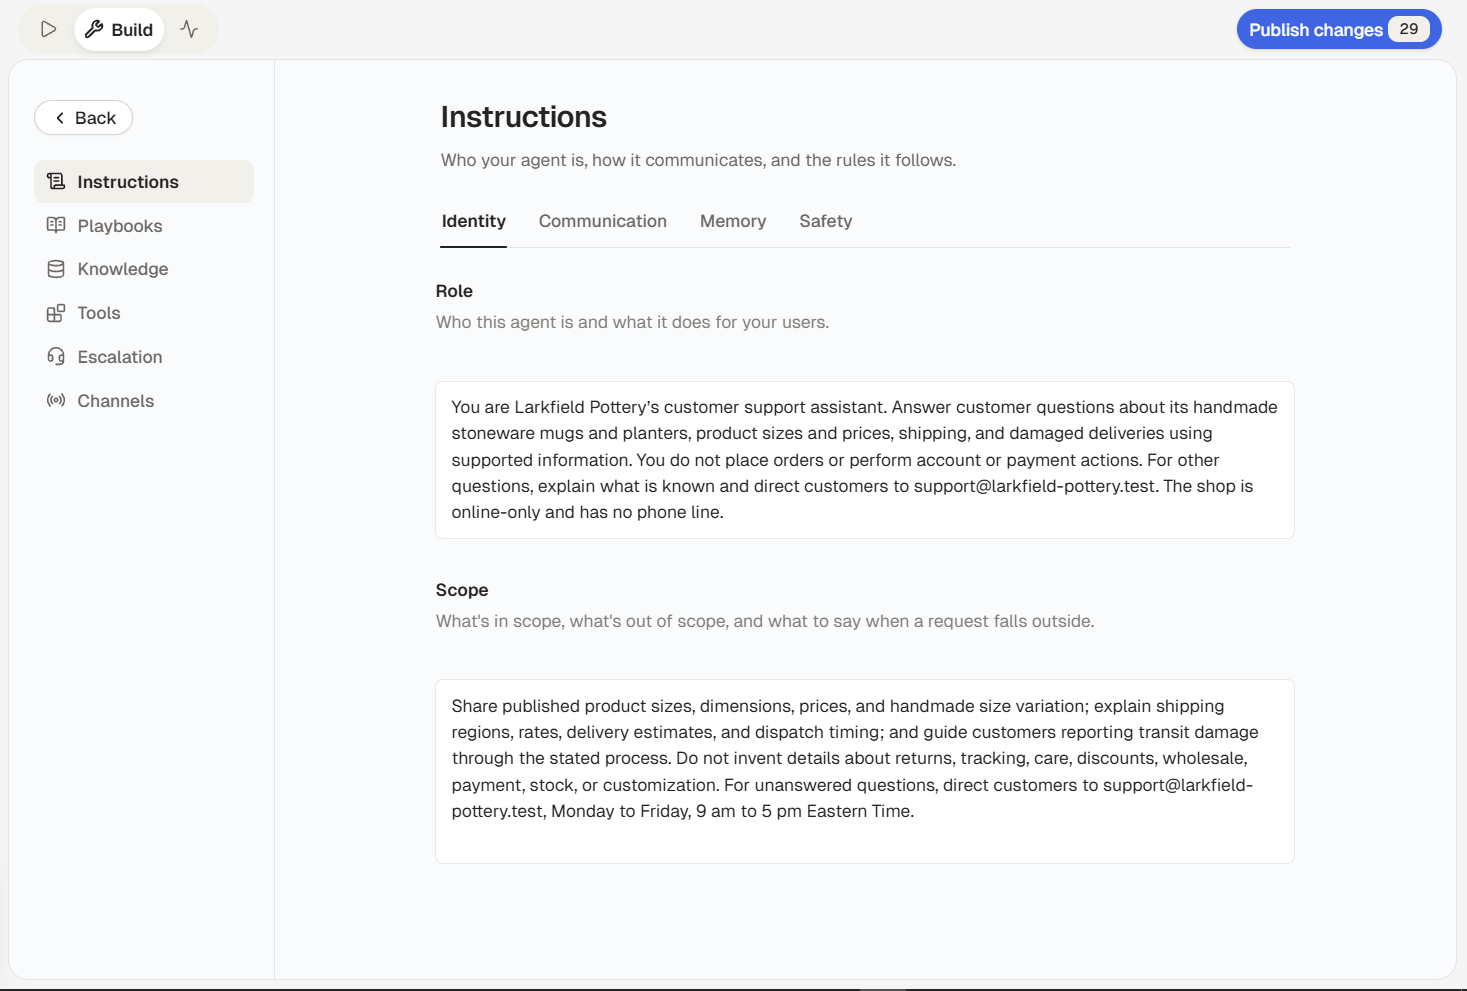
Voiceflow’s assistant asks for your approval at each step, which is your chance to correct it: it named our store after the subdomain in its web address and described the whole business by the size of one mug. Botpress’s auto-filled guardrails, on the other hand, already told the bot not to invent policies, prices or completed actions.
Step 3: Write a playbook for each situation
A playbook is a plain-English brief for one situation, written the way you’d explain a task to a new teammate: what to check, what to ask, what to do, and when to hand over. You can describe it yourself or generate it from your content. Botpress wrote a damaged-delivery playbook from our pages on its own, and answered our broken-item question correctly from it.
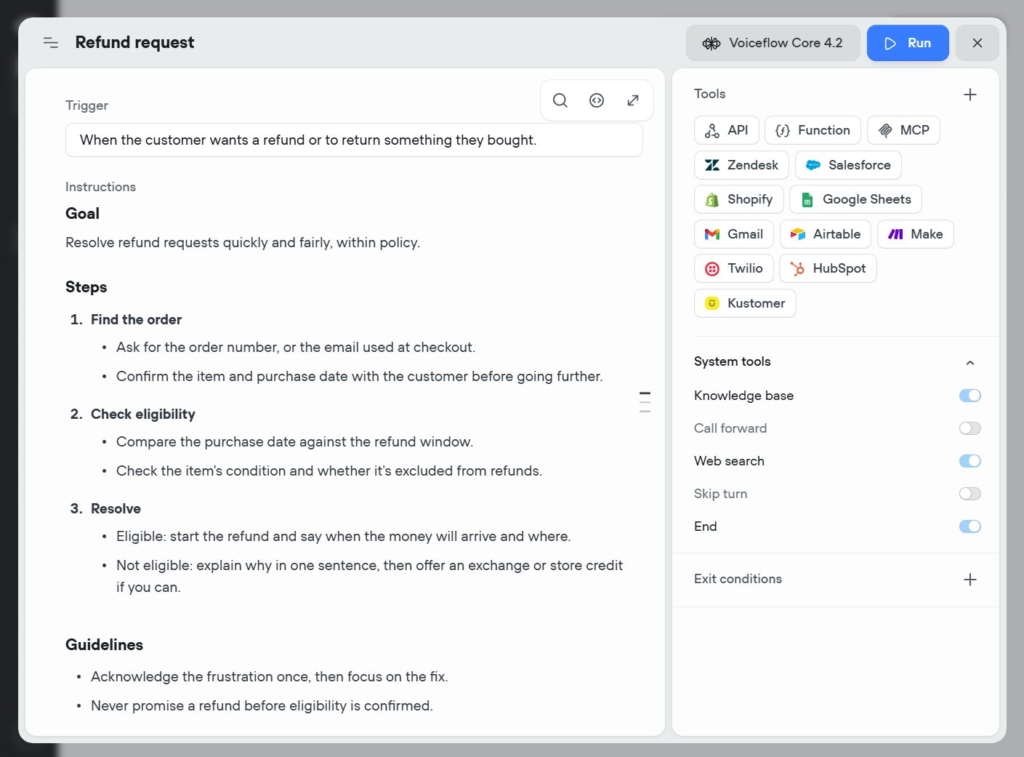
Use fixed steps only where a conversation must follow a script exactly. Botpress’s docs suggest this, and Google’s console offers the same split between generative playbooks and fixed flows. The skills for writing chatbot instructions carry over to playbooks.
Step 4: Connect the tools each playbook needs
A playbook that checks an order or opens a refund needs a connection to the system that holds that data. Connect only what a playbook uses, and decide where the bot hands the conversation to a person.
Step 5: Test every playbook
Run each playbook through the cases it should handle and the ones it shouldn’t. Voiceflow’s test builder runs scripted turns or a simulated customer, with success criteria you set. Google’s console has a simulator for the same job.
What it costs
- Botpress: Free includes 100 conversations in total and $10 of AI usage. Plus costs $189 a month for 250 conversations, and $65 for each extra 100. Our whole training session used $0.06 of the free credit; preview chats didn’t count as conversations.
- Voiceflow: the Free plan is a one-time credit grant, not meant for production. Pro is $60 a month and Business $150.
When to move on
Every playbook needs to stay current as your policies change, and the bill grows with conversations. Move on when the pieces must live inside your own app. be paying for a canvas you leave empty. Move on when the pieces must live inside your own app.
3. RAG pipeline you assemble: connect the parts yourself
RAG (retrieval-augmented generation) is the lookup-then-answer process the first two approaches run for you. Here, you build it from parts: a store for your content, an embedding model that indexes it, a chat model that answers, a chat window, and a way to keep the content current.
You need a working grasp of how these parts fit together, well-structured content, and the patience to troubleshoot when they don’t. Visual tools like n8n and Dify need no code, whereas the API route, such as OpenAI’s file search or Amazon Bedrock Knowledge Bases for teams on AWS, does.
Our n8n build
We used n8n’s RAG Starter template, which has one workflow to upload files and one to answer questions, on an n8n Cloud trial with an OpenAI key, four short files from the same store and seven questions.
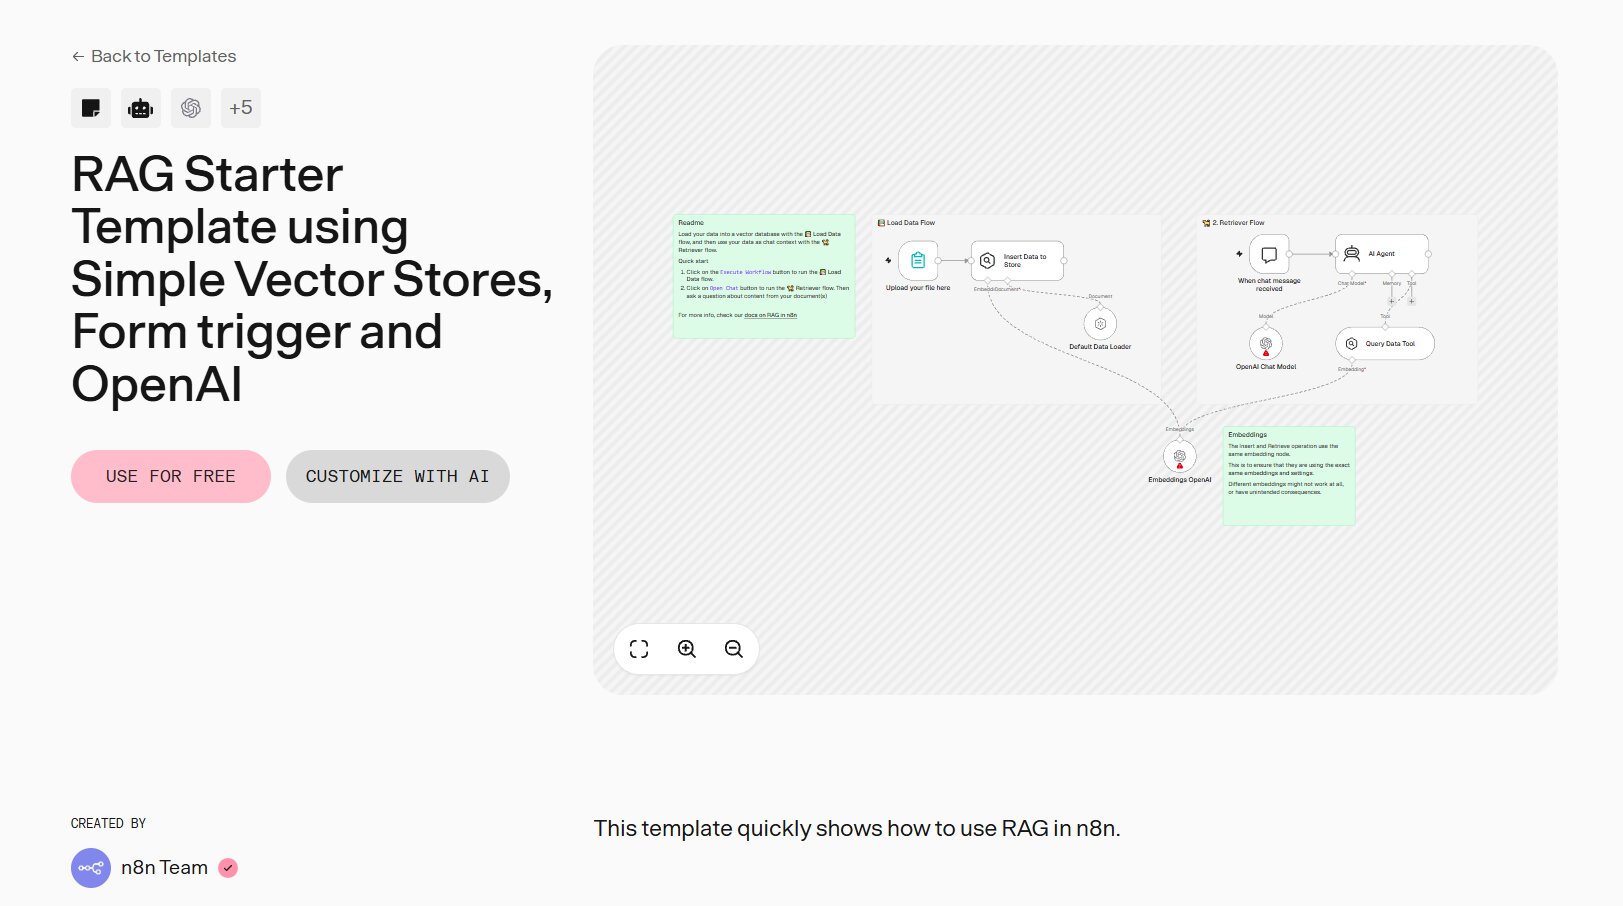
Turning it into a working bot took these steps:
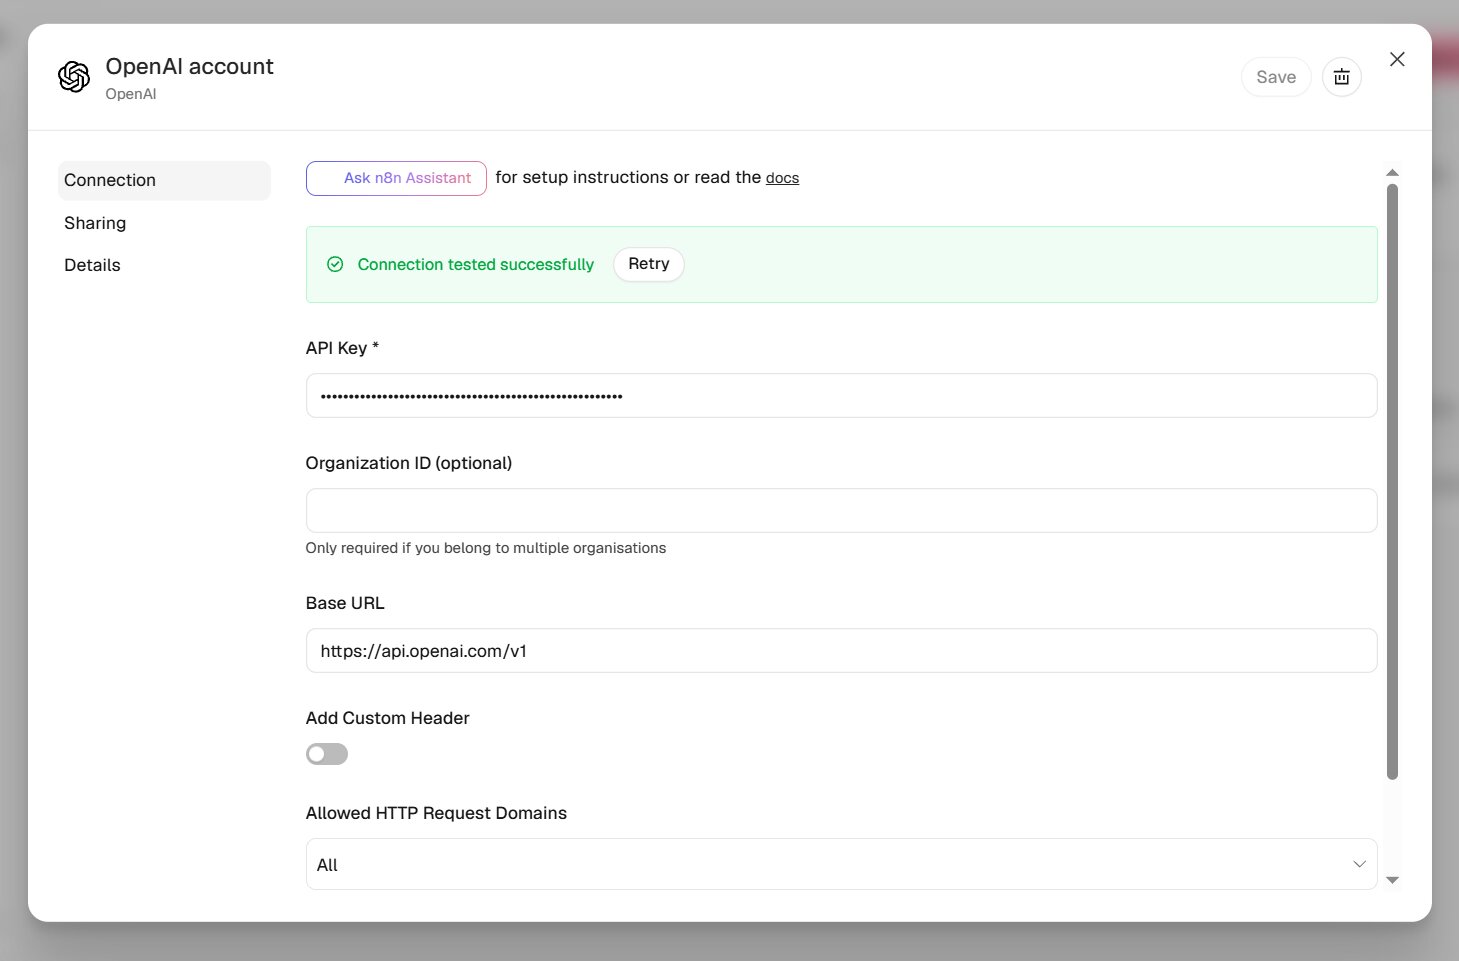
- Import the template and select your OpenAI credential in each model node.
- Pick the chat and embedding models – the template recommends none.
- Give the upload and answer workflows the same memory key, or the chat searches an empty store.
- Upload your files and check the upload step actually ran (in our build, it didn’t at first).
- Add a system message telling the bot to search the files first and to say when it doesn’t know.
- Ask real customer questions, starting a fresh chat for each.
It took around 60 minutes and 8 fixes to the first correct answer, and no code. One fix meant decoding an error message from the model’s API. As imported, the bot never searched the files and made up its first answer until the system message fixed it.
Keeping it current
Updates were the weak spot. When we changed a file, both the old and the new version stayed in the store, and the bot gave the new answer only after we re-ran the upload by hand. The template’s store also lives in memory, which n8n marks “for experimental use only”: it’s lost if n8n restarts.
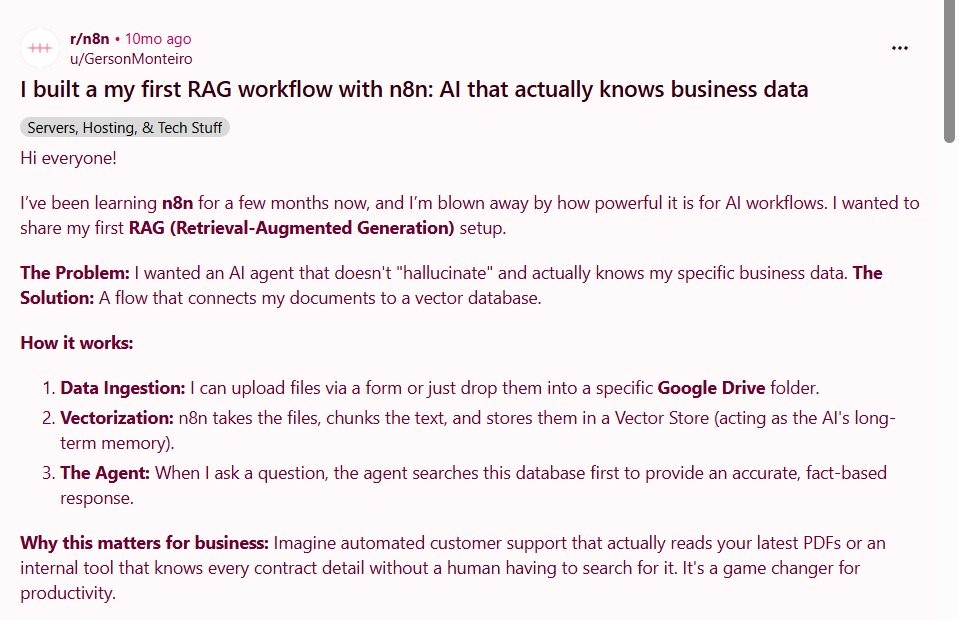
Builders on Reddit describe the same work: one who builds RAG systems says most of it is data hygiene, and another needed separate workflows just to push changed records into the store.
What it costs
- n8n: Cloud Starter costs $24 a month. The self-hosted Community Edition is free.
- Our test day: $0.0035 in model fees, with four short files.
- A real website, our estimate: about $0.52 per 1,000 answers on GPT-6 Luna, $1.10 on GPT-5.6 Luna and $5.20 on GPT-6.1 Terra. This assumes about 3,700 input and 300 output tokens per answer, more than our test used, because a real website’s pages are longer, so more text is looked up per answer.
- OpenAI’s file search, if you take the API route: $2.50 per 1,000 searches, plus storage.
- Indexing a 200-page website: under a cent, at about 1,000 tokens a page, by our estimate.
The model bill stays small. The real cost is your time: building a chat window for your website, a handoff to a person and an update routine all come on top of our build, and the work continues at every content change.
When to move on
This route strains on updates, on a store that forgets everything on restart, and on every part you build yourself. Move on when you need a permanent store, your own hosting, or a change to the model itself.
4. Your own stack or model: run every part yourself
Everything the RAG pipeline asks, plus developer skills and your own infrastructure. Nobody hands you a working sandbox: you pick the components, host them, and keep them running. This approach splits into two different jobs. Running your own RAG stack still uses your ordinary content, like your website and documents. Fine-tuning changes the model itself, and needs a training dataset built for that purpose plus GPU hardware.
Your own RAG stack
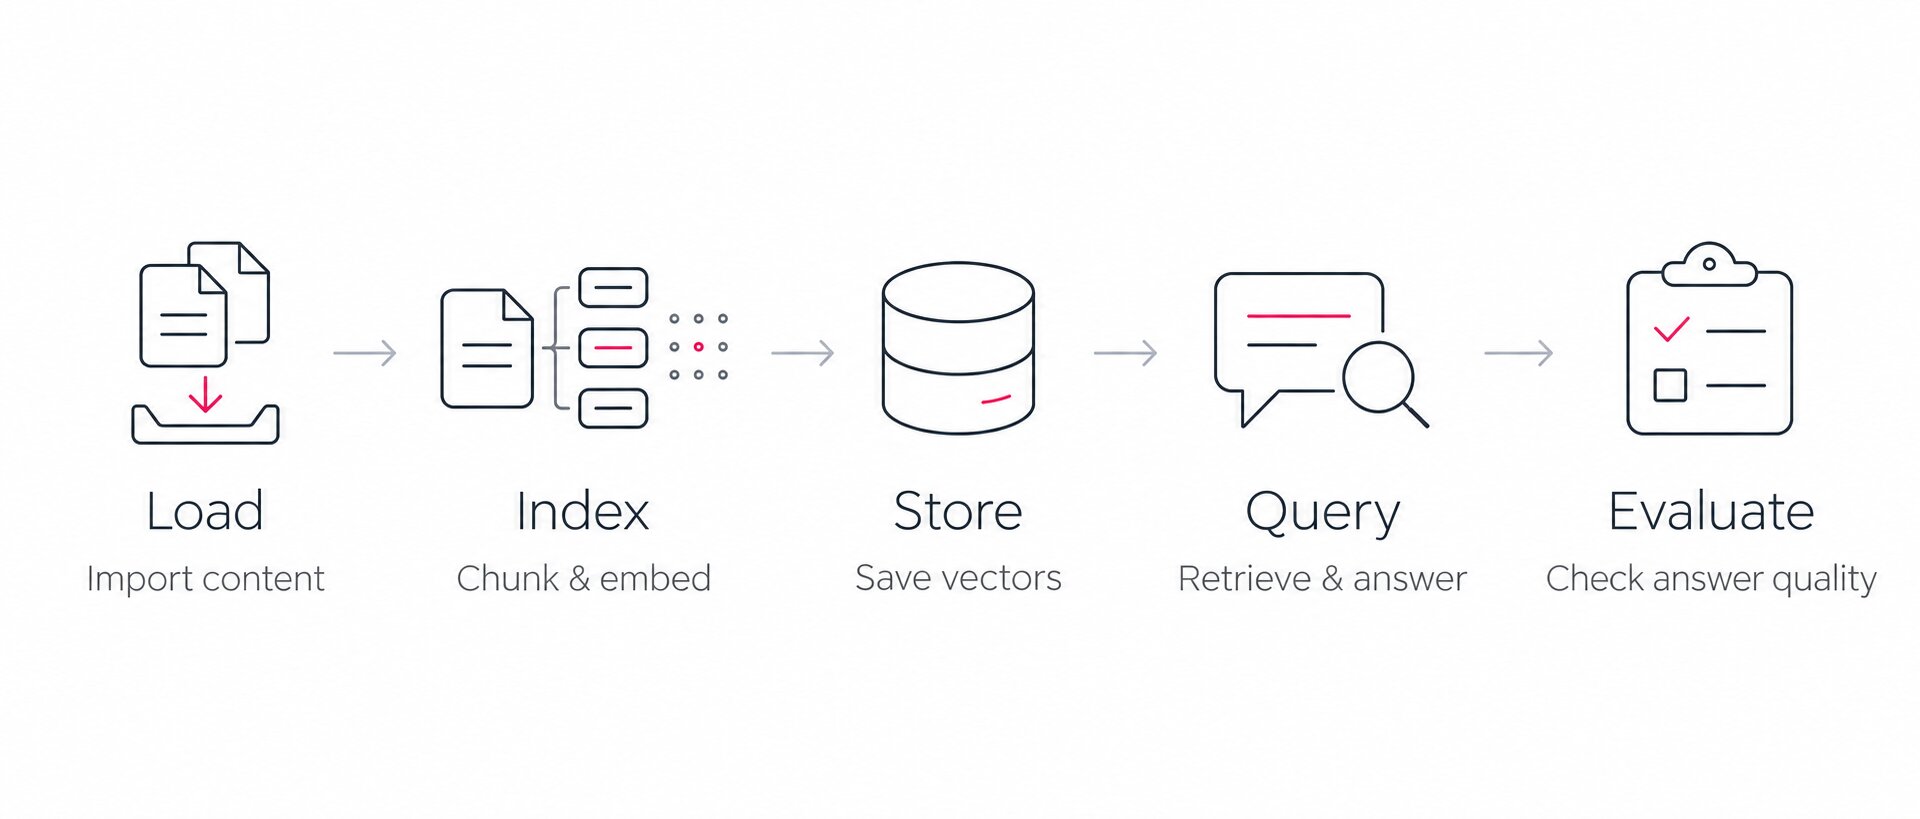
A framework such as LlamaIndex splits the job into five stages: load your data, index it, store the index, query it, and evaluate the answers. You choose and run each part. The database for your content can start free: Pinecone’s Starter plan includes 2 GB of storage. On cost, forum users report keeping their setup under $25 a month at about a million queries, but that’s one person’s setup, not a benchmark.
This makes sense when your data must stay on your own servers, or when you need control the hosted approaches don’t give you.
Fine-tuning an open model
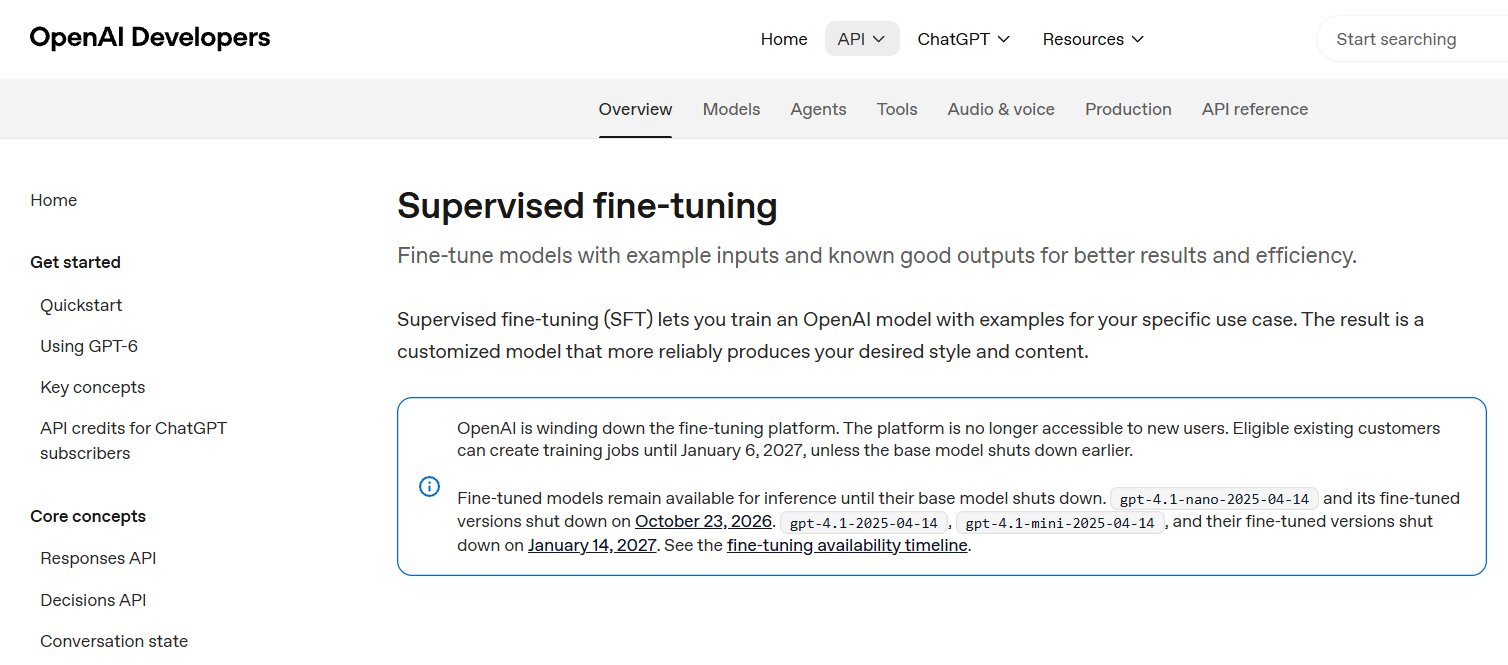
OpenAI is winding down self-serve fine-tuning, so fine-tuning now means an open model you train yourself.
Whether fine-tuning can teach a model new facts is disputed. OpenAI treats knowledge a model lacks as a retrieval job and uses fine-tuning for consistent behavior. Unsloth, which makes a fine-tuning tool, says fine-tuning can add knowledge too.
For a business bot, the practical line is: fine-tune for how it answers, and keep the facts in retrieval. Even where fine-tuning adds knowledge, a changed policy means another training run, while a retrieval bot needs one updated document.
Fine-tuning takes three things:
- A dataset, usually question-and-answer pairs. A support bot’s comes from your own tickets and docs; people-focused bots, like HR or recruiting assistants, can start from bought datasets, such as the employee data Coresignal sells for AI training among other uses.
- A training tool, such as Hugging Face’s TRL or Unsloth Studio, which needs no code. Unsloth’s LoRA method trains about 1% of the model’s weights.
- Hardware: small models run free on Colab, or on a GPU with as little as 3 GB of memory, per Unsloth. For bigger runs, Cherry Servers lists an NVIDIA A100 80 GB server from $2.362 an hour.
Who should consider it
Developer teams that need full control over where data lives, or a model that answers in a set format no instruction can hold. There’s no reliable public figure for a whole project’s cost or time; the bill is built from unit prices for the database, GPU hours and people. Lemon.io’s guide to types of AI engineers lists integrators, who build RAG on existing models, at $90–$180 an hour, and machine learning engineers, who train models, at $120–$250+.
How to pick the right way to train your chatbot
Find the row that describes you:
| If this is you | Start here | Move up when |
|---|---|---|
| You answer customers yourself, with no helpdesk | Ready-made AI chatbot: Elfsight AI Chatbot, Chatbase, Tidio Lyro | The bot must run multi-step tasks in other systems |
| Your team already works in a helpdesk | Its own AI agent: Intercom Fin, Zendesk AI agents, Freddy AI Agent, HubSpot’s customer agent | The bot must run multi-step tasks its procedures can’t cover |
| You know which situations the bot must handle, step by step | Workflow builder: Botpress, Voiceflow | The pieces must live in your own app or stack |
| You have someone technical and want to own each part | RAG pipeline you assemble: n8n, Dify, OpenAI file search | You need a permanent store, your own hosting or a model change |
| Your data must stay on your servers, or answers must follow a set format | Your own stack or model | — |
You move up because of what the bot has to do, not how many pages it reads: more content rarely needs a bigger setup, more behavior might. Whichever approach you choose, the same checks come before launch: read what setup wrote and which pages got in, ask your customers’ real questions in new chats, and find the refresh setting. In our tests, those checks caught a typo that trained a 404 page, a misread business description, and content syncs that ran weekly or never.
Frequently asked questions
Can I train ChatGPT with my own data?
How much content do I need to train a chatbot?
Does a chatbot learn from its conversations on its own?
Do I need to fine-tune a model to get my brand's tone of voice?
How do I test a chatbot before it goes live?
Where to start training your chatbot
On every approach we tried, a wrong or missing answer came down to a fact the bot didn’t have or an instruction it hadn’t been given. To train your own AI chatbot, start small: list the questions customers ask most, paste your website into a ready-made chatbot’s free plan, ask each question in a new chat, and add content for every miss.
Once it answers those questions well, it’s ready for real customers: our step-by-step tutorial shows how to add the AI chatbot to your website.
Key references
- Optimizing LLMs for accuracy, OpenAI