Making your website WCAG compliant isn’t just a legal or ethical necessity — it’s a smart way to create a better experience for all your visitors. The Web Content Accessibility Guidelines (WCAG) define the international standards for ensuring accessibility across all types of digital content.
If you’re wondering “is my website WCAG compliant?” or unsure where to start, an accessibility widget can provide a fast, effective, and user-friendly solution to help meet those standards. With just a few clicks, you can improve usability and reduce the risk of accessibility violations.
- Improves accessibility for all users. The widget enables customizable features like text resizing, contrast toggles, and screen reader support, making content easier to consume for people with various disabilities.
- Helps you meet WCAG and ADA requirements. By integrating key compliance functionalities, the widget brings your website closer to meeting recognized accessibility standards and regulations.
- Enhances user experience and engagement. A more inclusive interface increases usability for everyone — not just users with impairments — resulting in longer visits and better conversion potential.
- Reduces legal and reputational risks. Demonstrating proactive accessibility support lowers your exposure to accessibility-related complaints and lawsuits.
- Easy to install and manage. Unlike custom development, a widget requires no coding expertise, making it ideal for business owners or marketers looking for a plug-and-play solution.
Installing an accessibility widget is a simple yet powerful upgrade that enhances your website’s inclusivity, user experience, and long-term compliance. In the next section, we’ll show you how to quickly set up the Elfsight accessibility widget and start improving your website’s compliance in minutes.
Make Website WCAG Compliant: Quick Solution
Now that you understand the value of making your website accessible, let’s take a quick look at how you can start the process using Elfsight’s accessibility widget. It’s fast, intuitive, and doesn’t require any coding.
- Open the Elfsight editor, select a widget layout and start customizing by clicking “Continue with this template”.
- Enter your website URL in the “Check” section and run a scan to identify WCAG issues.
- Configure widget position, visibility, session duration, and custom code in the “Settings” tab.
- Click “Add to website for free”, copy the embed code, and paste it into your website’s backend.
This streamlined process gives you immediate access to powerful digital accessibility practices, helping you follow your website accessibility checklist without technical effort.
See how easy it is – build your accessibility widget in minutes!
Top Features of the Elfsight Widget
Elfsight’s accessibility widget is designed to help you achieve a WCAG compliant website quickly and effectively. This solution combines ease of use with powerful functionality, allowing any business to improve usability for all visitors.
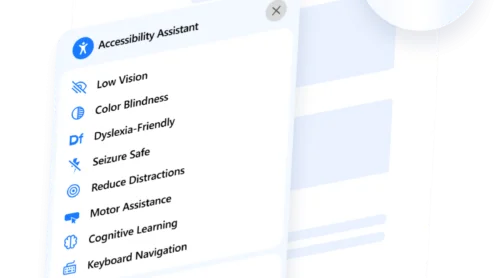
- Preset accessibility profiles. Offer ready-to-use modes for visual impairments, ADHD, cognitive disabilities, and more — activated in one click.
- Flexible content scaling and contrast control. Visitors can adjust font size, spacing, and contrast to create a more readable, user-friendly environment.
- Keyboard navigation support. Ensures full website navigation without a mouse, essential for users relying on keyboard controls.
- Readable fonts and highlight links options. Simplify font styles and improve visibility of clickable elements to enhance clarity and interaction.
- Adjustable color schemes and text alignment. Personalize how content appears, making it more accessible to users with different visual processing needs.
- Customizable interface design. Match widget colors, positioning, and button styles to blend perfectly with your website’s branding.
- Multilingual interface and localization. Automatically detects language preferences or lets you set up custom translations for global audiences.
These features not only support inclusive navigation tips and visual impairment-friendly design — they also give you full control over accessibility improvements without writing a single line of code. Next, we’ll walk you through the full process of creating and embedding the widget on your website.
Full Guide to WCAG Compliance Widget Setup
To help you make a website WCAG compliant, Elfsight provides a step-by-step editor that makes it easy to build, configure, and publish your accessibility widget in minutes. Below is a detailed walkthrough based on the platform’s interface.
- Choose a Template. Start by opening the Elfsight editor and selecting the “Accessibility Template”. Click “Continue with this template” to begin customizing.
- Run an Accessibility Check. In the “Check” section, enter your website URL and click “Check”. The tool scans your website using Google Lighthouse to identify WCAG compliance issues.
- Adjust General Settings. Go to the “Settings” tab to configure display options like widget position, visibility across pages and devices, visitor session duration, and custom code options (CSS and JS).
- Embed the Code on Your Website. Click “Add to website for free”, copy the provided embed code, and paste it into your website’s HTML editor or admin panel. Choose your platform from the list if you need specific guidance.
This setup gives you everything you need to improve screen reader compatibility and promote inclusive design with zero technical complexity.
Now that you’ve seen how straightforward it is to build and launch the widget, let’s explore other methods you can use to improve your website’s accessibility and stay WCAG compliant.
Other Ways to Make Your Website Compliant
If you’re aiming for maximum control and flexibility, manual implementation of WCAG standards using semantic HTML and ARIA attributes is a powerful alternative to widget-based solutions. This approach is commonly used by experienced developers working on custom-coded websites or when fine-tuned accessibility features are required across specific interface components.
Unlike automated compliance tools, manual implementation allows you to embed accessibility directly into your website’s structure. This ensures that accessibility support is deeply integrated and highly adaptable to the unique needs of your layout and content. However, it also requires a strong understanding of web development, as well as ongoing testing and compliance validation.
Manual Implementation Using HTML and ARIA Attributes
Here’s a detailed step-by-step guide to manually applying WCAG-compliant features using standard HTML5 semantics and ARIA (Accessible Rich Internet Applications) attributes:
- Use semantic HTML structure from the beginning. Divide your webpage content using semantic tags like <header> for introductory content, <nav> for main navigation, <main> for core content, <section> for grouped topics, and <footer> for closing information. This helps screen readers understand the page layout more efficiently.
- Apply ARIA roles and landmarks to dynamic elements. Use attributes such as role=”button” for clickable <div> elements, aria-hidden=”true” to hide decorative elements from assistive technology, and aria-live=”polite” for live updates. These roles improve comprehension for screen reader users.
- Label interactive elements clearly. Use aria-label, aria-labelledby, or aria-describedby on buttons, form inputs, and links to provide context. For example, a close icon should be marked with aria-label=”Close menu” so users understand its function even without visual cues.
- Set up logical keyboard navigation using tabindex. Assign tabindex=”0″ to make custom elements focusable and tabindex=”-1″ to skip elements from tab order. Ensure the tabbing sequence follows a natural reading flow from top to bottom and left to right.
- Maintain sufficient color contrast. Use high-contrast text and background colors that meet or exceed WCAG Level AA requirements (minimum 4.5:1 for normal text, 3:1 for large text). Run your color scheme through a contrast checker before publishing updates.
- Enable accessible forms and inputs. Use <label> elements connected with for attributes to associate labels with form fields. Add aria-required=”true” or native required attributes to guide users during input.
- Test the result with assistive tools. Install a screen reader such as NVDA (for Windows) or VoiceOver (for macOS). Navigate through your website using keyboard-only controls and listen to how each element is announced. Identify confusing or unlabeled areas and iterate as needed.
By following these steps, you can build a highly accessible, standards-compliant website interface from the ground up without relying on third-party tools or scripts.
Comparison of Accessibility Solutions
Here’s a detailed comparison between using the Elfsight accessibility widget and implementing accessibility manually via HTML and ARIA.
| Method | Pros | Cons |
|---|---|---|
| Elfsight Accessibility Widget | Offers full WCAG coverage with no coding required and installs in minutes. | Customization may be limited to predefined layout and appearance settings. |
| Manual HTML & ARIA Implementation | Allows fine-grained control over every accessible component on the website. | Requires advanced development skills and ongoing audits to maintain compliance. |
For most website owners, using a powerful and ready-to-use solution like the Elfsight Accessibility Widget is the fastest and most effective way to achieve and maintain compliance without technical complexity.
With both options in mind, it’s time to look at best practices and expert tips for maximizing the effectiveness of your chosen method and ensuring long-term accessibility.
Smart Tips for Better Accessibility
To get the most value from your accessibility widget and ensure a smooth integration, it’s important to follow several practical tips. These recommendations apply to any widget, no matter the platform or provider, and can help you maintain inclusive, effective functionality across your entire website.
- Embed the widget in a consistent, visible location. Place the widget button in a fixed position—typically bottom left or right — so it’s easily discoverable without obstructing other content. Avoid positioning it where pop-ups or sticky elements appear.
- Set up visibility rules for device types. Configure the widget to work equally well on both desktop and mobile versions of your website. Not all features scale automatically, so verify alignment and responsiveness during setup.
- Test with screen readers and keyboard navigation. After embedding the widget, navigate your website using only a keyboard and a screen reader. Ensure all widget features are accessible without a mouse and properly announced by assistive technologies.
- Don’t block essential content layers. Make sure that when activated, the widget’s menu doesn’t cover critical website elements like calls-to-action, menus, or chat buttons. Adjust size and placement if needed.
- Regularly review usage data or feedback. Many widgets include stats or feedback modules. Monitor these to see which accessibility profiles are used most and adjust your settings accordingly to better serve your audience.
- Keep styling aligned with your brand but prioritize clarity. While customization is useful for maintaining brand identity, avoid styles that reduce readability or contrast. Stick to high-contrast colors and legible fonts.
Following these tips will help you maintain a balance between design and usability — ensuring your accessibility widget genuinely supports inclusive navigation. Up next, let’s see where these tools work best and who benefits from them most.
Advantages of a WCAG Compliant Website: Use Cases
Accessibility widgets are not limited to a single niche. They provide universal value across industries where user inclusivity, compliance, and experience are mission-critical. Below are key sectors that benefit significantly from integrating accessibility features on their websites.
Application in eCommerce and Retail 🛒
Online stores handle diverse audiences, including people with temporary or permanent disabilities. Accessibility widgets help retailers ensure that product descriptions, navigation, and checkout flows are readable and easy to use for everyone. Key features like keyboard navigation, font scaling, and high-contrast modes make it easier for customers with visual impairments to complete purchases without assistance.
Application in Education and Online Learning 🎓
Educational platforms are legally and ethically obligated to support students with diverse learning needs. Accessibility widgets help by allowing students to adjust text size, use dyslexia-friendly fonts, and navigate content using screen readers. These features reduce barriers to learning and create an equal opportunity environment for all learners.
Application in Healthcare and Medical Services 🏥
Medical websites must be accessible to patients of all abilities, especially those searching for time-sensitive information. An accessibility widget ensures critical details like contact forms, appointment booking, and treatment information can be accessed by people with low vision or cognitive impairments. It also supports screen readers and voice navigation for those who rely on assistive technologies.
As you can see, the accessibility widget plays a vital role in improving user experience for all visitors, regardless of industry. Next, we’ll address potential issues you might encounter during setup — and how to resolve them quickly.
Fixing Common Issues
Even though accessibility widgets are built to simplify compliance, there are still technical and functional nuances that users should be aware of. Below are common questions and difficulties that may arise during or after implementation — along with solutions to help you troubleshoot them effectively.
Why doesn’t the widget appear on my website after embedding the code?
Why aren’t some of the widget’s features working correctly?
Is one widget enough to guarantee full WCAG compliance?
How do I know if my website is WCAG compliant after setup?
Understanding these technical aspects can help you avoid common implementation errors and maintain a smooth user experience across devices. In the final section, we’ll summarize key takeaways and your next steps toward full WCAG compliance.
Conclusion
Ensuring your website meets WCAG accessibility standards is no longer optional — it’s essential for providing equal access, improving user experience, and minimizing legal risk. Whether you choose a manual implementation or a ready-made solution, applying digital accessibility practices is a critical part of modern web development.
Using a tool like the Elfsight accessibility widget makes the process faster, more consistent, and easier to manage without coding skills. From preset accessibility profiles to mobile-friendly settings, it’s a practical way to align with current accessibility standards for websites while keeping your workflow efficient and focused.
Need More Help?
We hope this guide has given you clarity and direction on how to make a website WCAG compliant. If you need further assistance, reach out — we’re here to help you build a more accessible, user-friendly experience. Elfsight is committed to providing flexible, no-code widget solutions that work for any type of business.
Want to connect with like-minded creators? Join our growing Community to exchange ideas and feedback. Have a feature request? Add your thoughts to our Wishlist — we’re always listening.