Knowing how to make a website compliant with the Americans with Disabilities Act (ADA) is essential for businesses that want to provide an inclusive experience for all users and avoid legal complications. ADA compliance ensures that your content is accessible to people with disabilities by following established accessibility standards for websites.
Here are the reasons why your website needs to be ADA compliant:
- Automatic accessibility enhancements. The widget brings your website closer to Web Content Accessibility Guidelines WCAG and ADA standards by adjusting key interface and usability elements in real time.
- No development effort needed. You don’t need coding skills or external help to implement it — setup takes minutes and works on any platform.
- Visually and functionally flexible. Customize the widget to match your design while maintaining full accessibility features for all users.
- Reduced legal exposure. Meet compliance expectations and avoid lawsuits by actively improving your website’s accessibility profile.
- Better experience for every visitor. Accessible websites are easier to navigate, understand, and engage with — improving satisfaction and conversions for all users.
Now that you understand the compelling reasons for ensuring ADA compliance, it’s time to shift focus from why to how. Let’s walk through a simple way to add a compliance assistant to your website using Elfsight’s accessibility solution.
Add ADA Compliance to Your Website Quickly
Now that you know why accessibility matters, the next step is taking action. If you’ve been wondering how to make your website ADA compliant without technical hassle, Elfsight offers a fast and beginner-friendly way to do it using an accessibility widget.
Here’s how to create your own compliance assistant in just a few steps:
- Open the Elfsight editor and choose the ADA Compliance widget template.
- Adjust settings like contrast toggles, font resizing, and text spacing to meet your accessibility goals.
- Customize design elements such as button styles, placement, and language to match your branding.
- Click “Add to website for free“, copy the integration code, and paste it into your website’s backend.
See how easy it is – build your own accessibility widget now!
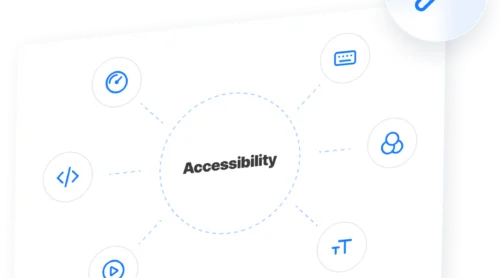
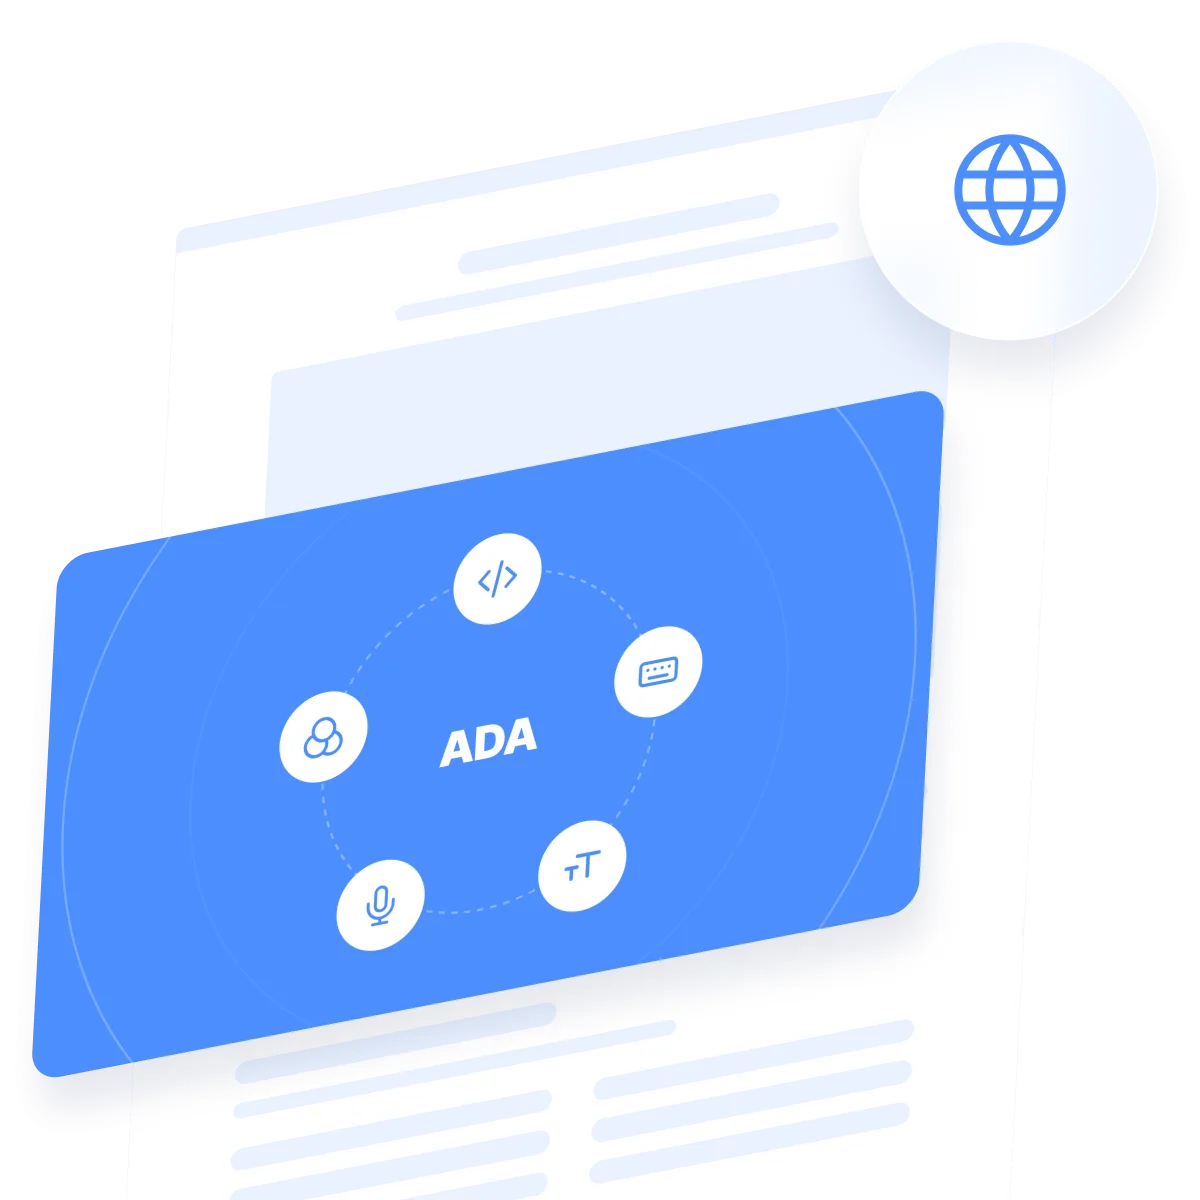
Features of the Elfsight Accessibility Solution
Once you’ve set up the widget, it’s time to explore why Elfsight is one of the most effective tools to make your website ADA compliant. It’s packed with essential features designed to improve accessibility and help you meet compliance standards effortlessly.
Here are the standout features and benefits that make this accessibility widget a powerful choice:
- Text size and spacing control. Visitors can easily adjust font size, line height, and letter spacing for a more comfortable reading experience.
- Color and contrast adjustments. The widget offers high contrast, dark mode, and light mode settings to support users with visual impairments.
- Keyboard navigation support. Enables full navigation using a keyboard, improving usability for people who can’t use a mouse.
- Highlight links and headings. Helps users visually identify clickable elements and section titles for easier navigation.
- Image alt text toggles. Provides an option to show or hide image descriptions for screen reader compatibility.
- Multilingual support. Automatically detects and adjusts language for users worldwide, enhancing accessibility across regions.
- One-click activation. The widget appears as a floating icon that users can enable or disable at any time, offering full control.
With these features in place, you’re well on your way to improving user accessibility and creating an inclusive experience. Now let’s walk through the full process of customizing and installing your widget on the website.
Make Your Website ADA Compliant: Full Guide
When learning how to make sure a website is ADA compliant, the Elfsight accessibility widget is a powerful, no-code solution that helps ensure adherence to WCAG compliance guidelines. It supports users with visual, motor, and cognitive impairments through a broad selection of preset modes and screen reader compatibility. The widget also offers built-in website accessibility testing powered by Google Lighthouse.
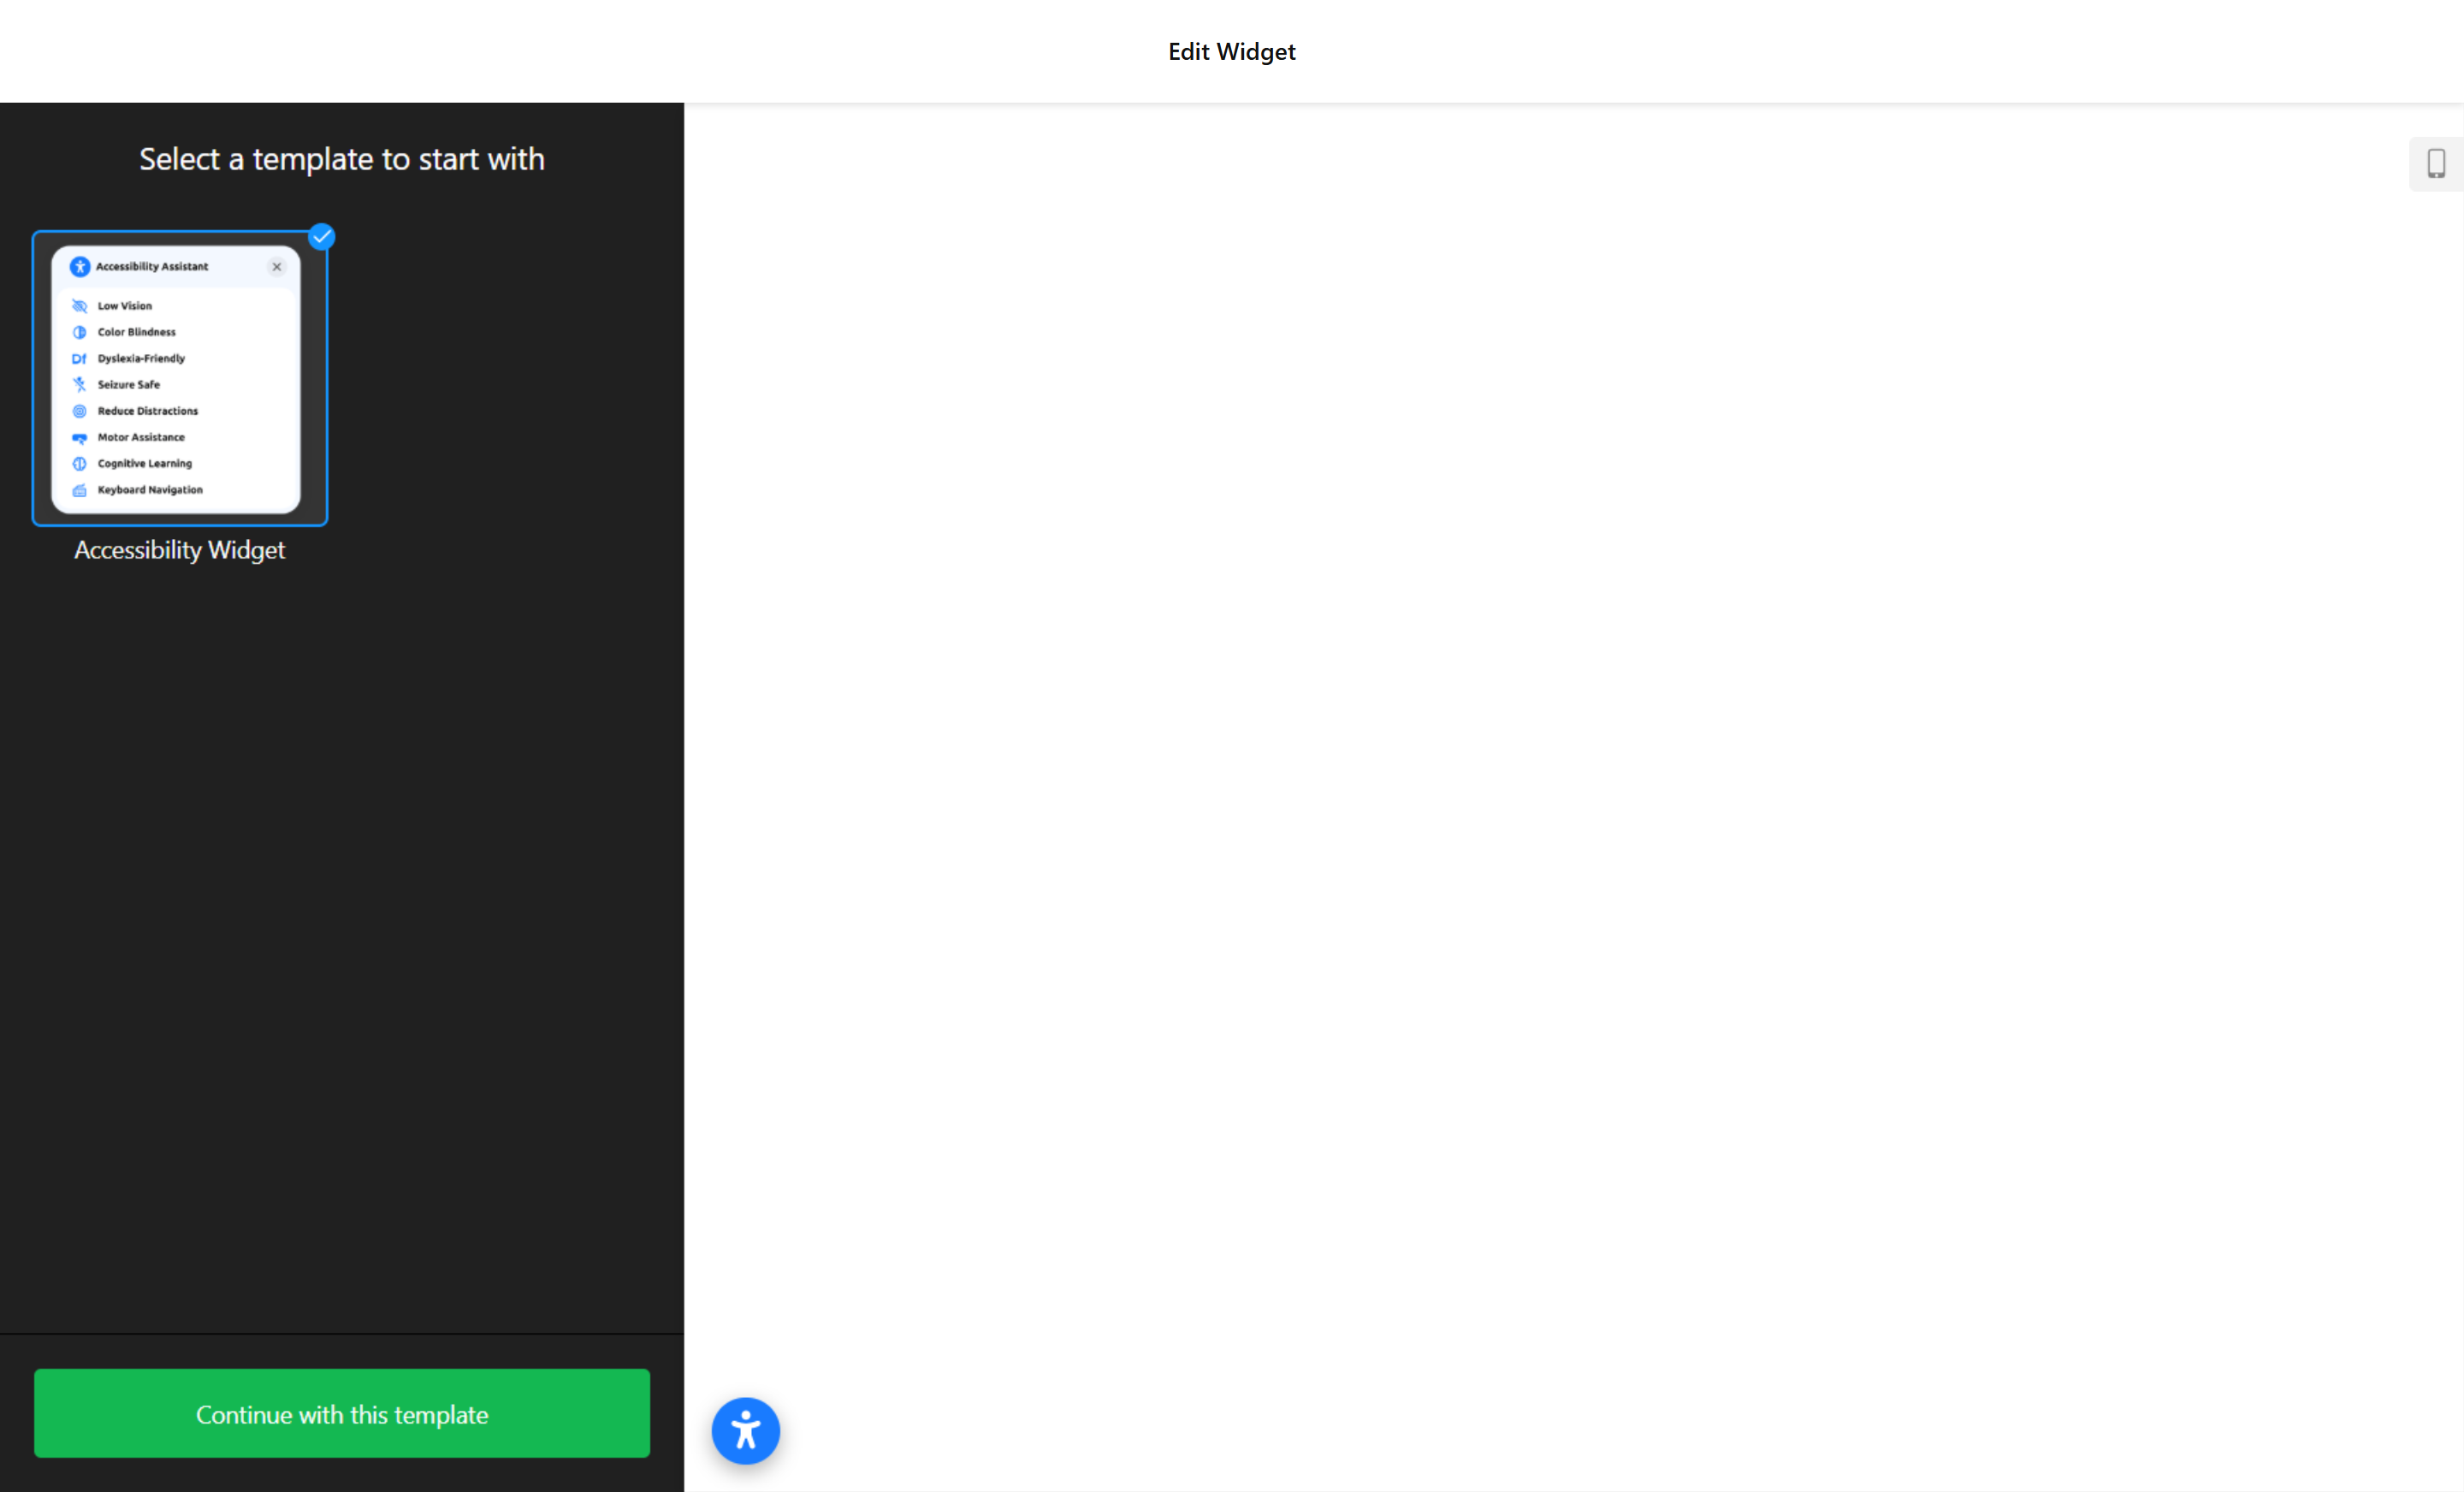
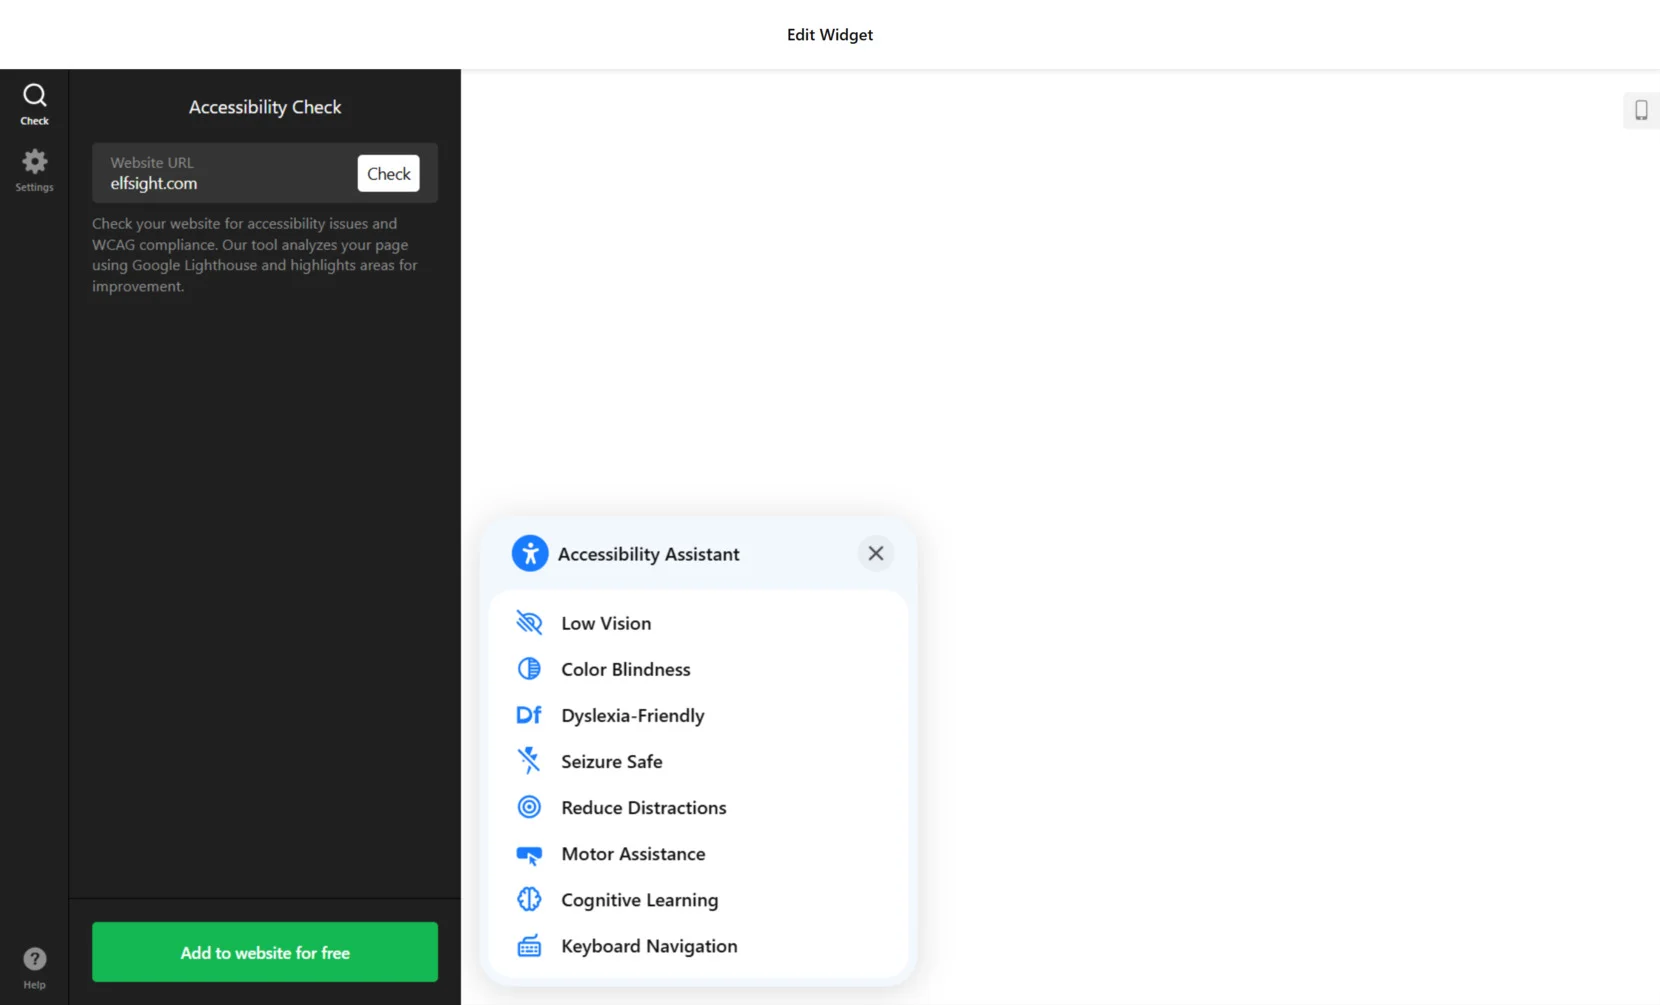
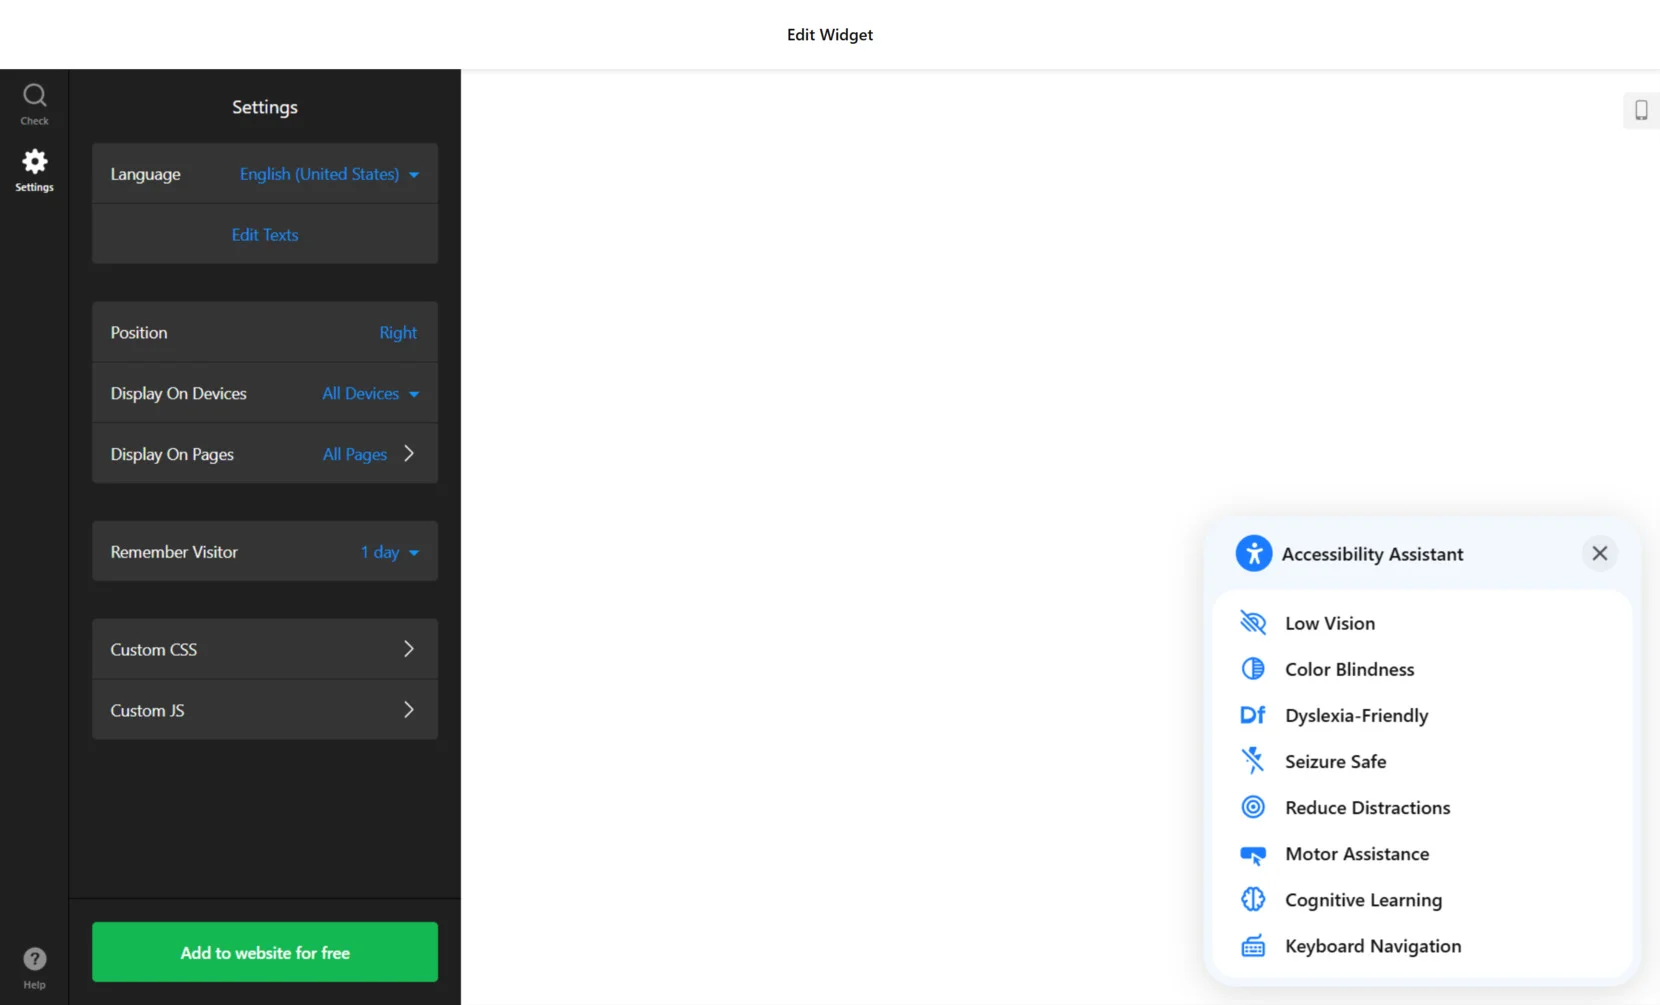
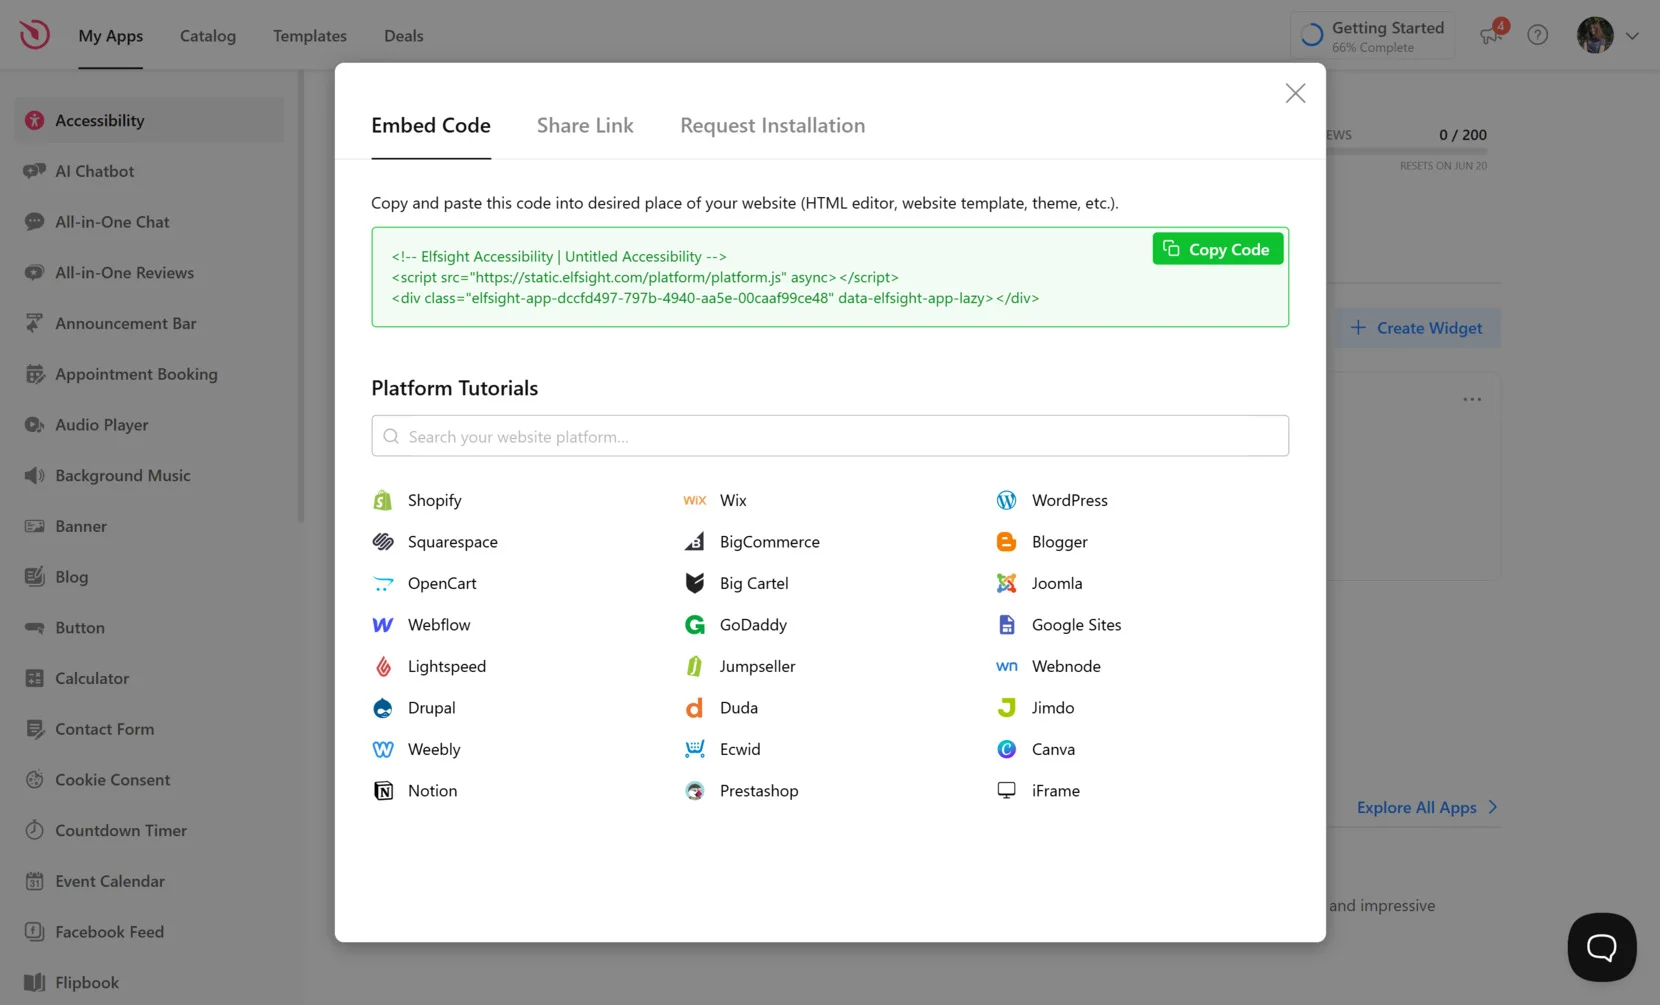
Below is a step-by-step guide to creating, customizing, and installing the Elfsight Accessibility widget based on the provided visual walkthrough:
- Choose a Template. Open the Elfsight editor and locate the accessibility widget. Select the “Accessibility Template” from the available options and click “Continue with this template” to proceed to customization.

- Run an Accessibility Check. Enter your website URL into the checker field and click “Check”. The tool scans the page using Google Lighthouse and returns a list of issues or improvement opportunities that impact WCAG compliance. This is a crucial first step in website accessibility testing.

- Configure Widget Settings. In the “Settings” tab, choose the language of the widget, edit texts if needed, and decide where and how it should appear. You can adjust its position (Left or Right), choose whether to show it on all devices and pages, set the visitor memory duration (such as 1 day), and even inject Custom CSS or JS if your accessibility policy requires deeper customization.
- Embed the Code on Your Website. Click “Add to website for free” to generate the HTML embed code. Copy the provided code snippet and paste it into the desired area of your website backend — usually in the footer or global scripts section — to ensure it loads across all pages. Once added, save and publish your changes to activate the widget live.
With this setup complete, your website will instantly become more inclusive and compliant with essential WCAG accessibility requirements. Visitors will be able to personalize their experience based on their unique needs and limitations.
Now that you’ve seen how easy it is to set up the accessibility widget, let’s explore other methods to make an ADA compliant website using alternative tools and strategies.
Other Ways to Build ADA Compliant Website
For those who need a custom-built accessibility solution or are working with a fully coded website, a manual implementation using WAI-ARIA roles and WCAG 2.1 guidelines offers the most control. This method ensures deep integration of accessibility features into the core structure of your website, making it suitable for developers and enterprise-level projects where precision is key.
Manual Integration Using WAI-ARIA and WCAG Guidelines
This method involves making your website accessible by following official recommendations provided by the W3C. It’s a technical approach that enhances how assistive technologies like screen readers interpret your content, ensuring every user can navigate and interact with your website effectively.
- Review the official WCAG 2.1 success criteria. Begin by studying the Web Content Accessibility Guidelines (WCAG) published by the W3C. These guidelines outline principles like perceivable, operable, understandable, and robust (POUR), which are essential for accessibility.
- Plan semantic structure using proper HTML elements. Ensure that your content is logically structured. Use headings in order (<h1> through <h6>), meaningful <nav> and <main> elements, and proper <label> tags for all form fields.
- Add ARIA roles and attributes to support assistive technologies. Use ARIA (Accessible Rich Internet Applications) roles such as role=”navigation”, aria-expanded, aria-hidden, and aria-label to enhance non-standard HTML elements and give screen readers more context.
- Ensure all content is accessible by keyboard. Verify that all interactive components such as menus, buttons, modals, and forms can be reached and activated using the keyboard alone (using Tab, Enter, and Esc keys). Avoid elements that require only mouse input.
- Include alt text and meaningful descriptions for images. Add descriptive alt attributes to all non-decorative images. Ensure images used as links or buttons also include ARIA labels where needed for clarity.
- Provide sufficient color contrast and readable fonts. Text should have at least a 4.5:1 contrast ratio against its background. Avoid using color as the sole means of conveying information and select fonts that are easily legible.
- Test with screen readers and audit tools. Use software like NVDA (Windows), VoiceOver (Mac), or Chrome’s Lighthouse audit tool to test how your content is read aloud and navigated by assistive devices. Identify and fix common accessibility issues before launch.
Comparison of ADA Compliance Methods
The table below compares the manual coding approach to Elfsight’s widget, highlighting one major advantage and one drawback of each method.
| Method | Pros | Cons |
|---|---|---|
| Elfsight Accessibility Widget | Quick to install, requires no coding, and includes a full suite of accessibility features ready to use. | It enhances accessibility through an overlay but doesn’t modify the underlying code of your website. |
| Manual WAI-ARIA Integration | Provides complete structural control and enables full customization based on official accessibility standards. | This method is time-intensive, requires advanced coding skills, and is difficult to maintain without technical expertise. |
Manual integration offers unmatched control, but for most business owners and marketers, it’s too complex and slow to implement. That’s why Elfsight stands out—offering a simple, powerful, and fast solution that works for any website. Next, let’s look at tips to keep your accessibility up to standard once your widget is live.
Smart Tips for Meeting ADA Requirements
Once you’ve embedded an accessibility widget, it’s important to configure and manage it properly to make sure your website stays compliant and truly user-friendly. These tips apply universally, no matter which solution or platform you choose.
- Place the widget where users expect it. The most intuitive position is usually the bottom-left or bottom-right corner of the screen. Avoid hiding it in menus — accessibility should always be one click away.
- Test the widget across devices. Before publishing, check how the widget behaves on mobile, tablet, and desktop. Make sure buttons and settings remain responsive and easy to reach on all screen sizes.
- Check color and contrast settings manually. Even if the widget includes color tools, verify that text and backgrounds meet WCAG contrast ratios to avoid legibility issues. Don’t rely solely on automation.
- Combine widget use with semantic structure. Accessibility widgets improve usability, but they work best when the underlying HTML uses proper tags and headings. Avoid skipping heading levels or misusing elements like <div> in place of <button>.
- Write clear labels and alt text for all content. Widgets won’t automatically fix poorly written link text or missing image descriptions. Always add meaningful alt tags and avoid using generic phrases like “Click here”.
- Inform users about accessibility features. Include a short section in your footer or accessibility statement explaining how to use the widget and what features are available. This improves transparency and user trust.
- Test with screen readers regularly. Run periodic checks using tools like NVDA (Windows) or VoiceOver (Mac) to make sure the widget functions well with real assistive technology.
With these best practices in place, your accessibility widget becomes a powerful tool — not just a checkbox. Next, let’s look at real examples of how different industries successfully implement these solutions to improve usability and stay compliant.
Web Accessibility Features in Action
Accessibility widgets are versatile tools used across a wide range of industries. Whether for legal compliance, better usability, or brand trust, companies of all sizes can benefit from implementing a solution that meets ADA compliant website requirements. Below are key industries where these solutions are especially impactful.
Application in Healthcare and Medical Services 💉
For healthcare websites, ADA compliance isn’t just good UX — it’s often tied to regulatory obligations like HIPAA and federal funding requirements.
Healthcare providers must ensure that all patients, regardless of ability, can navigate appointment systems, access medical records, and read content. An accessibility feature plugin helps hospitals, clinics, and private practices provide equal access to health-related information, support tools, and online forms.
Application in Education and Online Learning 🎓
Adding accessibility features helps ensure inclusive learning environments and aligns with modern e-learning standards for all users.
Schools, universities, and online learning platforms must prioritize accessibility to accommodate students with diverse needs. Embedding a website accessibility enhancer makes learning content readable, interactive components operable, and navigation manageable for users with disabilities.
Application in E-commerce and Retail 🛒
Retailers benefit from accessibility by tapping into a wider customer base and improving conversion through more usable interfaces.
Online stores must make product navigation, checkout processes, and customer service features accessible to all users. An inclusion booster ensures shoppers can interact with product details, filter options, and payment steps using screen readers and keyboards alone.
These examples show how crucial accessibility is across sectors. From healthcare to retail, every industry can improve user inclusion and meet ADA guidelines by adopting smart accessibility solutions. Let’s now explore what common problems may arise — and how to solve them efficiently.
Fixing Common Issues
While accessibility widgets simplify the process of making your website ADA compliant, users may still encounter technical challenges, configuration issues, or misunderstandings about compliance. This section addresses frequent problems and how to solve them effectively.
Does using a widget guarantee legal compliance?
Why doesn’t the accessibility widget cover all WCAG requirements?
Why is the widget not displaying on my website after installation?
Can accessibility widgets slow down page loading?
Why are some screen readers not detecting widget content?
How often should I test accessibility after installing a widget?
Understanding these challenges helps you proactively avoid missteps and maintain a truly accessible experience for all users.
Wrapping Up
Ensuring your website is ADA compliant isn’t just about checking off legal boxes — it’s about building a digital space that welcomes every user. From installing an accessibility widget to understanding WCAG compliance guidelines, this guide has covered practical, effective ways to improve usability and meet accessibility standards. Whether you opt for a no-code solution or a manual approach, the goal is clear: equal access for all.
By taking action now, you’re not only reducing legal risks but also expanding your reach and enhancing the user experience across your entire audience. Embedding a compliance assistant is one of the simplest and most immediate steps you can take. When paired with ongoing testing and inclusive web design practices, it becomes a powerful strategy to future-proof your online presence.