Why Editing Your Shopify Contact Form Matters
Every successful online store relies on seamless communication with customers, and a well-designed contact form plays a key role. Shopify provides a default form, but many businesses outgrow the basic setup and need more tailored solutions. Whether you want to collect additional information, align the form with your brand’s style, or ensure it matches your customer experience goals, customizing your contact form is essential.
Methods to Edit Shopify Contact Forms
When it comes to editing your Shopify contact form, you have two main options: using Elfsight’s Contact Form widget or editing the form directly within Shopify. Each approach has distinct advantages depending on your customization needs and technical expertise.
Method 1. Using Elfsight’s Contact Form Widget
➕Pros:
- No coding required. Perfect for non-technical users, allowing easy customizations.
- Advanced features. Includes field additions, styling, custom confirmation messages, and form integrations.
- Real-time preview. Visual editor shows instant updates as you edit.
➖Cons:
- Third-party solution: As an external tool, it requires embedding the widget into Shopify, which may involve a few extra steps for installation.
Method 2. Editing Within Shopify
➕Pros:
- Free: Shopify’s default form editor is included in the platform.
- Seamless integration into your store.
➖Cons:
- Limited customization: Few options for adding custom fields or designing the form.
- Technical complexity: Advanced edits, such as adding fields, require coding knowledge (using Liquid, Shopify’s templating language).
Quick Guide: How to Edit Contact Form with Elfsight
Elfsight’s Contact Form widget makes customizing your Shopify form effortless, whether you need a simple form or a complex one with multiple fields. To start editing your contact form with Elfsight, simply open the Elfsight Contact Form widget editor to try the changes in real time.
- Customize your contact form in the intuitive editor.
- Copy the unique code generated for your form.
- Embed the code into your Shopify store.
Try creating the widget in the intuitive editor right now and see how simple it is!
Features of the Elfsight Contact Form Editor:
- Easy-to-use visual editor. Make real-time changes in the Elfsight editor, where you can see every adjustment reflected immediately.
- Full customization. Adjust colors, fonts, and templates to match your store’s branding.
- Flexible fields. Add or remove fields (e.g., name, phone, order number) based on the information you need.
- Responsive design. All changes ensure your form looks perfect on any device, from desktops to smartphones.
Here’s a step-by-step guide on how you can modify your contact form using Elfsight’s tools.
A Detailed Guide on How to Edit Shopify Custom Contact Form with Elfsight
- Access the online editor.
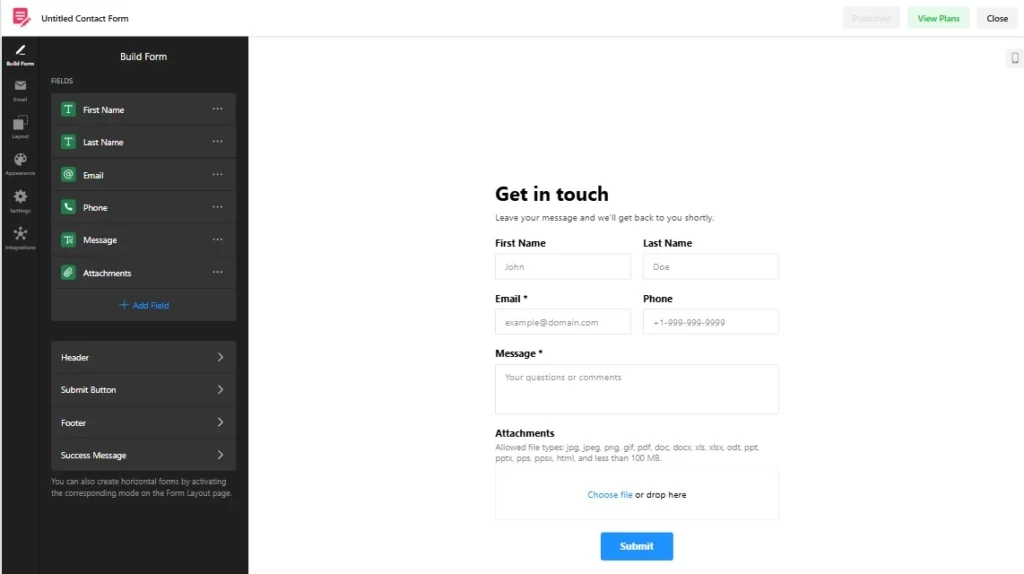
- Adjust design elements:
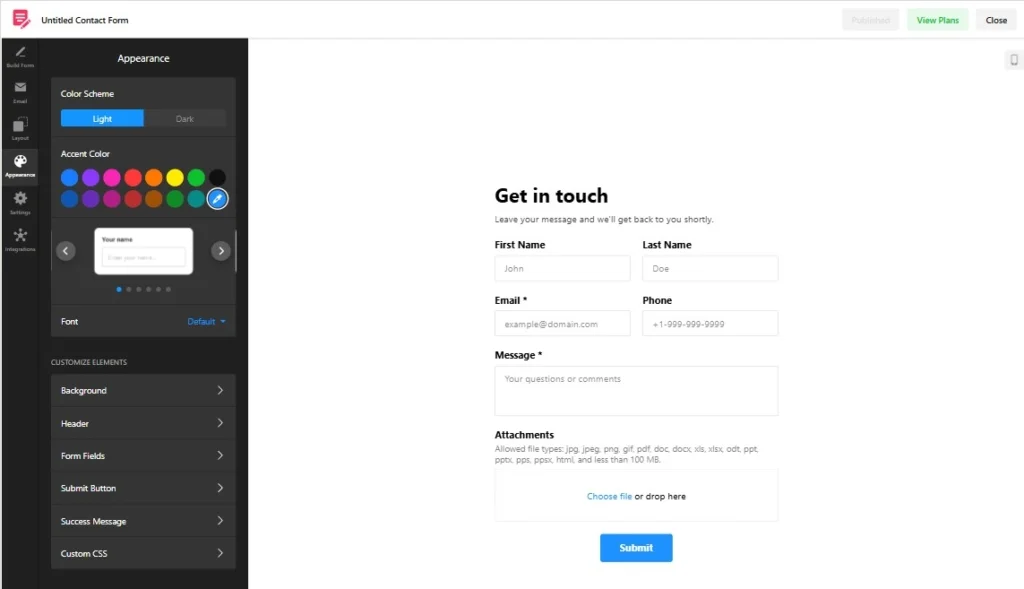
- Modify colors, fonts, and button styles to align with your store’s branding.
- Add or remove form fields such as name, phone number, or order number, depending on your business needs.
- Adjust spacing and layout to ensure a sleek, responsive design that looks great on both desktop and mobile.
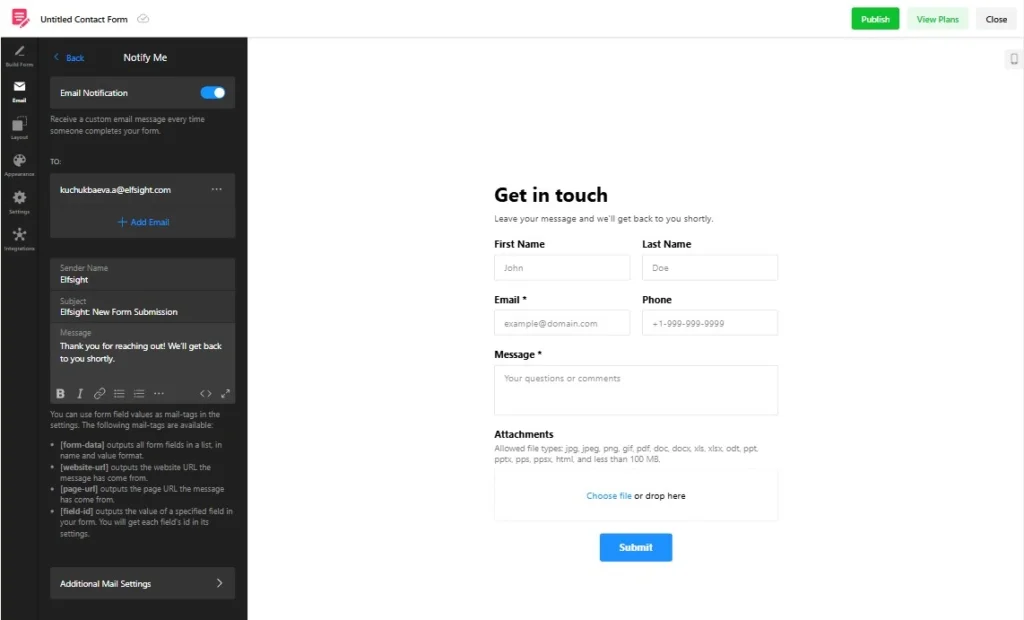
- Set confirmation messages. Personalize the message users see after submission (e.g., “Thank you for reaching out! We’ll get back to you shortly.”).
- Preview and save. View real-time changes in the editor, ensuring your form appears exactly how you want. Save the final version and get a code snippet to embed it in your Shopify store.
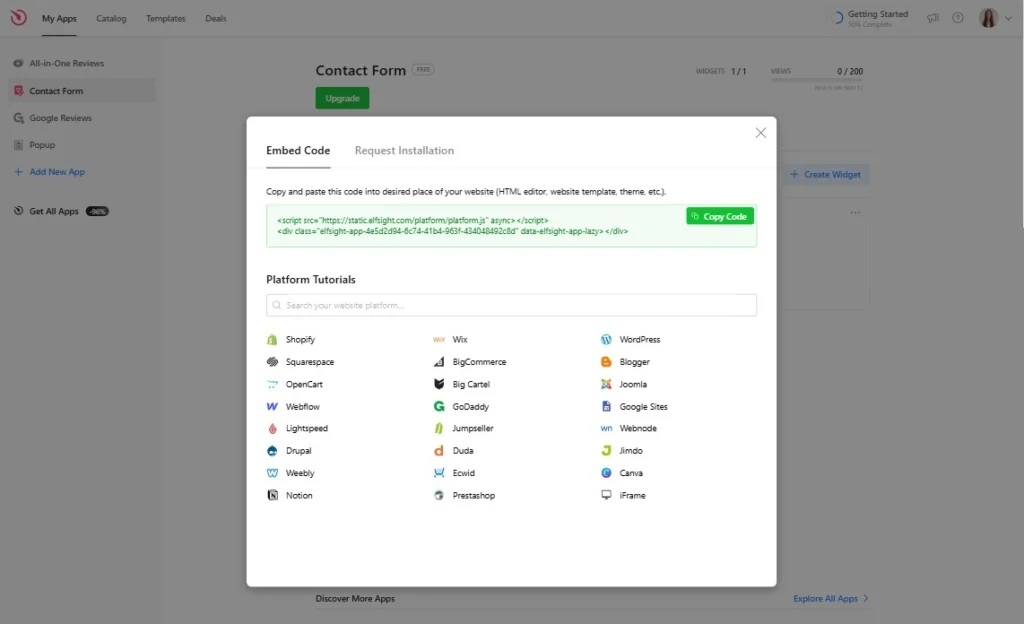
With Elfsight, you get ongoing access to a dashboard where you can continue to make edits and preview changes, allowing you to refine your form as your business grows.
For detailed setup instructions, follow this guide on how to add Elfsight’s Contact Form to your Shopify store.
How to Edit Contact Forms Directly in Shopify
Shopify provides a basic contact form by default, giving store owners a straightforward way to collect inquiries. This form is automatically included when you create a “Contact” page using Shopify’s built-in page editor.
If you prefer using Shopify’s built-in editor, here’s how to make basic changes to your contact form:
- Create a Contact page
- In your Shopify admin, go to Online Store > Pages, click Add Page, and choose the Contact page template.
- Customize basic fields
- Modify field labels (e.g., change “Message” to “Inquiry”) directly in the Page Editor.
- Advanced customizations (optional)
- Access Online Store > Themes > Actions > Edit Code.
- Locate contact-form.liquid and add new fields using Liquid code.
- Save and Preview: Save changes and check your form to ensure it’s displaying correctly.
This method works well for simple contact forms but can be limiting for more complex needs. For more advanced customizations, you need to use Liquid code, Shopify’s templating language, which can be challenging for non-tech users.
Best Practices for Shopify Contact Forms
Designing an engaging and user-friendly contact form can improve customer interaction and increase conversion rates. Here are some best practices to keep in mind:
Minimal fields
Ask only for the essential information needed for your business, such as name, email, and message. Fewer fields mean higher chances of users completing the form.
Mobile optimization
Ensure your contact form is responsive and works well on all devices. Test the form on smartphones and tablets to confirm that the design remains clear and user-friendly.
Confirmation message
After submission, thank users with a friendly confirmation message. You can also guide them on the next steps, such as checking their email or visiting another page for further assistance.
Testing and A/B Testing
Regularly test your contact form’s functionality to avoid missed messages. Experiment with different layouts and wording through A/B testing to determine what resonates best with your audience. Elfsight’s widget allows for easy updates, making it ideal for ongoing testing.
Conclusion
A well-designed contact form is essential for any online store, ensuring smooth communication with customers. Whether you’re using Shopify’s default form or advanced tools like Elfsight’s apps, the right form setup can boost engagement and streamline customer interactions.
Elfsight makes it easy to create customized, professional contact forms with no coding required, helping businesses maintain meaningful connections with their customers. Try Elfsight’s Contact Form widget today to enhance your Shopify store with forms tailored to your needs.
FAQ
How can I edit a contact form in Shopify without using code?
Use Elfsight’s Contact Form, which offers a visual editor. You can change the form layout, colors, fonts, and fields directly from the Elfsight dashboard — no coding required.
How do I track submissions from my Elfsight Contact Form?
You can manage submissions via the Elfsight dashboard, where all responses are stored. Integrate your form with Google Sheets or CRM tools for seamless data management.
Why isn’t my Shopify contact form sending emails?
- Check if the recipient email is correctly set under Email > Notify Me on the Elfsight dashboard.
- Look for potential SMTP or DNS issues that could block messages.
- Test the form with a different email address to see if spam filters are the issue.
How can I change my Shopify contact form email address for notifications?
Go to Elfsight dashboard > Email > Notify Me to add a new email address and delete the old address if needed.
Is it possible to create multiple custom contact forms for different pages?
Absolutely! Elfsight’s widget lets you create and embed multiple unique forms tailored to specific products or pages, each with different fields and designs.


