In today’s digital world, chatbots have become indispensable tools for businesses and organizations across industries. From enhancing customer support to streamlining internal operations, these AI-powered assistants save time, reduce costs, and improve user experiences.
Leveraging the advanced conversational capabilities of ChatGPT, you can build a chatbot that not only understands natural language but also provides contextually relevant and human-like responses. In this guide, we’ll walk you through everything you need to know — from setup to customization — so you can harness the power of ChatGPT and create a chatbot tailored to your needs.
Understanding ChatGPT Chatbots
When exploring chatbot development, it’s crucial to understand what makes the ChatGPT-powered chatbot stand out from traditional chatbot frameworks. Unlike rule-based bots that rely on rigid scripts or decision trees, this tool leverages advanced natural language processing to handle complex, dynamic conversations with ease.
Here’s why building a chatbot using ChatGPT is a move to another level:
- Advanced conversational AI. ChatGPT uses sophisticated natural language processing (NLP) to understand and respond in a way that feels human-like.
- Context-aware responses. It can handle complex queries and adapt to different conversation contexts, providing more relevant and accurate answers.
- Customization. Creating a custom ChatGPT chatbot allows you to tailor its personality, tone, and functions to suit specific business needs.
- Flexibility for various use cases. Whether it’s for customer service, lead generation, or automated content, the tool can be easily adapted for a wide range of applications.
By using ChatGPT, you unlock the capabilities of AI-driven conversations that are both dynamic and personalized, making it a standout option over traditional chatbot framework.
Simple Solution: Create an AI Chatbot with Elfsight
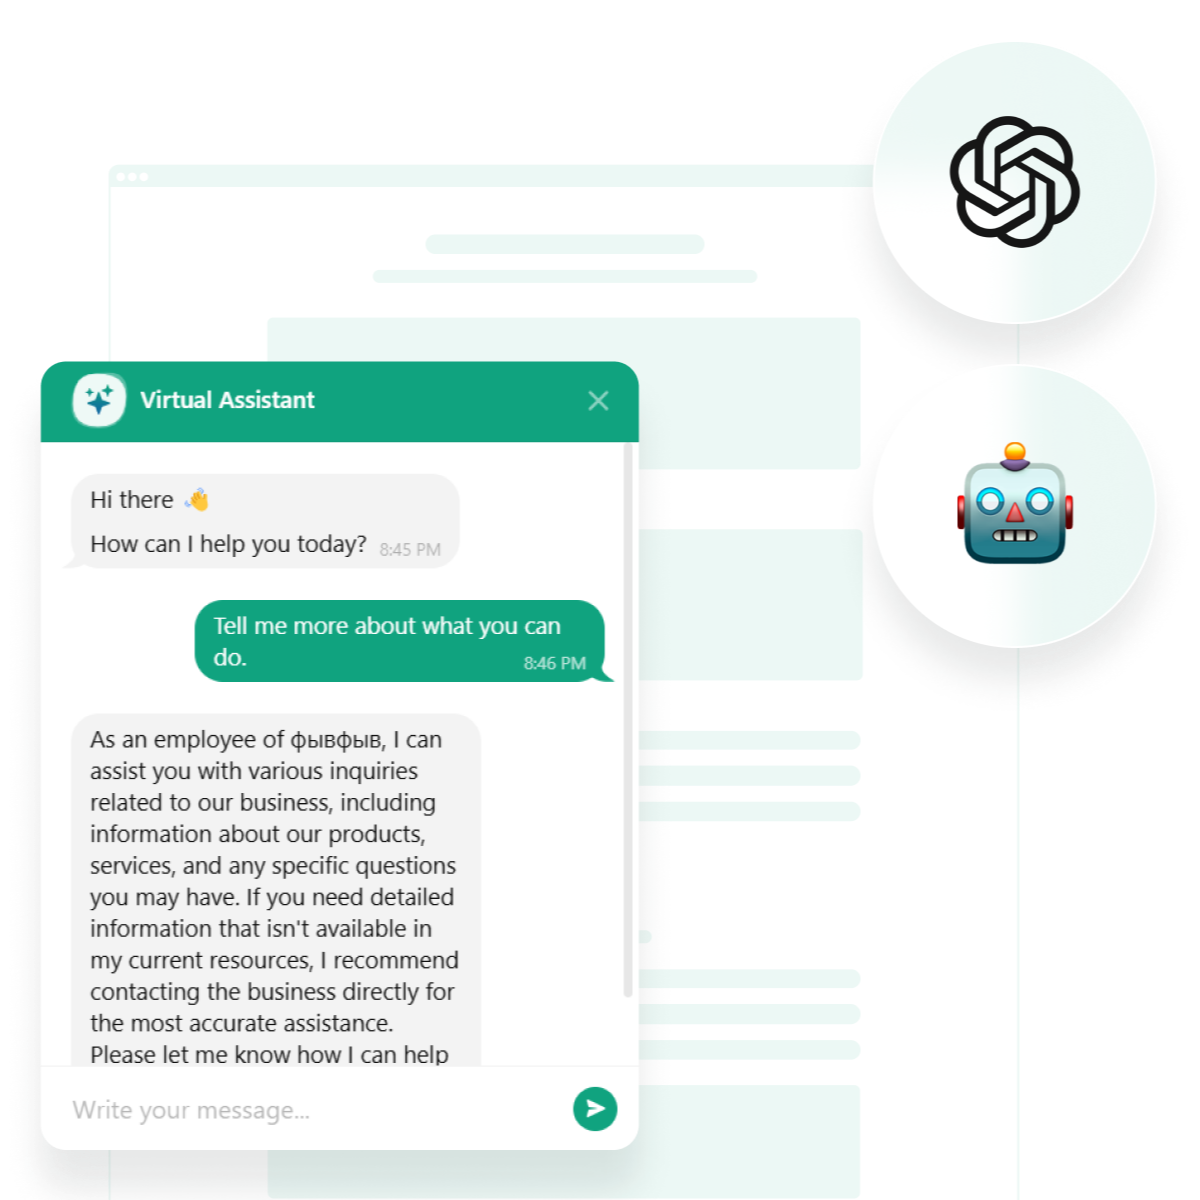
Not everyone has coding skills, but that shouldn’t stop you from building your own chatbot. If you’re looking for a simple solution to create a chatbot using ChatGPT without the need for technical expertise, Elfsight AI Chatbot widget is an excellent option.
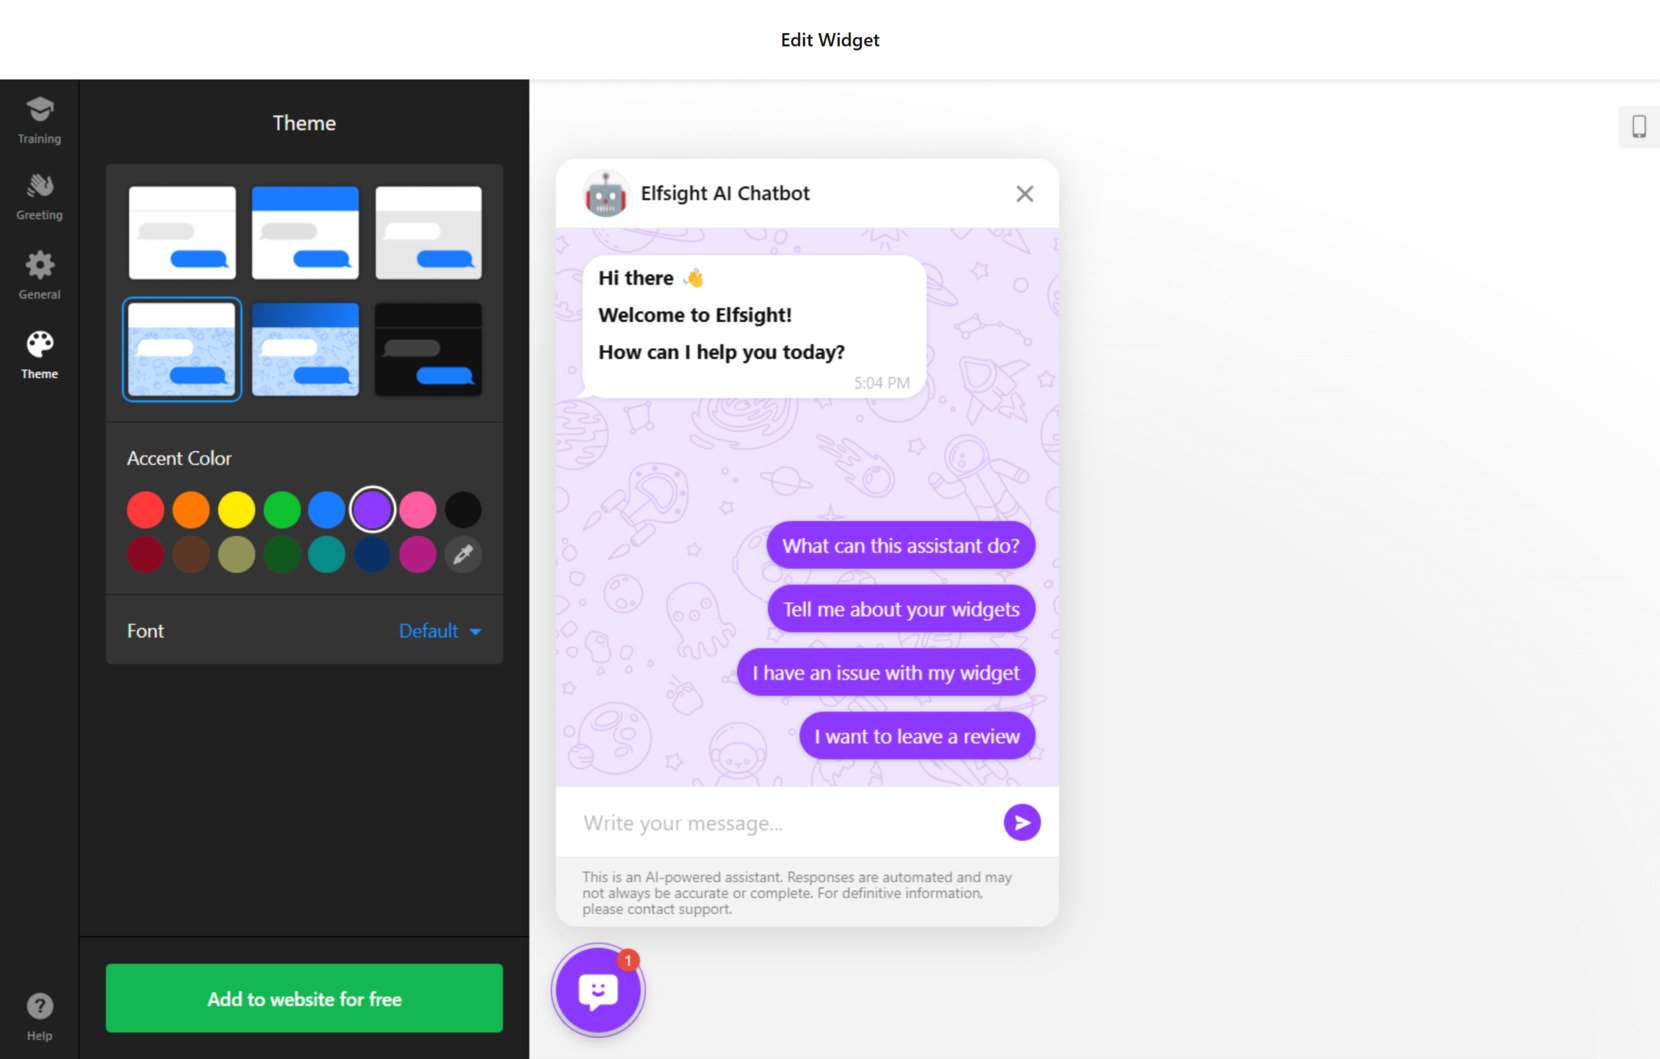
The widget is powered by ChatGPT 4.0 Mini, one of the most advanced AI models available, ensuring that it delivers intelligent, accurate responses to your customers. This user-friendly tool allows you to create a chatbot without writing a single line of code.
Here’s a quick instruction to help you get started:
- Open the widget editor and introduce your business to the AI chatbot.
- Customize the chatbot’s behavior, greetings, and any special instructions to guide interactions.
- Personalize the look, settings, and theme of the chatbot to match your website’s design.
- Copy the generated embed code and add the chatbot to your website.
Create your own AI-powered chatbot in no time with our intuitive editor!
AI Chatbot widget’s features
- Easy onboarding
With the intuitive instruction generator, you can easily set up the AI by simply sharing details about your business. This guarantees your chatbot delivers precise and context-aware recommendations tailored to your company’s unique needs. - Personalization for your brand
Choose your chatbot’s avatar, name, chat bubble, font, colors, and even chat wallpaper to reflect your brand’s identity. This ensures that every conversation feels consistent and authentic to your users. - Q&A and knowledge sharing
Add custom questions and answers, upload training files in multiple formats (PDF, TXT, DOCX, etc.), and even share educational text blocks. These features allow your chatbot to be equipped with relevant, accurate information to enhance customer satisfaction. - Save chat history
Elfsight Chatbot automatically captures chat history, letting your support team to revisit past interactions, ensuring continuity in conversations and personalized service. - Follow-up messages
Keep users engaged with timely reminders and follow-up messages to prevent unresolved issues. It ensures that your customers never feel forgotten and receive the help they need. - Multilingual support
Elfsight AI Chatbot offers multilingual capabilities, allowing you to engage users from different linguistic backgrounds, expanding your reach and connecting with global audiences.
\We have a detailed guide on how to add the AI chatbot to a website, where you’ll find how to embed the widget to different CMS, like WordPress, Wix, Shopify, and many more. Check it out!
Before Building a Chatbot Using ChatGPT
If you’re aiming for a more tailored solution, where you have full control over the chatbot’s functionality and integration, a more complex setup will be required. This typically involves utilizing the OpenAI API and building the chatbot from scratch. While this route requires technical knowledge, it offers unmatched flexibility to create a truly custom experience for your users.
Before you start, you need to make sure that you have and know how to use the OpenAI API key. This will allow your chatbot to communicate with OpenAI’s language model, enabling it to understand and respond to user queries with high accuracy.
If you haven’t gotten your API key from OpenAI yet, here’s what you need to:
- Sign up on OpenAI. Go to OpenAI’s website and create an account if you don’t already have one. Once logged in, navigate to the ‘API section’ of the dashboard.
- Retrieve your API Key. After signing up, you can access the API by navigating to the ‘API Keys’ page. Here you will find your unique API key. Copy this API key for later.
- Set up billing. OpenAI’s API requires billing information, as it is a paid service. Ensure you have set up your payment information to start using the API.
To make a custom ChatGPT bot with specific features, you’ll also need some programming skills (in our examples, we’ll use Python). You’ll be writing code to integrate the OpenAI API with your website or app, customizing the chatbot’s responses, behavior, and user interactions to meet your specific requirements.
Step-by-Step Guide: How to Create a Chatbot with ChatGPT
Creating a chatbot with ChatGPT can be a rewarding project, whether you’re a developer looking to integrate AI into your website or a business seeking a custom solution for client interaction. Below, we’ve compiled a comprehensive guide that will take you through the entire process.
Step 1. Setting up the environment
Before you start coding, it’s essential to set up the development environment. This ensures you have all the tools and libraries necessary to interact with the OpenAI API and build your chatbot.
- Install required libraries. Begin by setting up a Python environment (preferably using virtualenv to keep your dependencies organized). Install the pip install openai requests libraries.
- Set up an IDE. You can use any text editor or integrated development environment (IDE) like VSCode, PyCharm, or Jupyter Notebooks to write and test your code.
- Ensure you’re working in Python. Make sure you have Python 3.x installed. You can download it from the official Python website if you haven’t done so yet.
- Environment variables. For security reasons, it’s good practice to store your API key as an environment variable. On your terminal or command prompt, you can set an environment variable as follows: export OPENAI_API_KEY=”your-api-key”.
Step 2. Developing your custom ChatGPT chatbot
Now that you have your environment set up and API access, it’s time to start creating your ChatGPT chatbot. This section covers writing the code and adding functionalities to your bot.
- Write basic chatbot code. Start by writing the core logic to interact with OpenAI’s API.
- Add functionality for user input. Give the bot’s ability to understand a range of user inputs, such as greetings, questions, or commands. You can also modify the code to include specific instructions to make the bot more tailored to your needs. For example, add responses to common questions or guide users through certain processes.
- Implement error handling. Ensure that the bot can handle errors such as invalid inputs or network failures gracefully. You can add try-except blocks to catch these errors.
- Add personalization features. Consider storing user information (name, preferences, etc.) to make conversations more personal. For example, prompt the user for their name at the beginning and use it in future interactions.
import openai

# Set up OpenAI API key
openai.api_key = "your_openai_api_key_here"

# Dictionary to store user preferences
user_data = {}

def chat_with_gpt(prompt):
    """Function to interact with OpenAI's GPT-3/ChatGPT model."""
    try:
        response = openai.Completion.create(
            engine="gpt-3.5-turbo",  # Or "gpt-4" if available
            prompt=prompt,
            max_tokens=150,
            temperature=0.7
        )
        return response.choices[0].text.strip()
    except Exception as e:
        return f"Oops! Something went wrong: {str(e)}"

def get_user_name():
    """Function to prompt user for their name if not provided yet."""
    user_name = input("What's your name? ")
    user_data['name'] = user_name
    return user_name

def personalized_chat(user_input):
    """Main function for handling user input and providing personalized responses."""
    # Check if user's name is stored, if not, ask for it
    if 'name' not in user_data:
        user_name = get_user_name()
        return f"Nice to meet you, {user_name}! How can I assist you today?"

    # Handle specific cases (e.g., greetings, checking status)
    user_input = user_input.lower()
    if "how are you" in user_input:
        return f"I'm doing great, {user_data['name']}! How about you?"
    elif "hello" in user_input or "hi" in user_input:
        return f"Hello, {user_data['name']}! How can I assist you today?"
    elif "help" in user_input:
        return "I can assist you with common inquiries. Just ask me anything!"
    else:
        return chat_with_gpt(user_input)

# Main loop for user interaction
while True:
    user_input = input("You: ")

    # End chat if user types 'exit'
    if user_input.lower() == 'exit':
        print("Bot: Goodbye!")
        break

    # Get bot response
    response = personalized_chat(user_input)
    print("Bot:", response)
Explanation:
- chat_with_gpt: Handles interaction with the OpenAI API, includes error handling.
- get_user_name: Asks the user for their name if it’s not already stored.
- personalized_chat: Main function that combines all features — personalized greetings, common responses, and fallback to ChatGPT for general queries.
- The program runs in a loop, continuously interacting with the user. If the user types “exit”, the conversation ends.
How it works:
- The bot first checks if the user’s name is stored. If not, it asks for it.
- The chatbot handles specific inputs like greetings and requests for help.
- If the input doesn’t match predefined responses, it sends the input to the OpenAI model for more general responses.
- If anything goes wrong during the interaction with the OpenAI API, it catches the error and provides a fallback message.
This code integrates basic chatbot functionality, personalized responses, and handles both user input and errors seamlessly.
Step 3. Testing your ChatGPT chatbot
Testing is a crucial part of building a chatbot. As you develop your bot, you’ll need to ensure it works as expected and provides accurate responses to users.
- Test basic conversations. Start by testing simple conversations to ensure that your chatbot responds as expected. Check whether the responses are coherent, contextually relevant, and appropriate for the input.
- Check for errors. Test edge cases such as incomplete or nonsensical input. See how the chatbot reacts to unusual user behavior, and make adjustments to the code to improve its responses.
- Refine based on feedback. Get feedback from others who will interact with your chatbot. Use their input to improve the chatbot’s understanding and responses.
- Optimize performance. After initial testing, you may need to optimize the chatbot for better performance, such as reducing response times, handling more complex queries, or refining how it processes user input.
- Keep on improving. Continue refining your chatbot based on testing results and real-world usage. You can improve the bot’s responses, adjust its behavior, or add new features to enhance its usefulness.
By following these steps, you’ll be able to build a ChatGPT chatbot. In case you need additional help, head to the OpenAI’s help center or community forum to get expert advice.
Custom ChatGPT Chatbot vs. Elfsight AI Chatbot
When deciding between building a custom ChatGPT chatbot and using an easier no-code solution from Elfsight, you need to evaluate the two approaches. Below is a comparison table that highlights the key features and differences between the methods.
| Feature | Custom ChatGPT Chatbot | Elfsight AI Chatbot |
| Technical Skill Requirement | High – Requires coding and programming knowledge | Low – No coding required, user-friendly interface |
| Customization | Full customization of responses, behaviors, and design | Design customization is somewhat limited; chatbot templates are available |
| Development Time | Time-consuming – Requires coding, debugging, and testing | Quick setup – Get started within minutes |
| Cost | Varies – You’ll need to pay for API usage, hosting, etc. | Subscription-based model with a free plan offered |
| Scalability | Highly scalable with custom adjustments | Scalable, but limited to the platform’s features and plans |
| Integration Options | Full control – Can be integrated with any platform | Easy integration with websites, limited to platform support |
| Maintenance and Updates | Requires manual updates and code maintenance | Automatic updates and maintenance handled by Elfsight |
| User Interface | You design the UI, completely customizable | Pre-designed chat interface, customizable through settings |
| API Access | Direct access to OpenAI API for complete flexibility | No direct API access – relies on Elfsight’s backend |
| Multilingual Support | Can be added with development work | Supports multiple languages by default |
| AI Model | Full access to GPT models and the latest versions | Powered by GPT-4o mini, limited to Elfsight’s implementation |
| Support and Documentation | Community-based support and OpenAI documentation | 24/7 customer support with tutorials and guides from Elfsight |
Key takeaways:
The Custom ChatGPT chatbot is ideal for developers or businesses that need full control over the chatbot’s functionality, design, and integration. It allows complete flexibility but requires significant technical skills, time, and effort. The Elfsight AI Chatbot is perfect for companies looking for an easy-to-deploy solution without technical expertise. It offers essential features, fast setup, and built-in customization options, but with some limitations.
Tips on Building a Powerful Chatbot with ChatGPT
Creating a powerful and effective ChatGPT chatbot involves more than just coding. To ensure your chatbot delivers a great user experience and meets the needs of your business, consider these tips to enhance its functionality:
- Set clear goals for your chatbot. Define specific objectives for your chatbot, such as increasing customer retention, automating support, or generating leads. Aligning your chatbot’s functionality with business goals ensures it delivers measurable results.
- Experiment with conversation styles. Customize your chatbot’s tone of voice and responses to match your brand personality—whether it’s professional, friendly, or humorous. Experimenting with conversational styles can help you discover what resonates best with your audience.
- Regularly test user scenarios. Simulate real-world scenarios to test how your chatbot handles complex or unexpected interactions. Run scenarios such as multi-step queries or ambiguous questions to ensure your chatbot provides smooth, intuitive assistance.
- Encourage user feedback directly in chats. Add prompts that ask users to rate their experience or provide suggestions at the end of interactions. Real-time feedback helps identify improvements while making users feel valued.
- Combine chatbot insights with Live support. Use your chatbot’s data to improve your overall customer support strategy. For instance, analyze chatbot transcripts to identify recurring issues and empower live agents with insights for handling more complex cases.
FAQ
Do I need to know programming to make a chatbot?
Is creating a chatbot with ChatGPT expensive?
How do I pick the best chatbot for my needs?
Conclusion
In this guide, we covered the key steps of creating a chatbot using ChatGPT. We also explored how custom solutions offer complete control over design and functionality, but come with the need for technical skills and time investment. For those seeking an easier and quicker approach, Elfsight AI Chatbot offers a user-friendly, no-code solution that still provides powerful chatbot functionality.
Ultimately, the choice between a custom chatbot and a no-code alternative like Elfsight depends on your goals, technical capabilities, and how much flexibility you need in your chatbot’s design.


