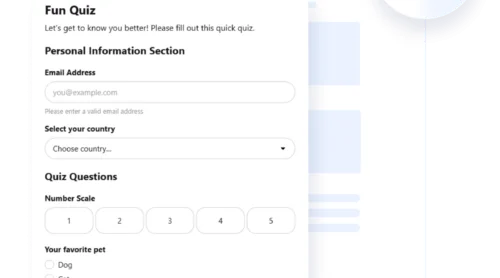
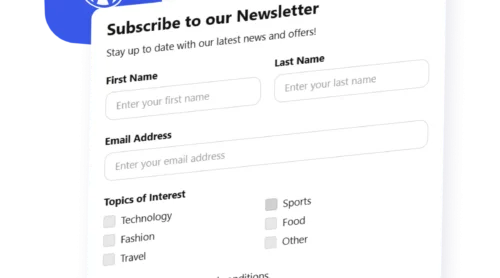
A signup form is a simple way to collect user information — typically names and email addresses — directly on your website. Whether you’re building a newsletter list or offering exclusive content, creating a signup form for a website helps turn casual visitors into engaged subscribers.
If you want to grow your audience, increase interaction, or streamline your user onboarding process, adding a signup form to your website is exactly what you need. It’s quick to set up and delivers long-term value for any type of business or project.
- Grow your email list effortlessly. Signup forms help you collect email addresses from visitors in real-time, giving you direct access to your audience.
- Improve your marketing communication. With a growing list of subscribers, you can promote updates, offers, and content with better reach and personalization.
- Simplify the user onboarding process. By guiding users through a signup journey, you ensure a smoother start and increase engagement from the beginning.
- Capture leads for future conversion. A well-placed form helps gather potential customer data you can nurture over time.
- Keep your audience engaged long-term. Regular communication through signup-based channels builds trust and encourages repeat visits.
Now that you understand what a signup form can do for your website, let’s look at how to get started with one quickly and easily.
Quick Guide to Creating an Online Signup Form
Creating an online signup form doesn’t have to be complicated. With Elfsight’s visual builder, you can design and launch a fully functional form in just a few minutes. Here’s a quick overview of how it works:
- Open the editor and pick a template. Start with a pre-made signup form that fits your needs.
- Customize the form fields, choose a layout and adjust the structure.
- Set background color, typography, and other elements to match your website’s design.
- Click “Add to website for free“, copy the generated code, and paste it into your website’s backend.
This process gives you full control over the look and function of your form — no need for external plugins or complex setups. You can preview changes instantly and make adjustments as needed to match your branding.
See how easy it is – create your own signup form in minutes!
Features of Elfsight’s Form Builder
Once you’ve seen how quick it is to build a signup form, it’s time to explore what makes Elfsight a powerful solution. This platform offers a combination of flexibility, user-friendly tools, and performance-focused features that help you add a signup form to your website with confidence.
Here’s what makes Elfsight’s form builder worth trying:
- Fully customizable layouts and fields. Add, remove, or rearrange form fields to fit your exact data collection needs, from basic emails to full contact details.
- Visual editing with real-time preview. Make changes with a simple interface and instantly see how your form will look on your website.
- Smart email notifications. Receive instant alerts when someone submits your form, so you never miss a lead or subscriber.
- Mobile-ready design. All forms are fully responsive and look great on desktop, tablet, and mobile devices without extra adjustments.
- Seamless data management. View, export, and manage all collected form entries in one place to streamline your workflow.
- Conditional logic support. Show or hide form elements based on user selections to keep the form experience clean and dynamic.
- Spam protection built-in. Use CAPTCHA and other built-in tools to keep your form free of bot submissions and fake entries.
With these features in place, you’ll have everything needed to build high-performing, professional signup forms. Next, let’s walk through the full process of creating and adding your form to a website in detail.
How to Add a Signup Form to Website: Step-by-Step
Now that you’re familiar with Elfsight’s features, here’s a step-by-step guide to creating and adding a signup form to your website. These steps are based on the actual form editor interface and will walk you through the entire process — from selecting a template to embedding your finished form.
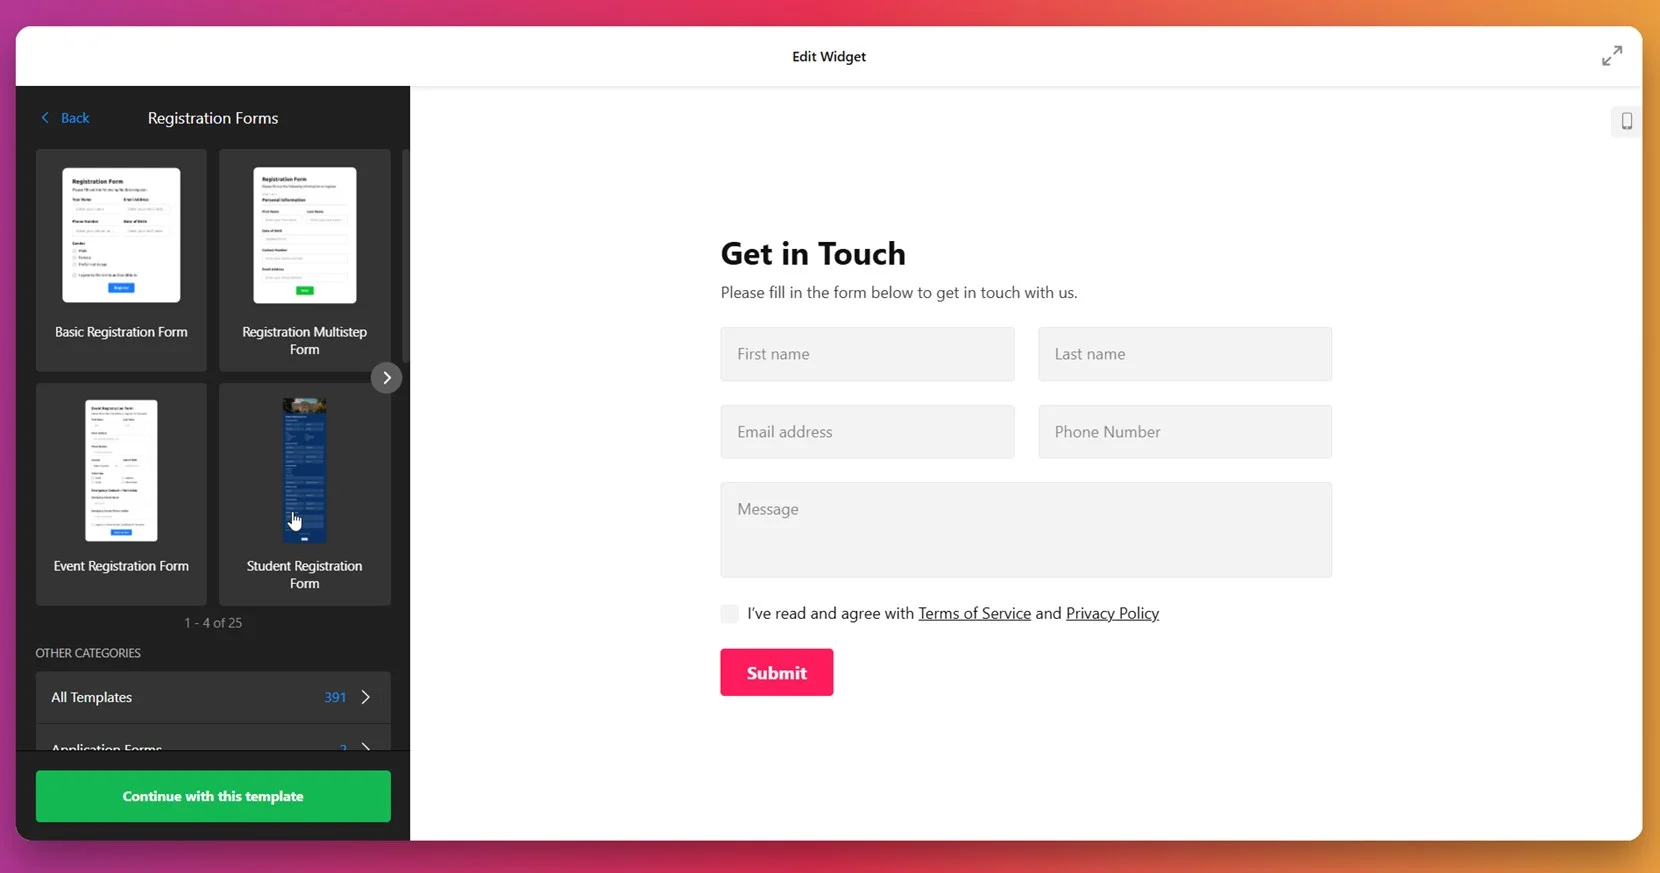
- Choose a template. Start by opening the widget editor and navigating to the “Sign Up Forms” category. Browse templates options, pick one, and click “Continue with this template”.

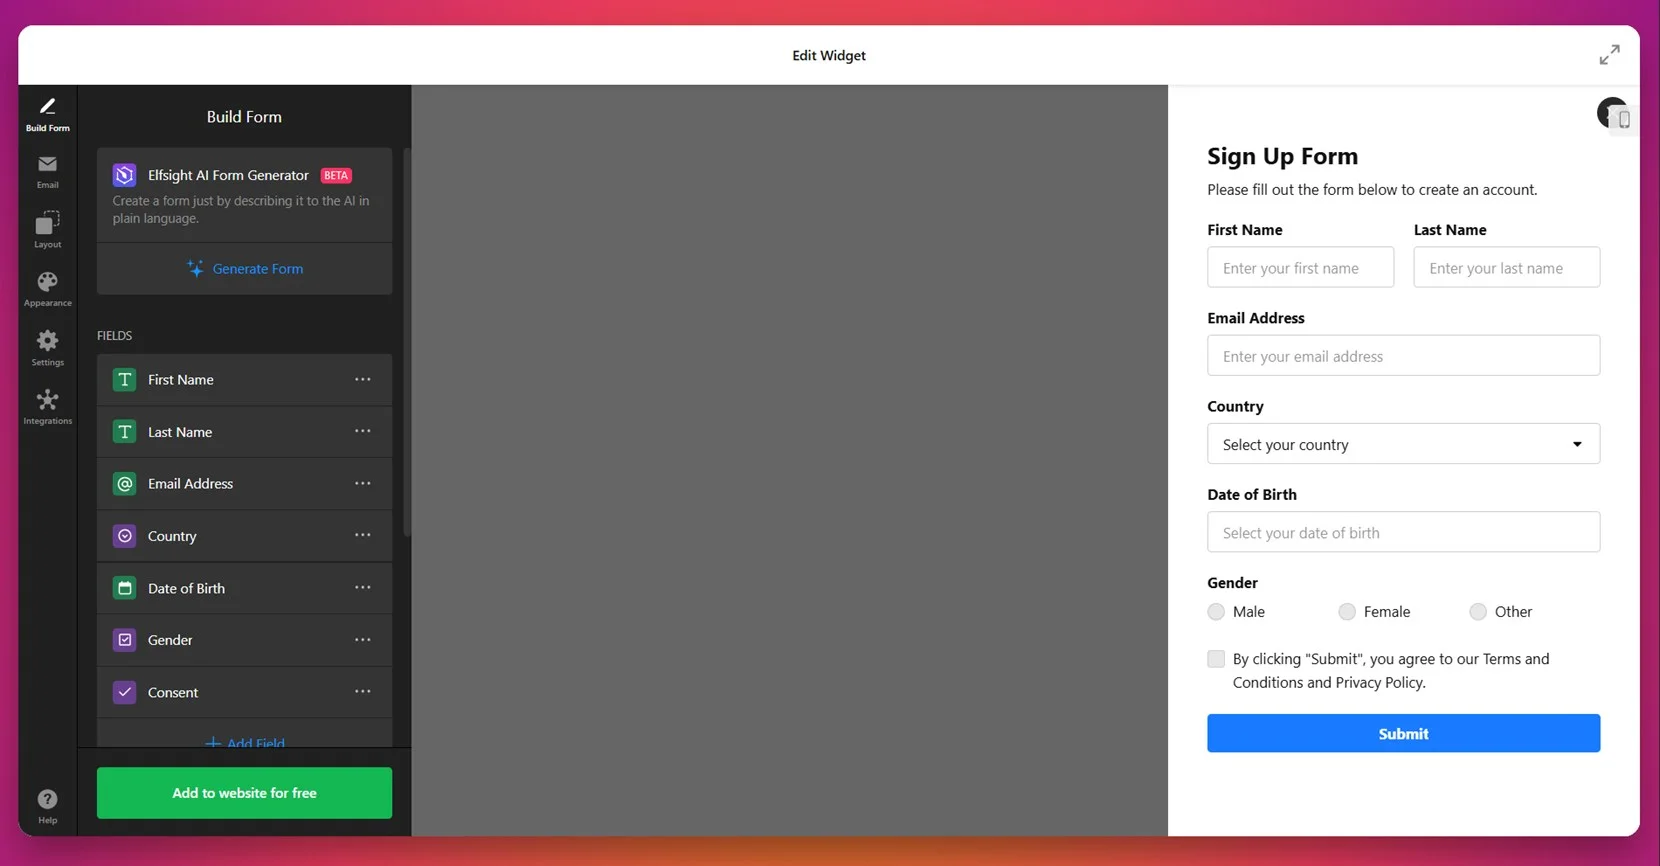
- Build your form fields. In the “Build Form” tab, add or remove fields such as name, email, country, date of birth, gender, and consent. Use the sidebar to drag elements and arrange them in the desired order.

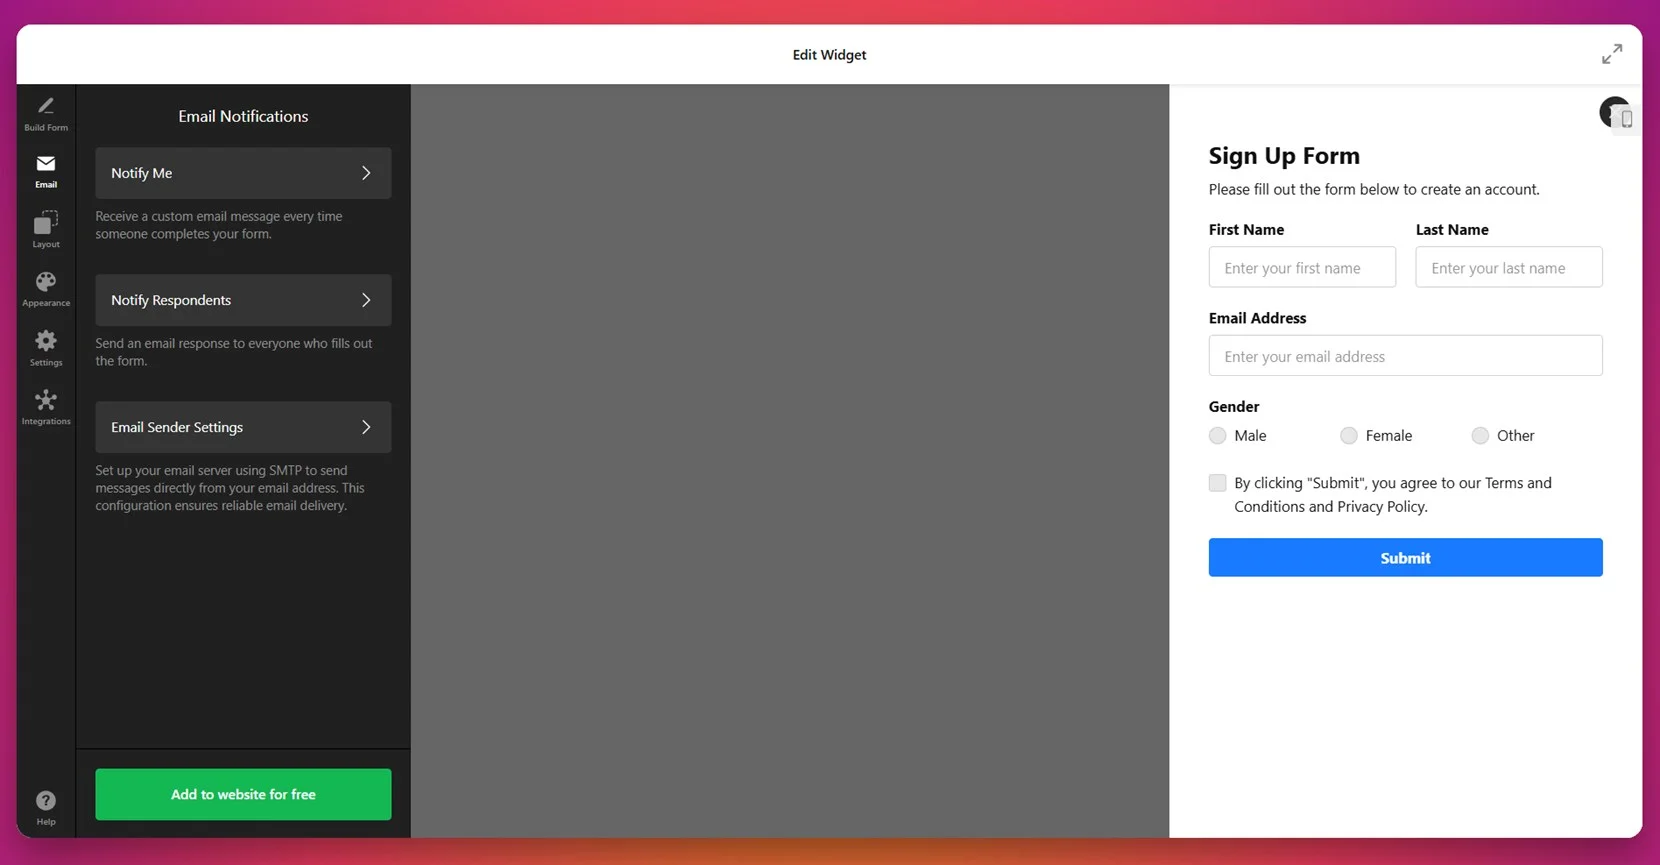
- Configure email notifications. Under the “Email” tab, set up alerts for yourself and automated responses for users who complete the form. You can also configure sender settings via SMTP for better delivery.

- Adjust the layout. Open the “Layout” tab and choose how the form is displayed — inline, floating, or multistep. You can set the width and layout direction (vertical or horizontal).

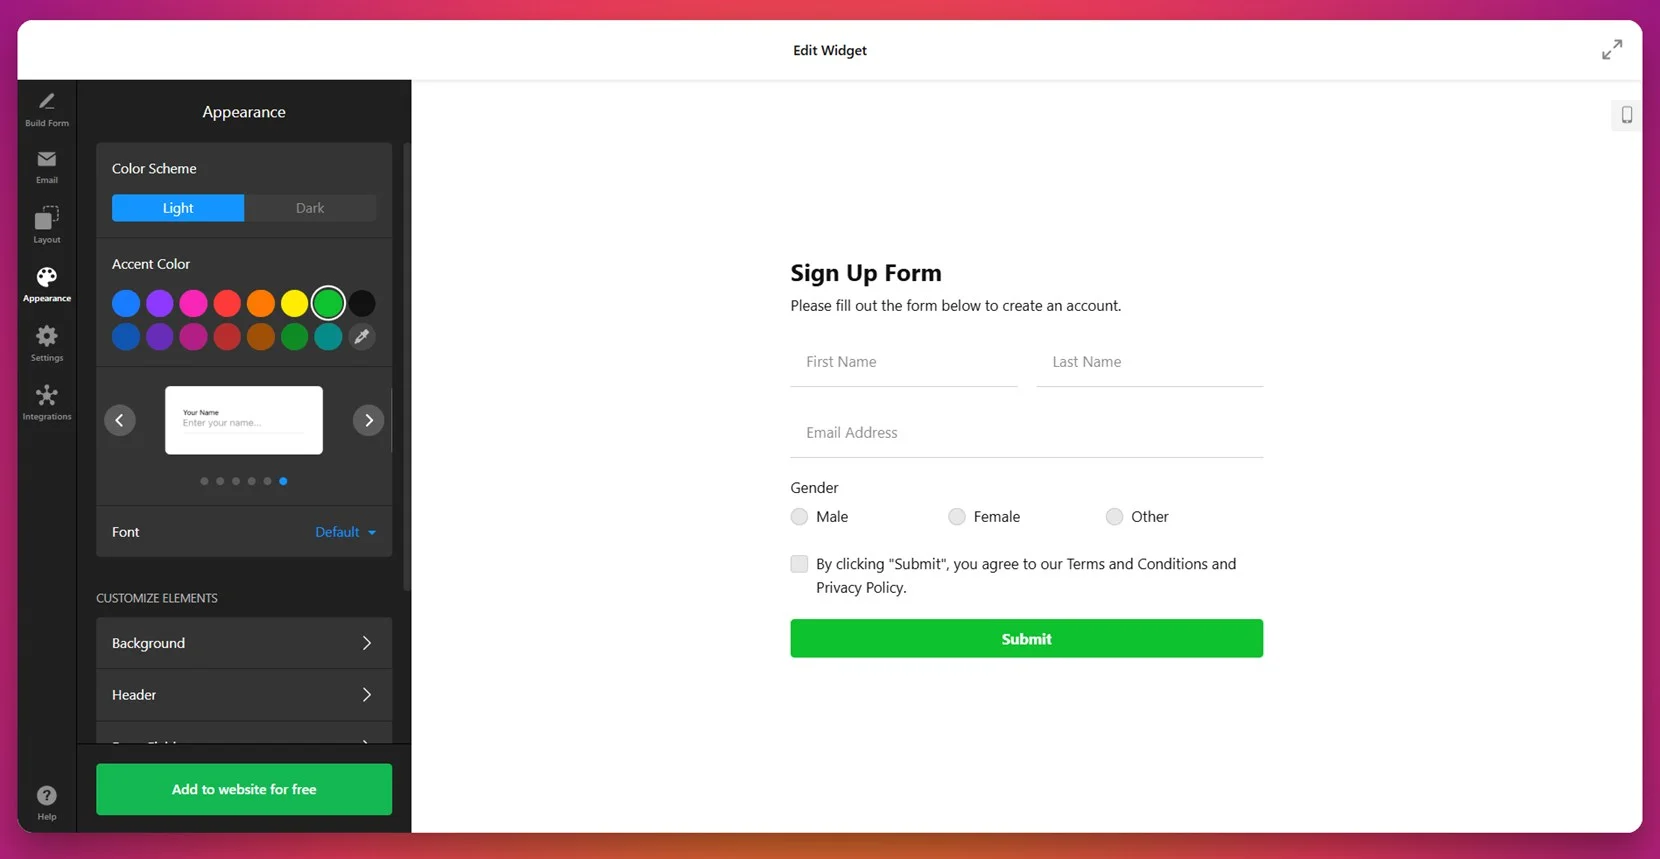
- Style the form appearance. Go to the “Appearance” tab to select a color scheme (light or dark), pick an accent color, and change font styles. Customize elements like background, header, and input field styles to match your branding.

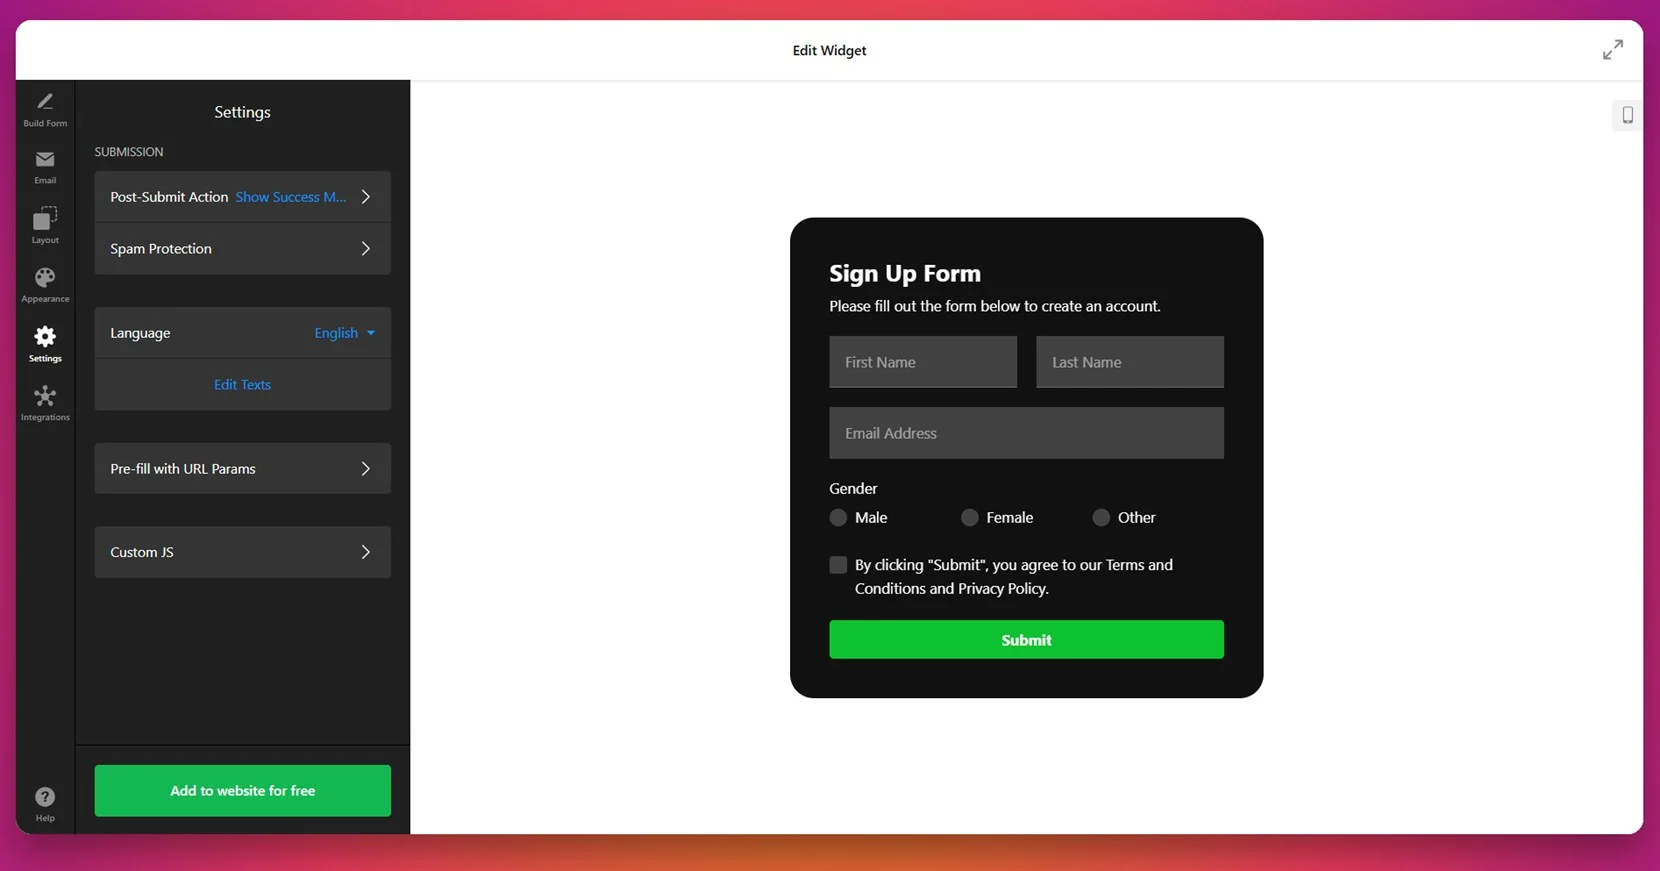
- Set final form behavior. In the “Settings” tab, configure the post-submit action (e.g., success message), enable spam protection, change language, and even add custom JavaScript if needed.

- Integrate with external services. Open the “Integrations” tab and connect your form to Mailchimp, Google Sheets, or Zapier to send collected data where you need it.

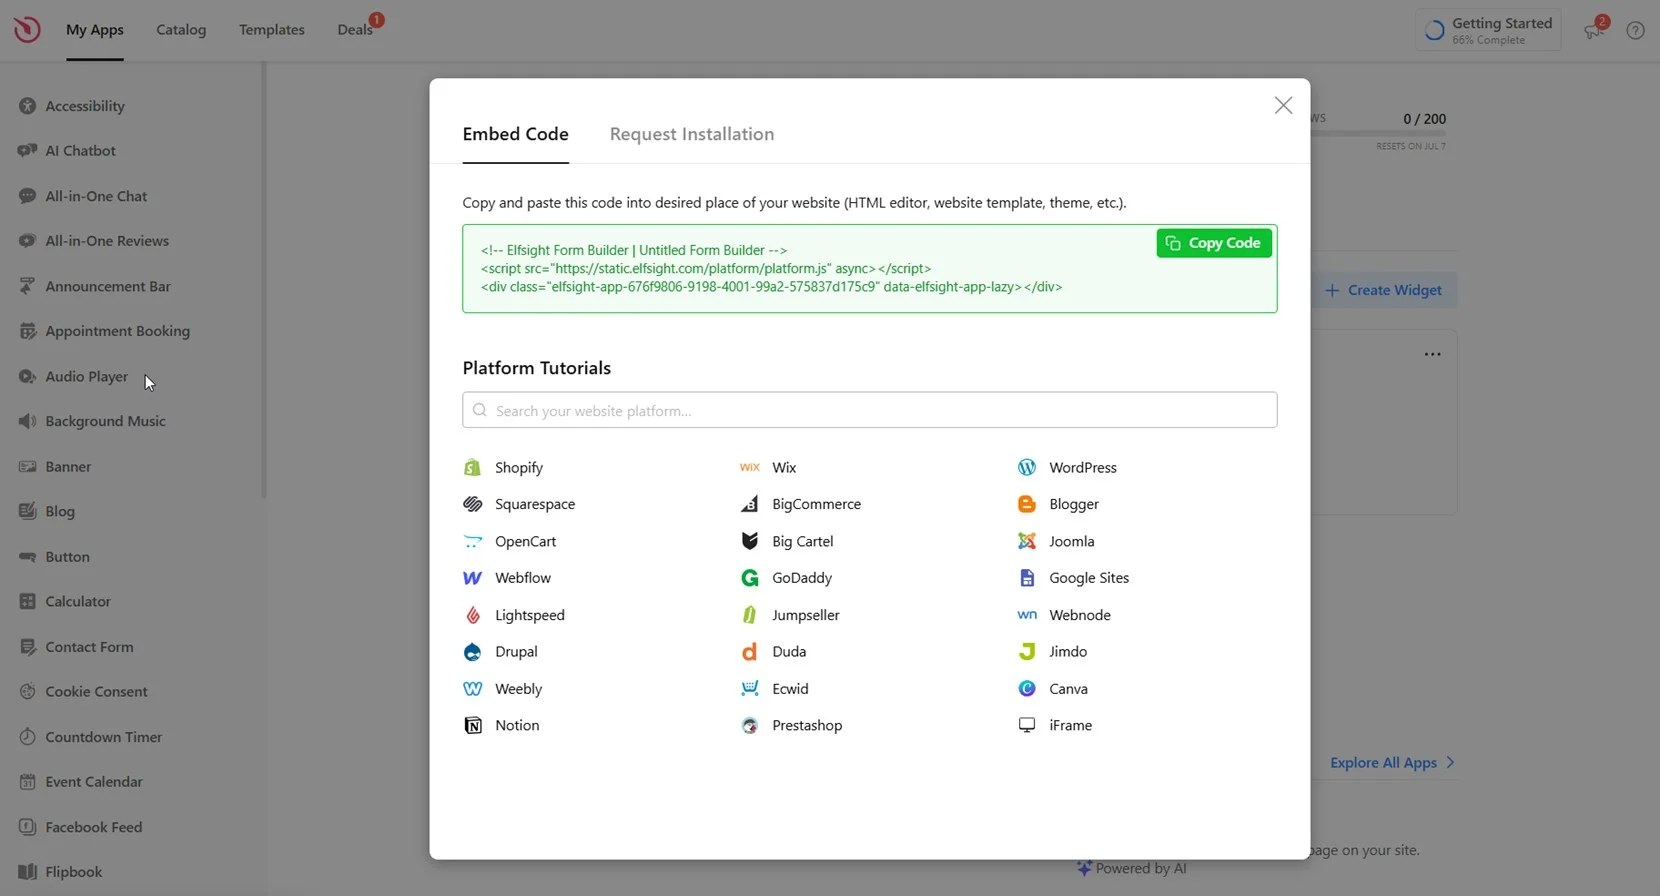
- Publish on your website. Click “Add to website for free” and copy the generated embed code. Paste this code into the appropriate place in your website’s HTML and save the changes.


This setup gives you full control over how your form works, looks, and connects to your existing marketing tools. It’s an all-in-one solution for collecting user signups efficiently.
If you’re exploring other ways to create or manage signup forms beyond this editor, the next section highlights alternative methods worth considering.
Other Methods to Add Signup Forms to Website
While Elfsight offers an all-in-one solution for creating and managing signup forms, there are other methods available depending on your platform and technical comfort. Below are several common alternatives used to embed web forms or set up website registration forms manually or through native builders. Each comes with its own setup flow, benefits, and constraints.
Using Manual HTML Form Integration
This method is suitable for users who prefer full control and are comfortable working directly with HTML. You can create a custom form manually and integrate it with your backend or an external service via form action endpoints.
- Write your HTML code. Start by creating a <form> element in your HTML file. Inside it, include fields like name, email, phone number, checkboxes for consent, and a dropdown menu if needed. Also, add a submit button to complete the form. Here’s an example:
<form action="/submit-form.php" method="POST"> <input type="text" name="name" placeholder="Your Name" required> <input type="email" name="email" placeholder="Your Email" required> <input type="tel" name="phone" placeholder="Your Phone"> <label> <input type="checkbox" name="consent" required> I agree to the terms </label> <select name="interest"> <option value="">Select an option</option> <option value="product">Product Updates</option> <option value="news">Newsletters</option> </select> <button type="submit">Submit</button> </form> - Set up the action URL. In the form’s action attribute, specify the server endpoint where the form data should be sent. Make sure the method is set to POST to securely handle user data. For example:
<form action="/submit-form.php" method="POST"> - Configure backend processing. Create a script in your backend language of choice—PHP, Node.js, or Python — to receive the form data. This script should read the form input, sanitize it to prevent security risks (like XSS or SQL injection), and optionally store it in a database or send it to an email address. For example, in PHP:
if ($_SERVER["REQUEST_METHOD"] === "POST") { $name = htmlspecialchars($_POST["name"]); $email = htmlspecialchars($_POST["email"]); // Store or process data here } - Add validation. To ensure users fill out the form correctly, include HTML5 validation attributes like required, type=”email”, or minlength. For more dynamic validation (e.g. real-time error messages), use JavaScript event listeners to validate data on the fly and provide immediate feedback before submission.
- Style the form. Use CSS to make the form blend seamlessly with your website’s design. You can style input borders, padding, button colors, fonts, and spacing. Responsive design can be achieved using CSS media queries or flexbox layouts for better mobile usability.
- Embed the form. Once complete, copy your entire form block (including the <form> tag, fields, and styling classes) and paste it into your website’s HTML where you want the form to appear. Make sure your backend file is properly hosted and accessible at the defined action URL.
This method gives maximum control over form logic, integrations, and appearance, and doesn’t rely on any external service or visual builder.
Using the Native Signup Form in WordPress
WordPress offers built-in support for forms through its default block editor or via its Jetpack plugin, which includes a basic form feature. This option is suitable for users managing their website via WordPress and preferring a native experience.
- Open the WordPress editor. From your WordPress dashboard, go to “Pages” or “Posts” and click “Add New” to create a new page, or select an existing one to edit using the block editor.
- Add a Form block. Click the “+” button in the editor to open the block inserter. Type “Form” in the search bar and select the “Form” block provided by Jetpack. Make sure Jetpack is installed and active.
- Choose the Signup Form type. After inserting the block, select a form template like “Newsletter” or “Signup” to begin with default fields.
- Customize fields. Click any form field to edit its label, placeholder, or input type. Add new fields such as dropdowns or phone number, or delete fields that aren’t needed.
- Style the form. Use the right-hand settings panel to adjust layout, spacing, colors, button style, and font size for a cohesive design.
- Publish the page. Click “Preview” to review the changes. Once ready, press “Publish” or “Update” to make the form visible on your website.
This method works well if you want a minimal, native WordPress experience without additional form plugins.
Using Google Forms for Signup
Google Forms is a free and quick option to set up a simple signup form and embed it into your website. It’s a good choice for basic data collection without design needs.
- Go to Google Forms. Visit forms.google.com and click the “Blank” form option or choose a pre-made template from the gallery to start creating your signup form.
- Set up your form fields. Enter a form title and description, then add fields such as name, email, phone number, and checkboxes by clicking the “+” button on the right sidebar. Choose appropriate field types like short answer or multiple choice as needed.
- Click Send. Once your form is ready, click the “Send” button in the top-right corner of the screen to open the sharing options.
- Adjust the size. In the embed tab (), set the desired width and height for how the form should appear when embedded into your website.
- Copy the embed code. Click the “Copy” button to copy the iframe embed code that Google generates for your form.
- Embed on your website. Paste the copied iframe code into your website’s HTML section or a dedicated embed block where you want the form to appear.
Google Forms is fast to launch and very accessible, making it a good temporary or entry-level option.
Comparison Table: Elfsight vs Other Methods
Here’s a quick comparison of different signup form solutions to help you evaluate which one works best for your website needs.
| Method | Pros | Cons |
|---|---|---|
| Elfsight Signup Form | Offers full design control, field flexibility, and third-party integrations in one place. | Requires embedding via a script, which some editors may restrict without full access. |
| Manual HTML Form | Gives complete control over logic, styling, and integration endpoints. | Requires backend knowledge and regular maintenance for stability and security. |
| WordPress Native Form | Built directly into the editor, making it easy for WordPress users to insert forms. | Requires Jetpack and lacks built-in integrations or advanced tracking features. |
| Google Forms | Fast, free, and doesn’t require registration or third-party setup. | Not suitable for brand-matching or seamless visual integration on professional websites. |
Each method offers a way to add a signup form depending on your goals and platform. However, if you want a balance of simplicity, customization, and functionality, Elfsight remains the most flexible and scalable option. In the next section, we’ll share some tips to help you get the best performance from your signup form.
Tips to Get the Most of the Online Signup Form
This section covers practical tips to help you embed and manage a signup form effectively on your website. These guidelines apply to any widget, regardless of platform or provider, and will help you improve the user experience, ensure better visibility, and increase conversions.
- Go to the Email tab of your form settings.
- Open Email Sender Settings and click Add Email Sender.
- Enter your SMTP server details, including your custom email address, SMTP host, port, username, and password.
Once saved, all outgoing emails (like new submissions or confirmations) will be sent from your branded domain — making your communications look more professional and trustworthy.
Here are more helpful tips for getting the most of your WordPress subscription form:
- Place the form in a high-visibility area. Position your signup form above the fold or within key content sections to ensure users see it without scrolling too much.
- Keep the form short and focused. Only request essential information. Forms with fewer fields tend to have higher completion rates and reduce user friction during the onboarding process.
- Use clear and persuasive CTAs. Replace generic buttons like “Submit” with action-driven phrases such as “Join Now” or “Get Started Free” to make the experience more engaging.
- Make sure it’s mobile-friendly. Test how the form looks and behaves on different devices. Adjust width and font sizes to avoid cut-off fields or unreadable text.
- Style the form to match your branding. Customize web forms easily by aligning fonts, colors, and buttons with your website’s theme. This improves trust and keeps the experience consistent.
- Display confirmation messages clearly. Always show users a success message or redirect them to a thank-you page after submission to confirm their action was received.
- Enable basic spam protection. Include reCAPTCHA or a simple verification step to prevent spam submissions without adding user frustration.
- Test before publishing. Check form behavior using multiple browsers and devices to catch alignment or functionality issues early.
These tips will help you set up a user-friendly, conversion-ready signup form. Now let’s explore who benefits most from using signup forms across different industries and use cases.
Who Needs Signup Forms: Use Cases
Signup forms are widely used across various industries to collect leads, build subscriber lists, and improve communication with users. Below are examples of how three key industries apply them effectively on their websites.
Application in SaaS and Tech Products 💻
SaaS companies and tech startups use signup forms to capture emails for beta signups, free trials, product updates, or onboarding flows. These forms are typically placed on homepage hero sections, pricing pages, or during in-app registration flows to streamline user acquisition and product access.
Application in Events and Conferences 📅
Event organizers use signup forms to manage attendee registrations, capture interest for upcoming events, and handle RSVPs. These forms are often used on event landing pages or ticketing portals and may include custom fields like session preference or meal selection.
Application in Real Estate 🏠
Real estate agents and agencies use signup forms to generate leads for property listings, offer viewing appointment requests, or subscribe users to listing alerts. Forms are usually integrated into property detail pages or floating in sidebars for quick lead capture.
As you can see, signup forms adapt to a wide range of business goals and customer journeys. In the next section, we’ll cover common problems you might encounter — and how to solve them.
Fixing Common Issues
Even though adding a signup form to your website is a straightforward task, several technical or user-related issues may arise. Below are the most frequent problems and how to address them effectively.
Why isn’t my signup form displaying on the website?
Why am I not receiving form submissions or notifications?
How can I fix styling issues with my embedded form?
What should I do if form data isn’t syncing with my integrations?
How do I prevent spam or bot submissions?
Why are users dropping off before completing the form?
Understanding and addressing these common issues will help keep your signup form functioning smoothly. Now let’s wrap up with a few final thoughts to reinforce what you’ve learned.
Conclusion
Adding a signup form to your website is one of the most efficient ways to capture leads, grow your audience, and streamline user engagement. With a wide variety of options — from manual HTML forms to drag and drop form builders — you can choose the approach that fits your workflow and technical comfort level. No matter the method, what matters most is creating a clear, user-friendly experience that aligns with your business goals.
We’ve covered everything from setup instructions to troubleshooting common issues, along with industry-specific use cases and best practices. With the right implementation, signup forms can become a powerful asset on your website, enhancing onboarding, conversions, and communication across the board.
Need More Info?
We hope this guide gave you everything you need to get started. If you’re looking to build smarter, cleaner web forms or have additional questions, contact us — our team is here to help. At Elfsight, we’re committed to offering powerful widget solutions tailored to your business goals.
We also invite you to join our Community, where users share strategies, feedback, and ideas. Got a feature request or enhancement suggestion? Drop it in our Wishlist — we’re always listening.