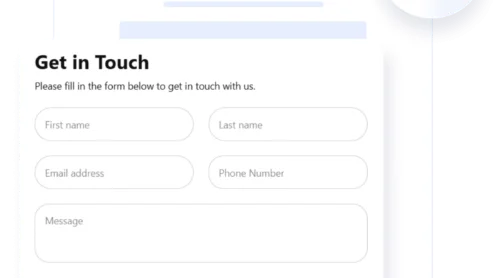
Integrating a Mailchimp form into your WordPress website is one of the fastest and most effective ways to grow your subscriber list. Whether you’re launching a newsletter, promoting offers, or building a community, embedding a Mailchimp contact form ensures you never miss a chance to connect with your visitors.
If you want a simple way to collect emails and automate your marketing efforts, a customizable form is exactly what your website needs. It lets you focus on building relationships while your system handles the lead generation.
- Boost subscriber growth effortlessly. A visible form on key pages helps turn visitors into subscribers with minimal effort.
- Automate email marketing from the start. New contacts are instantly added to your Mailchimp list, ready to receive your campaigns.
- Improve engagement and conversions. Personalized messages and offers reach the right audience at the right time, increasing interaction.
- Maintain full design control. Customizable layouts and styles allow your form to match your branding without technical headaches.
- Streamline data collection and management. All sign-up data is securely stored and synced with your Mailchimp account in real time.
Now let’s see how you can create this kind of form in just a few minutes using Elfsight’s no-code solution.
Build a WordPress Mailchimp Form in Minutes
Once you’ve seen the benefits of a Mailchimp form, the next step is to create one. Elfsight’s Mailchimp forms make this process quick and beginner-friendly, so you can launch your survey in just a few clicks — no coding required.
- Open the Elfsight editor and choose a Mailchimp form template that suits your purpose.
- Customize the layout, spacing, header, and alignment to fit your website’s structure.
- Adjust the colors, fonts, and background to match your branding style.
- Click “Add to website for free”, copy the generated code, and paste it into your WordPress backend.
This streamlined process gives you full control over your form’s appearance and performance without the complexity of manual setup. Whether you’re running a blog, store, or portfolio, adding a branded form helps you grow your email list while keeping the experience seamless for visitors.
See the plugin in action – build your Mailchimp Form with ease!
Features of the Elfsight Mailchimp Form Builder
Now that you know how easy it is to create a Mailchimp form using Elfsight, let’s look at the key features and benefits that make this solution a smart choice for any WordPress website.
- Instant integration with Mailchimp. Forms automatically sync with your Mailchimp account, saving you from manual list updates.
- Customizable design for any layout. Choose from various templates and layouts to match the look and structure of your pages.
- Drag-and-drop builder with no coding. Build and edit forms easily with a visual editor — no technical skills required.
- Flexible form field setup. Add, remove, or reorder fields to collect exactly the data you need from your visitors.
- Seamless dashboard management. View, sort, and manage all form submissions directly in your Elfsight panel.
- Mobile-optimized by default. Every form works flawlessly on both desktop and mobile without additional tweaks.
- Easy embedding for WordPress users. Just copy and paste the embed code — no plugins or complex setup involved.
These features are designed to simplify form integration and help you grow your mailing list automatically. Next, let’s walk through the full process of creating and embedding your form step by step.
How to Add Mailchimp Form to WordPress: Step-by-Step
Once you understand the core features, it’s time to walk through the full setup. With Elfsight, you can easily create and customize a Mailchimp signup form and add it to your WordPress website in just a few steps. Here’s how to do it using the widget editor.
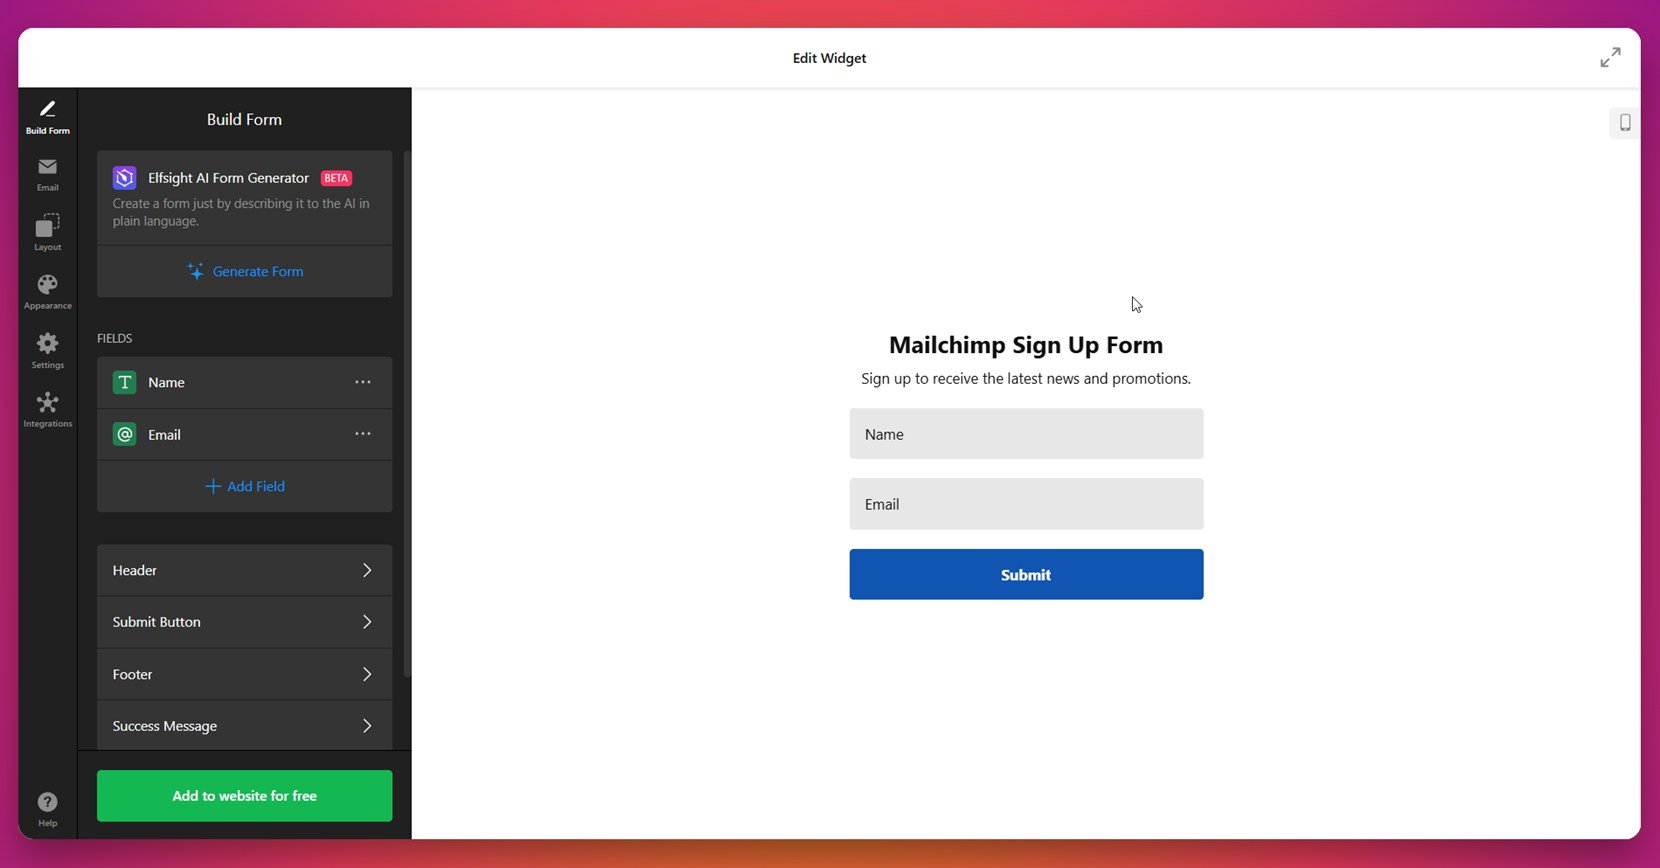
- Start by building the form. Open the Elfsight Form Builder and choose a Mailchimp-ready template. You can either create your form using the AI Form Generator or build it manually.

- Set up email notifications. Go to the “Email” tab. Enable “Notify Me” to receive alerts when someone fills out your form, and use “Notify Respondents” to send automated confirmation emails to new subscribers.

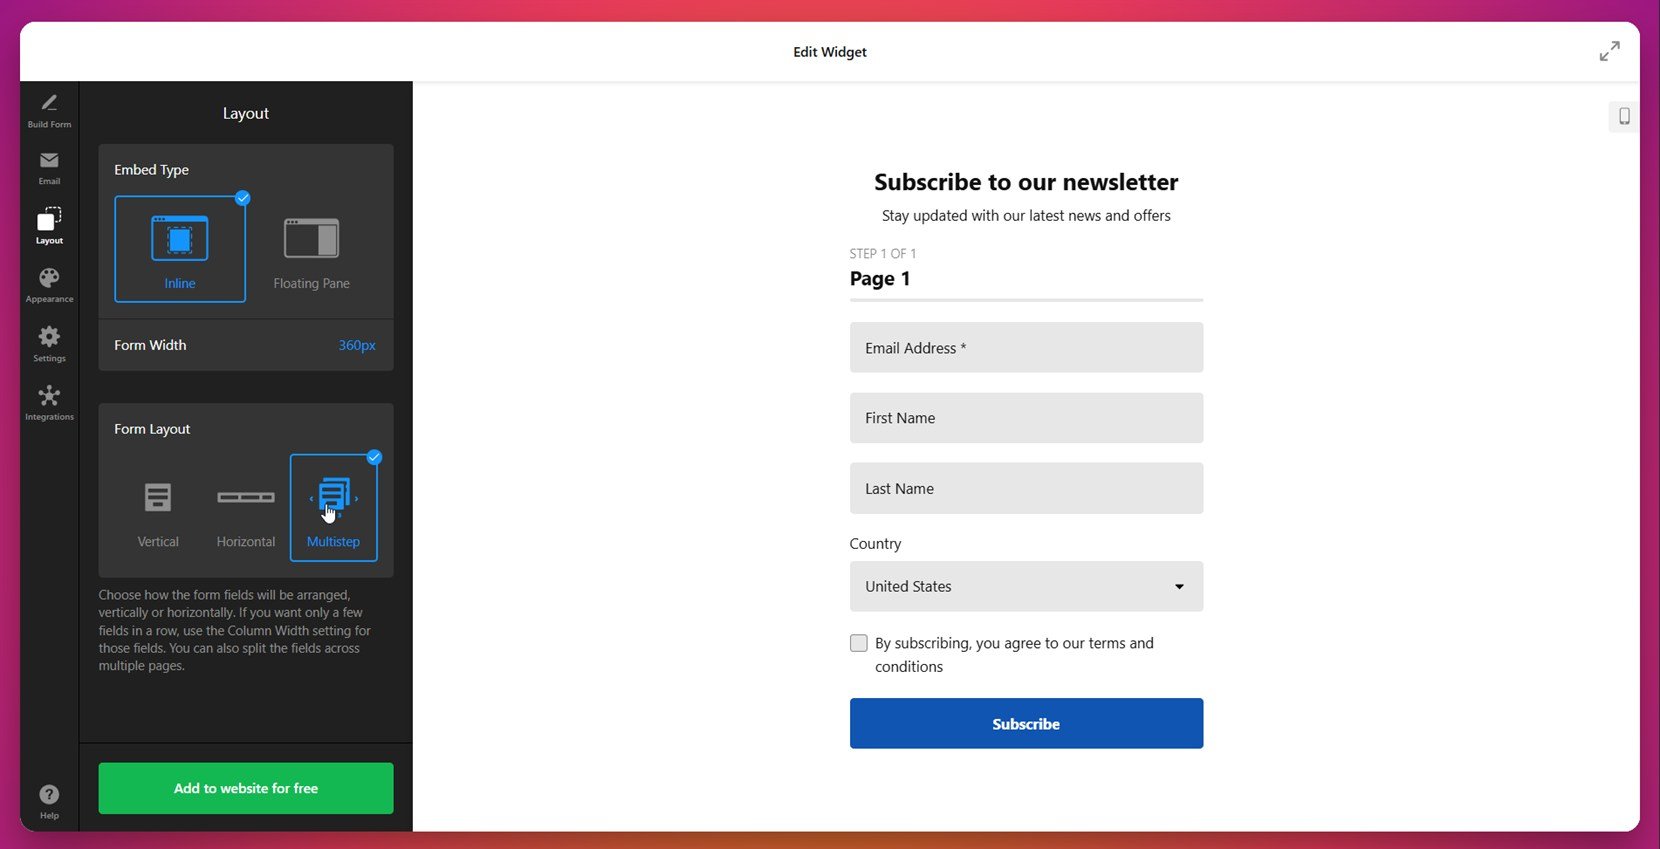
- Adjust the form layout. Open the “Layout” tab to choose the form’s position (inline or floating) and select how it will be displayed — vertical, horizontal, or multistep. This ensures better flow and higher completion rates.

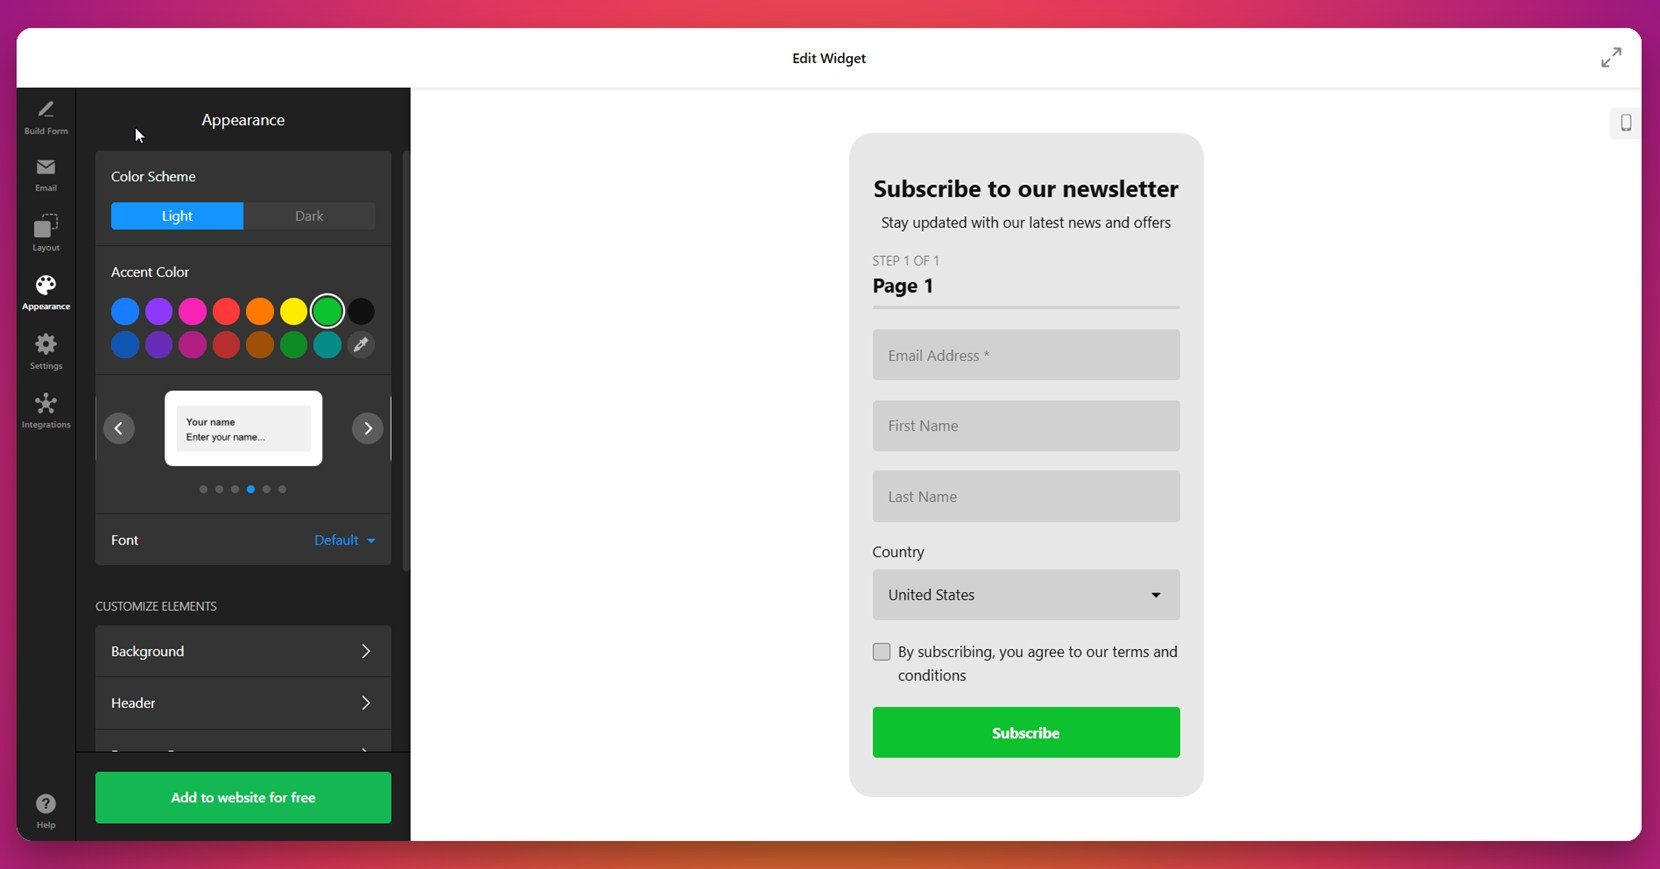
- Customize the visual appearance. Head to the “Appearance” section to apply a color scheme, select an accent color, and adjust font settings. You can fine-tune elements like background, headers, and spacing to align with your branding.

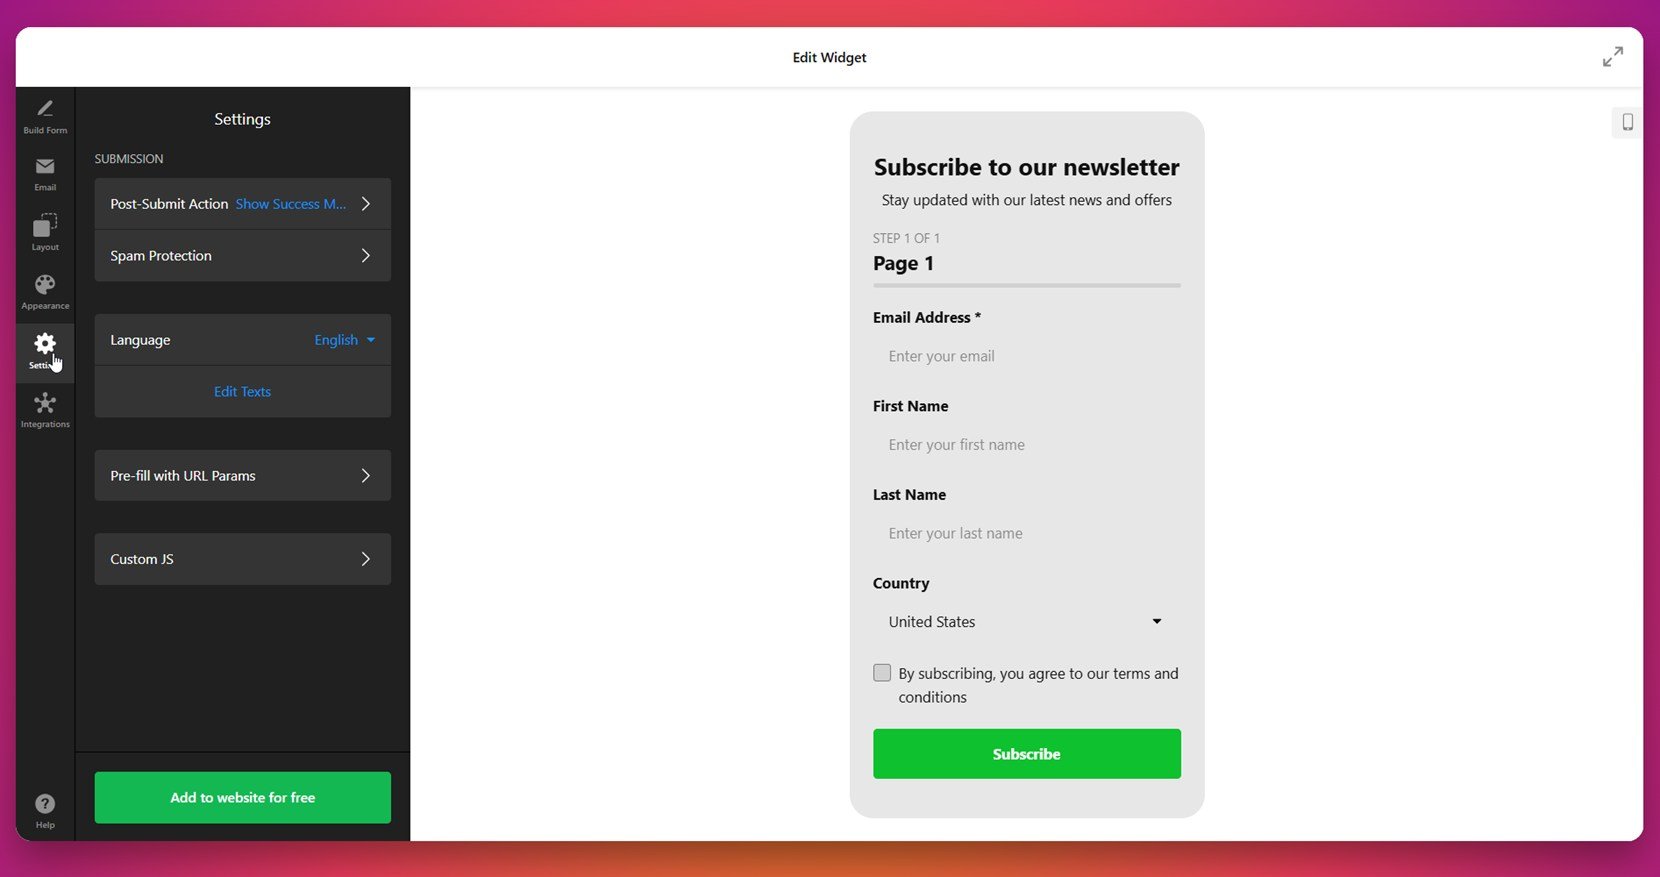
- Configure advanced settings. Under the “Settings” tab, choose what happens after submission, enable spam protection, set your preferred language, and optionally pre-fill fields using URL parameters.

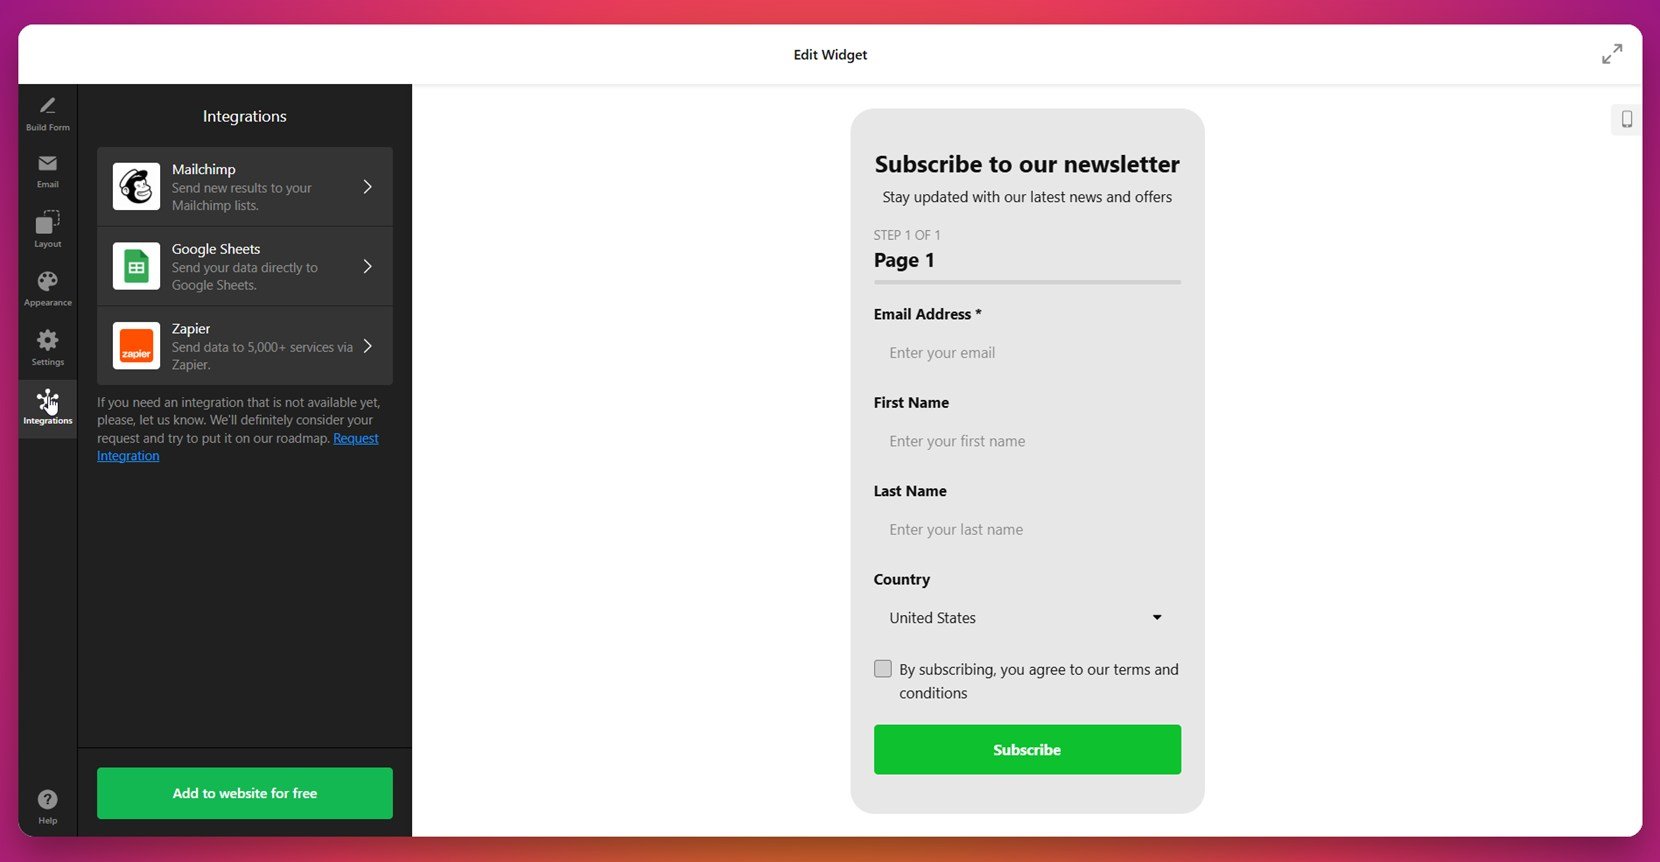
- Connect your integrations. Go to the “Integrations” tab and connect Mailchimp to automatically sync collected emails. You can also enable Google Sheets or Zapier to route data elsewhere.

- Embed the widget into WordPress. Click “Add to website for free”, copy the provided embed code, and paste it into your WordPress page. Save the changes and publish your updated page.


To add the Elfsight Mailchimp form to your WordPress website, you don’t need any plugins or developer help. Simply open the WordPress editor for the page or post where you want the form to appear. Add a new Custom HTML block, paste in the embed code you copied from Elfsight, and save your changes. You can also place the form in your sidebar or footer using a widget block in the WordPress Appearance settings.
This setup gives you a flexible and powerful form tailored to your audience and business goals, fully integrated with your Mailchimp email automation strategy.
With your Mailchimp form now live on your WordPress website, you’re ready to start collecting leads and engaging subscribers more effectively. If you’re curious about alternative setup methods, keep reading — we cover that in the next section.
Other Ways to Connect Mailchimp Forms with WordPress
To insert a Mailchimp form into your WordPress website besides using Elfsight, there are a few native and manual options worth considering. These methods may involve more setup but still allow you to collect subscribers effectively. Below are two popular alternatives: using Mailchimp’s official embed code and connecting via WordPress’s Mailchimp block (available in certain themes or via Jetpack).
Manual Code Writing Method
You can manually embed a Mailchimp signup form on your WordPress website by using a snippet of HTML code generated inside your Mailchimp account. This approach provides direct access to native Mailchimp functionality without relying on any third-party tool or plugin, making it suitable for users comfortable working with code.
- Log in to your Mailchimp account. Go to mailchimp.com and sign in. Once inside the dashboard, navigate to your audience list.
- Navigate to the audience section. In the left-hand menu, select “Audience”. If you have multiple lists, choose the one you’d like to grow with this form.
- Open the signup form tools. Click on “Manage Audience” and select “Signup forms”. This section provides several options for collecting subscribers.
- Choose “Embedded forms”. From the available form types, select “Embedded forms”. A base version of your form will appear, ready for customization.
- Configure the form layout. Use checkboxes to adjust visible fields, enable or disable titles, required field indicators, or add reCAPTCHA. The live preview will reflect your choices instantly.
- Copy the embed code. Once your form looks how you want it, copy the HTML code generated below the preview box. This is the code you’ll use to embed the form on your WordPress page.
- Paste it into your WordPress editor. Open the desired page or post in WordPress. Add a new “Custom HTML” block, then paste in the code you copied from Mailchimp.
- Preview and publish the form. Check how the form looks in the page preview. If everything appears correctly, save or publish your changes to make the form visible on your live website.
Using the embed code gives you complete control over what fields to show and connects directly to your Mailchimp audience, but it requires basic knowledge of how to handle HTML and page layout issues.
Block Editor Method
Adding a Mailchimp form using the Gutenberg block editor is a quick and code-free option that integrates directly within WordPress. It’s especially useful for those working with Mailchimp-compatible plugins or themes, such as Jetpack, and looking for a simplified setup.
- Install a Mailchimp-compatible plugin or theme. Ensure your WordPress installation includes support for Mailchimp blocks. Jetpack is one of the most common plugins that offers this feature. Install and activate it if it’s not already in use.
- Open the WordPress page editor. Navigate to “Pages” or “Posts” in your WordPress dashboard, and choose the page where the form should appear. Click “Edit” to open the Gutenberg editor.
- Insert the Mailchimp block. Use the block inserter to search for “Mailchimp”. Select the Mailchimp block from the results and add it to your content.
- Connect to your Mailchimp account. A prompt will appear asking you to log in and authorize access. Complete this step to sync your Mailchimp account with the form block.
- Customize the form layout. Select which fields to include, such as name and email, and adjust labels, button text, or alignment as needed. Some basic styling options may also be available depending on your theme.
- Publish the page. Use the preview button to check the form’s appearance, then click “Publish” or “Update” to make it live on your website.
This approach is efficient for quick deployments and works well within the native editor, but its flexibility is limited by the functionality built into the block and your theme’s support.
Comparison of Mailchimp Integration Methods
Below is a comparison of Elfsight and the alternative methods available for embedding Mailchimp forms into a WordPress website. Each method has its strengths, but Elfsight provides the most control and simplicity in one solution.
| Method | Pros | Cons |
|---|---|---|
| Elfsight Form Builder | Offers full customization, seamless Mailchimp sync, and visual editor with no coding required. | Requires copying and pasting third-party embed code into the WordPress editor. |
| Mailchimp Embed Code | Directly uses Mailchimp’s native form and integrates with your audience list immediately. | Limited design options and requires manual HTML/CSS adjustments for styling. |
| WordPress Mailchimp Block | Easy to use inside WordPress editor with simple configuration. | Only available through specific plugins or themes; offers minimal layout flexibility. |
While these methods get the job done, Elfsight stands out as the most versatile and user-friendly option for adding a Mailchimp form to any WordPress page. Let’s now explore some practical tips to get the best results from your form integration.
Tips to Make Your Forms Work Better
To make the most of your embedded Mailchimp form — regardless of the tool you choose — it’s important to follow some best practices that enhance functionality, responsiveness, and visibility across your WordPress website. Here are the key things to keep in mind when adding and managing any type of form widget:
- Place your form where it’s easy to spot. Position it above the fold or inside the sidebar so that visitors don’t need to scroll or search to find it.
- Use a responsive layout. Always test your form on mobile and tablet devices. Choose designs that scale properly across screen sizes to avoid losing potential subscribers.
- Don’t overload the form with fields. Keep the number of fields minimal. Only ask for essential details like name and email unless more data is critical to your process.
- Check email integration regularly. Even if the form appears to work, check your connected email service for new contacts to ensure the sync is functioning correctly.
- Embed cleanly using WordPress blocks or HTML widgets. Avoid adding forms in areas that may conflict with other scripts or elements, such as inside pop-ups managed by external plugins.
- Enable confirmation or success messages. Let users know their submission was successful with a custom message or redirect. This builds trust and improves the experience.
- Use proper contrast and font size. Make sure form fields, labels, and buttons are readable and visually distinct from the rest of your content.
These simple yet effective practices help ensure that your form performs well and delivers results. In the next section, we’ll look at real examples of who can benefit from using embedded Mailchimp forms and how different industries apply them.
Who Can Benefit from Mailchimp Forms: Use Cases
Mailchimp signup forms are used across many industries to streamline email marketing and subscriber collection. Below are key sectors where this widget delivers strong value and practical benefits for business growth.
Application in eCommerce and retail 💰
Online stores use Mailchimp forms to grow customer email lists, promote discounts, and send abandoned cart reminders. Placing a form on the homepage, product pages, or checkout areas helps turn visitors into subscribers, encouraging future purchases and loyalty.
Application in media and content platforms 📰
Blogs, online magazines, and newsletters use signup forms to build loyal readerships. Forms are typically embedded within article pages or displayed as popups to encourage readers to subscribe for updates, exclusive stories, or gated content.
Application in education and online learning 🎓
Educational institutions and course creators use Mailchimp forms to share enrollment details, course updates, and free learning materials. Forms placed on course landing pages or inside learning dashboards help educators maintain communication with current and prospective students.
As you can see, whether you’re in retail, publishing, or education, embedding a Mailchimp form into your WordPress website helps you capture interest and build ongoing relationships with your audience. Now, let’s address some common problems you might face and how to solve them quickly.
Troubleshooting Possible Issues
While adding a Mailchimp form to a WordPress website is generally smooth, a few technical or setup issues may arise. Below are common problems users encounter, explained in an FAQ format for quick troubleshooting.
Why isn't my Mailchimp form showing up on my WordPress page?
Why does my form look broken or misaligned?
Why aren’t form submissions reaching my Mailchimp list?
Can I use multiple Mailchimp forms on the same website?
How do I know if the form works on mobile?
By addressing these frequently asked questions, you’ll ensure that your Mailchimp form performs reliably on your WordPress website.
Conclusion
Adding a Mailchimp signup form to your WordPress website is a practical way to grow your email list and connect with your audience in a meaningful way. Whether you’re using a visual builder, embedding native code, or opting for advanced customization, the key is to ensure the form is well-placed, responsive, and integrated correctly with your Mailchimp account.
From selecting the right method to troubleshooting display and syncing issues, this guide covered everything you need to know to confidently publish a working form on your website. With the right setup and placement, you can streamline subscriber collection and enhance your marketing strategy from day one.
Looking for More Guidance?
We hope this walkthrough gave you the clarity you needed. If you’re ready to take things further, reach out to us and discover how to build the perfect Mailchimp form for your WordPress website. At Elfsight, our mission is to help you succeed with a smooth, intuitive widget experience.
Join our growing Community to exchange ideas, discuss new features, and suggest improvements. If you have a feature in mind, don’t hesitate to add it to our Wishlist — we’re building Elfsight together with you.