Adding an Instagram feed to your Webflow website is one of the most effective ways to keep your content fresh, visual, and socially connected. Whether you want to build trust, showcase real-time updates, or highlight your brand’s personality, embedding Instagram helps you do it all with minimal effort.
If you’re looking for a way to enhance your website’s visual appeal while boosting engagement, an Instagram Feed widget is exactly what you need. It not only displays your latest posts but also connects your visitors to your social presence without requiring them to leave your platform.
- Boosts visual engagement. Embedding your Instagram photos adds a dynamic and visually appealing element to your pages, helping capture attention immediately.
- Keeps your content updated automatically. Every time you post on Instagram, the feed on your website updates in real-time, saving you time and effort.
- Strengthens brand credibility. Showcasing authentic images, customer stories, and social proof builds trust and encourages conversions.
- Increases time on page. A live photo gallery encourages visitors to scroll through your content, keeping them engaged longer.
- Drives more followers and interaction. A visible Instagram feed naturally promotes your social channel, helping grow your following and engagement outside the website.
This makes the Instagram widget a powerful addition for any business aiming to merge content, branding, and social proof. In the next section, we’ll show you the quick way to Webflow Instagram integration using Elfsight’s no-code solution.
Add Instagram Feed to Webflow: Quick Solution
Now that you know why an Instagram widget is a valuable asset for your Webflow website, let’s go over how to quickly create one using Elfsight. The process is fast, intuitive, and requires no coding.
- Open the Elfsight editor and select the Instagram Feed widget template.
- Choose a layout style and adjust display settings like post spacing, width, and header visibility.
- Customize the colors, font, and design elements to match your website’s branding.
- Click “Add to website for free”, copy the integration code, and paste it into your Webflow project.
See the widget in action – build your Instagram Feed in minutes!
Features of Elfsight Instagram Widget
Once your Instagram widget is created, Elfsight gives you full control over how it looks and performs on your Webflow website. The widget is packed with flexible display options, styling features, and automation to ensure your feed looks stunning and stays updated at all times.
Here are the key features and benefits that make Elfsight a top choice for embedding Instagram content:
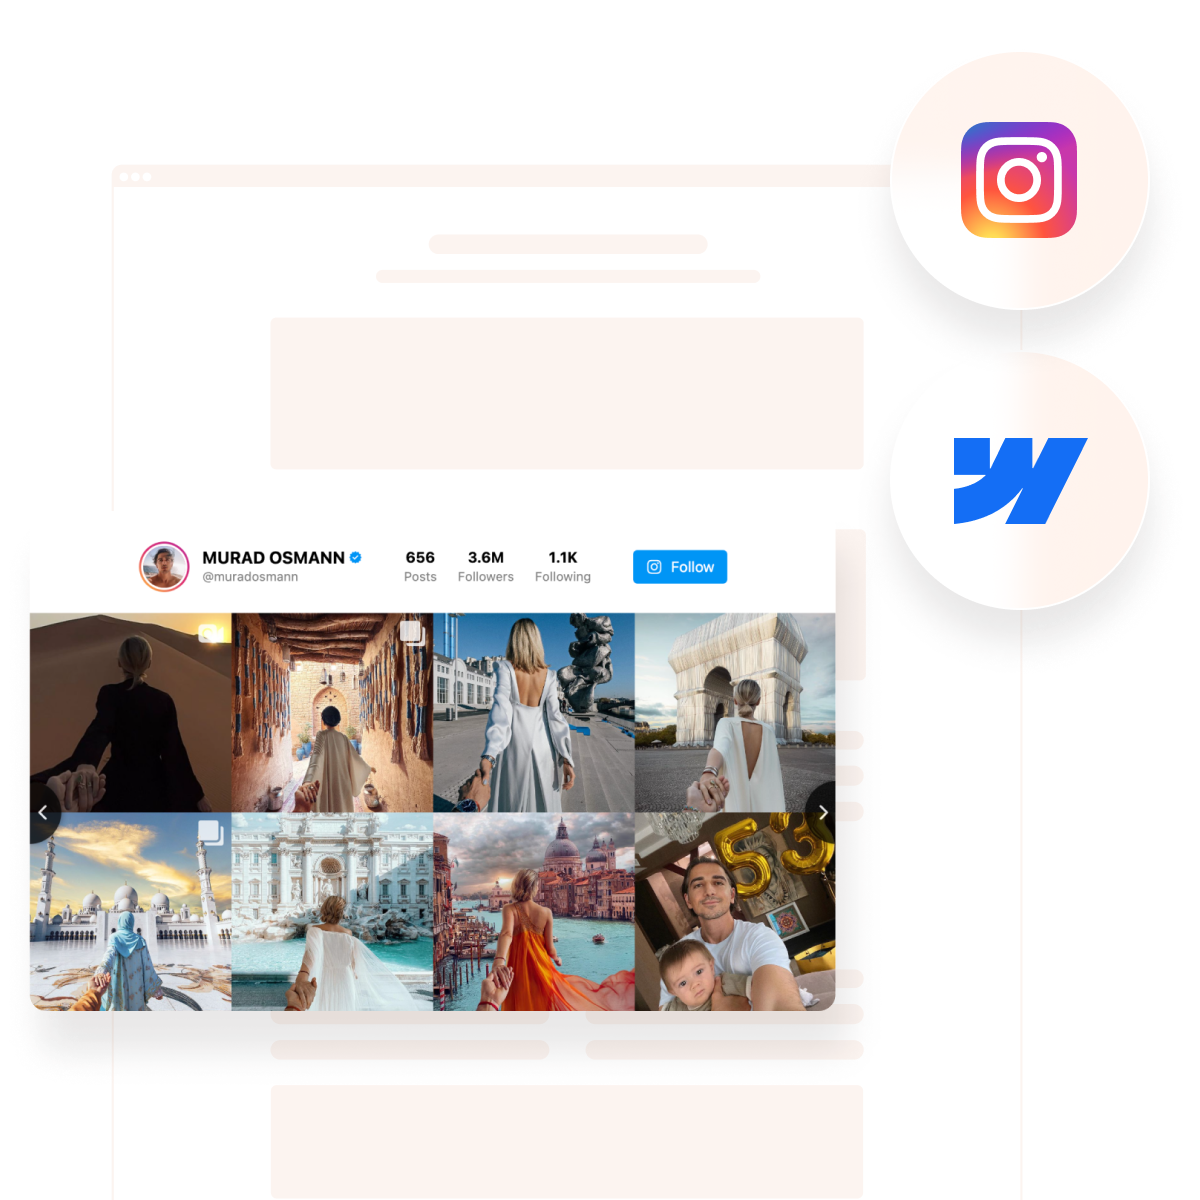
- Multiple layout options. Choose from grid, slider, or masonry to create a visual post display that fits your website’s structure perfectly.
- Content moderation. Hide specific posts manually or use filters to control what content appears in your social media feed.
- Responsive design. The widget looks great on any screen size and seamlessly adjusts across mobile, tablet, and desktop devices.
- Customization flexibility. Tweak colors, fonts, post spacing, and more to match your website’s design and branding.
- Automatic updates. Your feed stays current with no manual updates needed — new posts from Instagram appear instantly.
- Header and profile display. Highlight your Instagram account name, profile picture, and follower count for added credibility.
- No coding required. Integration takes just a few clicks and doesn’t require any development work or advanced knowledge.
With these features, Elfsight makes it easy to present a clean, engaging, and automated Instagram showcase on your Webflow website. Next, let’s walk through the full installation process step by step.
How to Embed Instagram in Webflow: Step-by-Step
Once you’ve explored what the Instagram widget can do, it’s time to embed your Instagram feed in Webflow. Below is a full walkthrough for building and customizing the widget using Elfsight’s editor. This process ensures seamless Webflow Instagram integration, allowing you to display real-time Instagram content directly on your website.
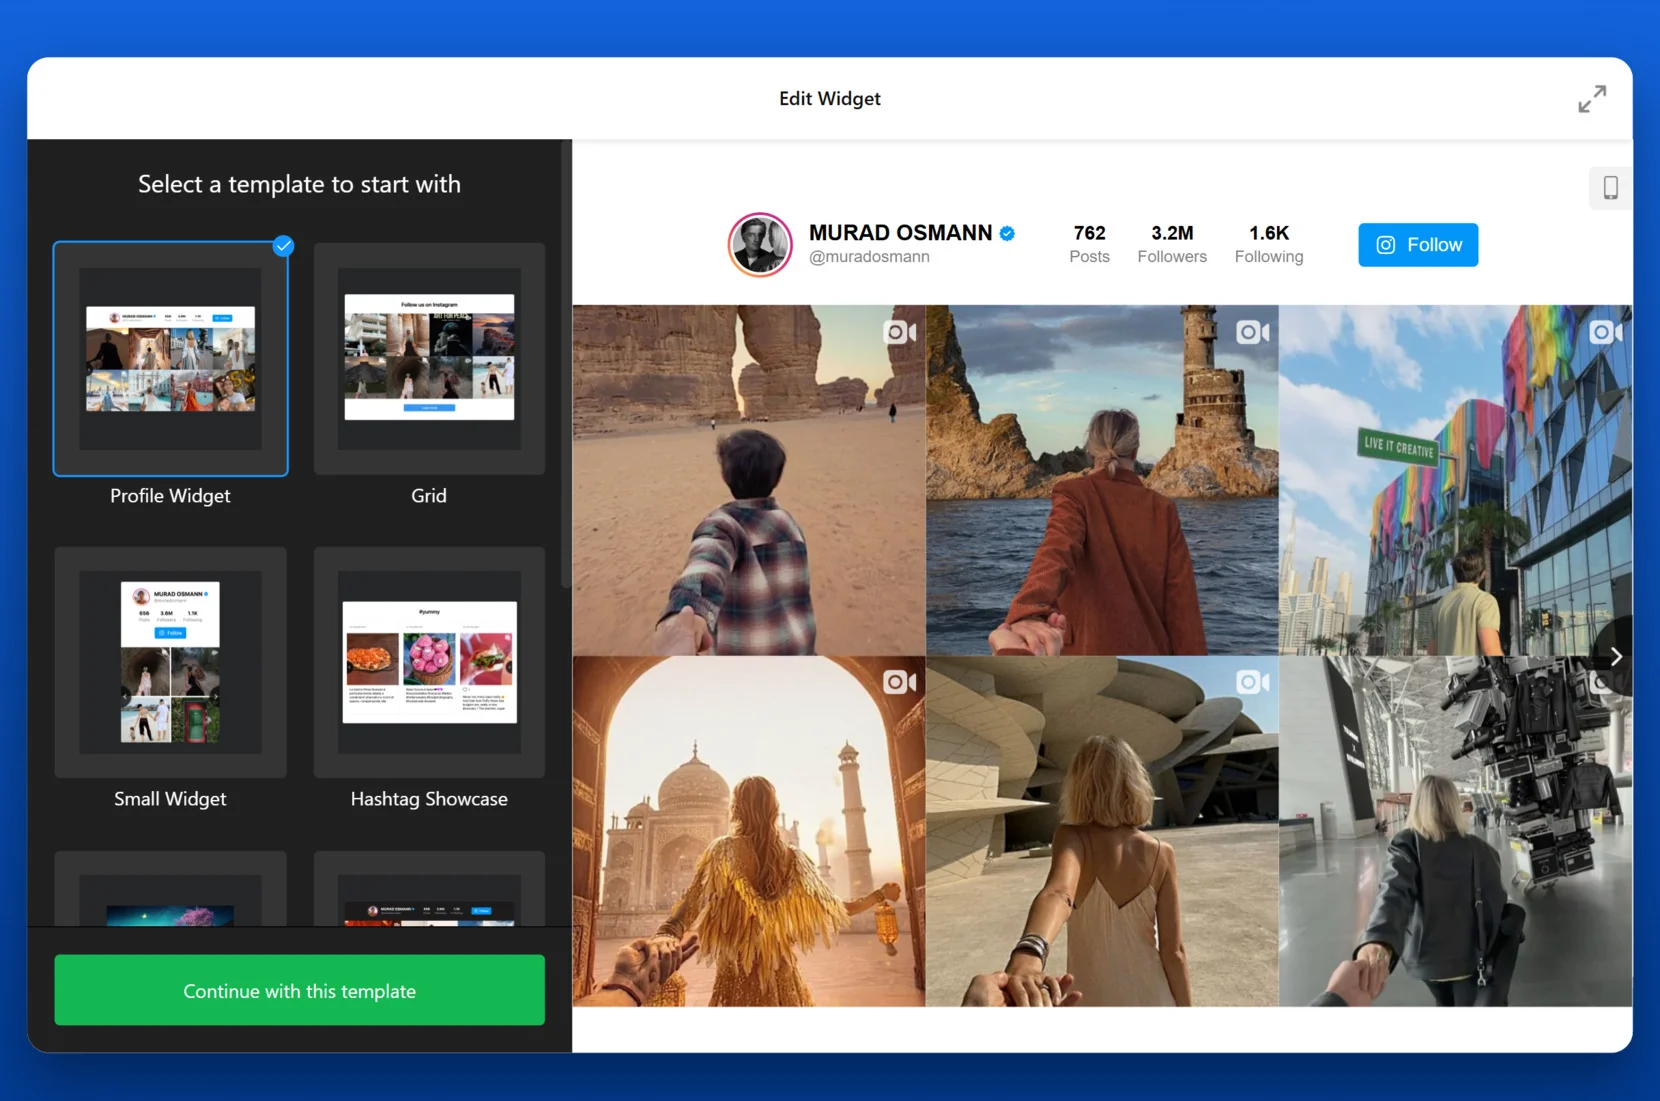
- Choose a template. Start in the editor by selecting a widget type. Click “Continue with this template” to move forward.

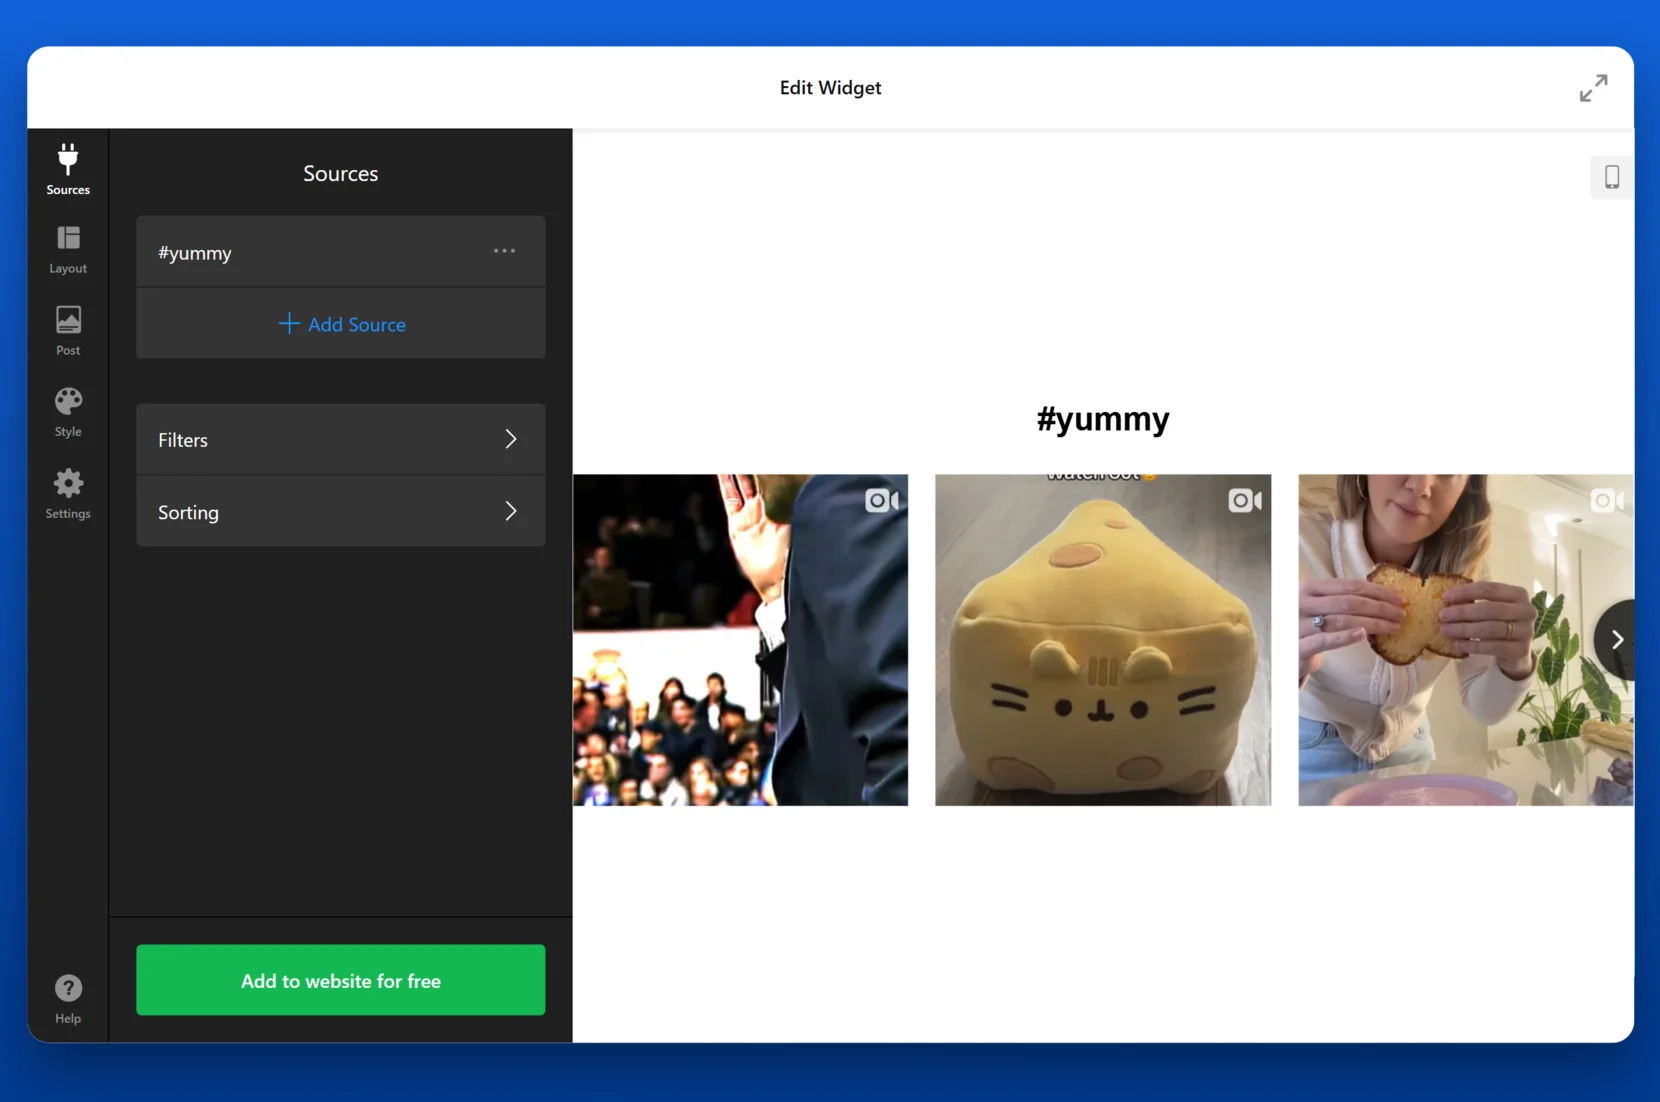
- Add your source. In the “Sources” tab, click “Add Source” and enter a profile handle or hashtag. This connects your widget to the content you want to showcase.

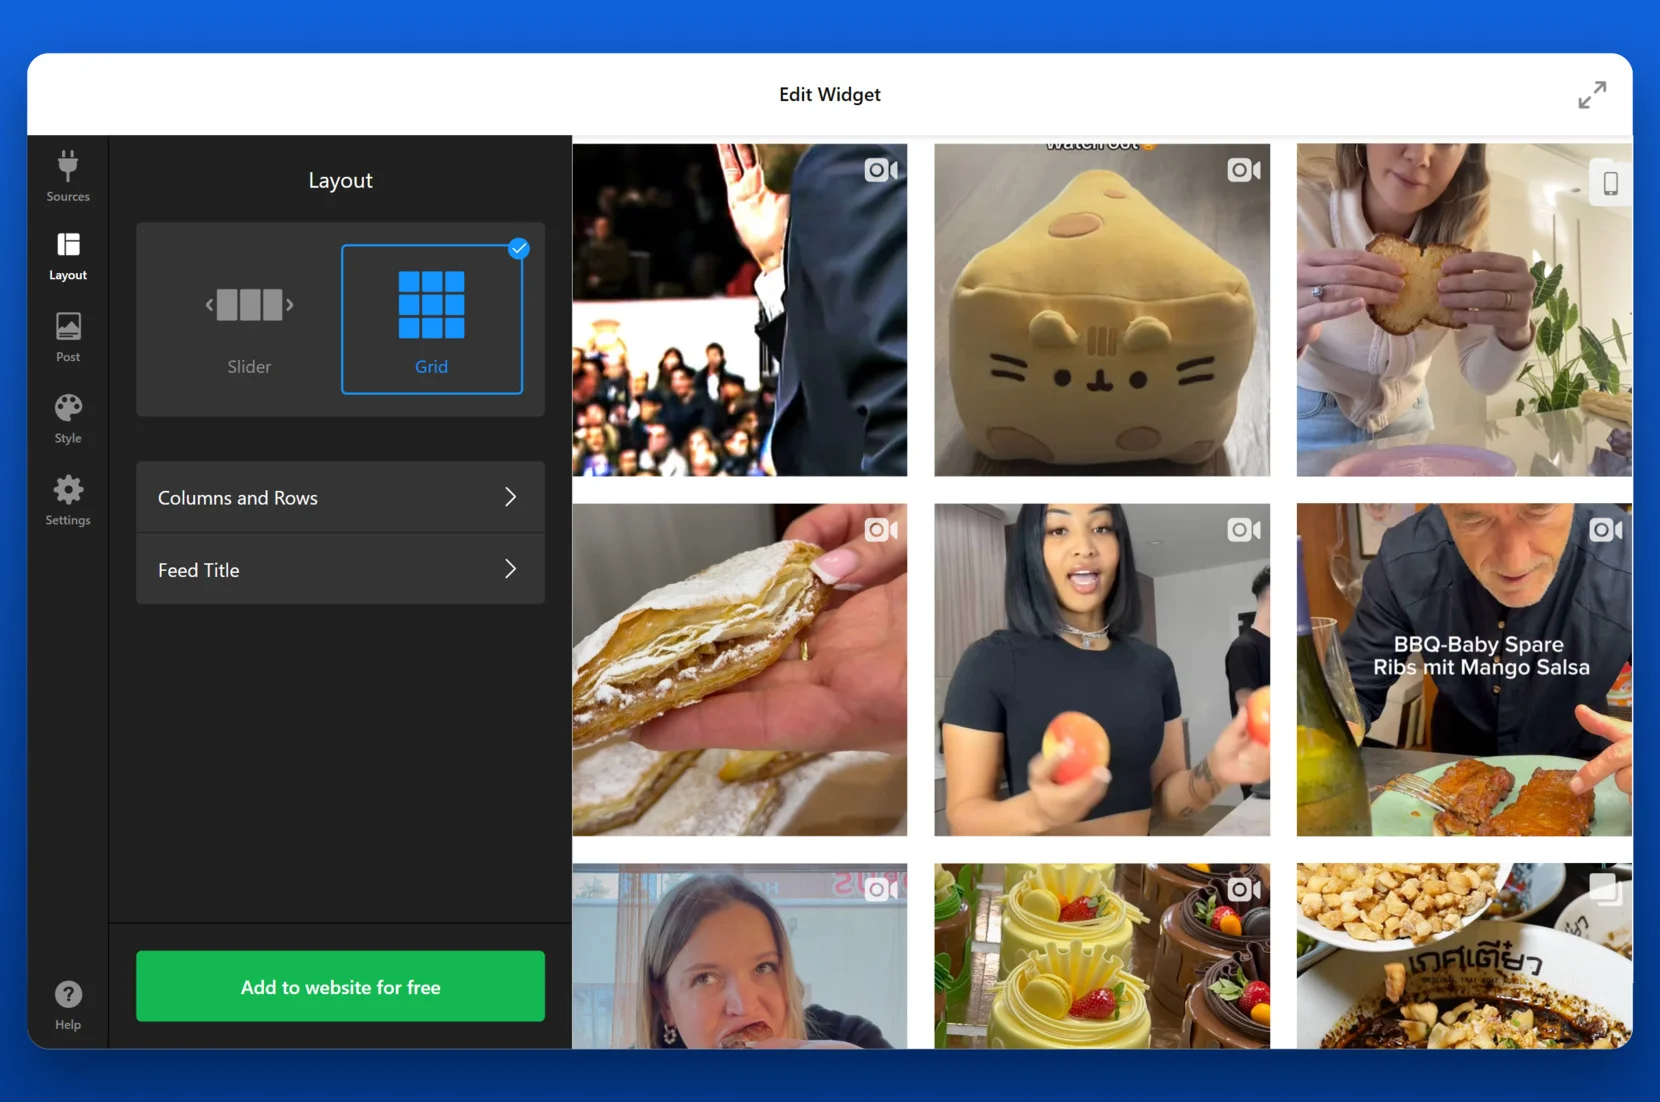
- Customize the layout. Go to the “Layout” tab and choose your preferred format, such as Grid or Slider. Use the layout settings to define column and row structure and control visibility of the feed title.
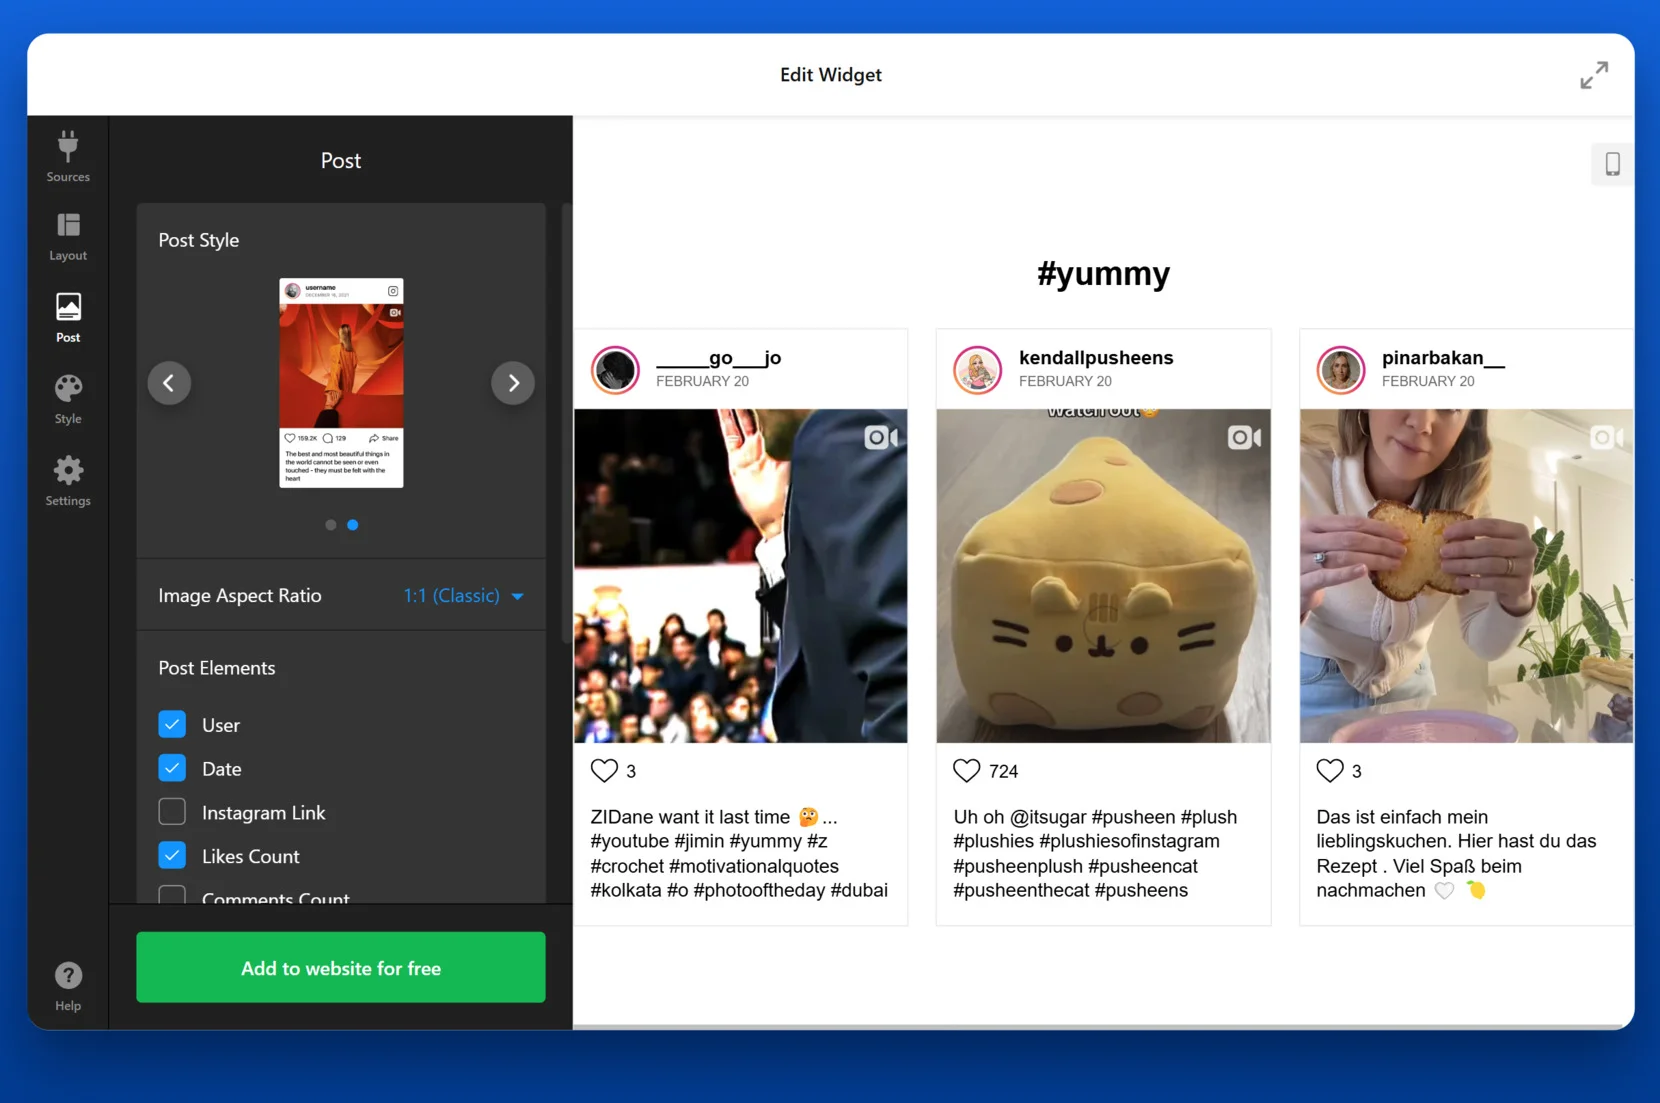
- Set post configurations. In the “Post” tab, pick the post style and aspect ratio. You can toggle elements like username, post date, likes, comments, and Instagram links to display or hide them.

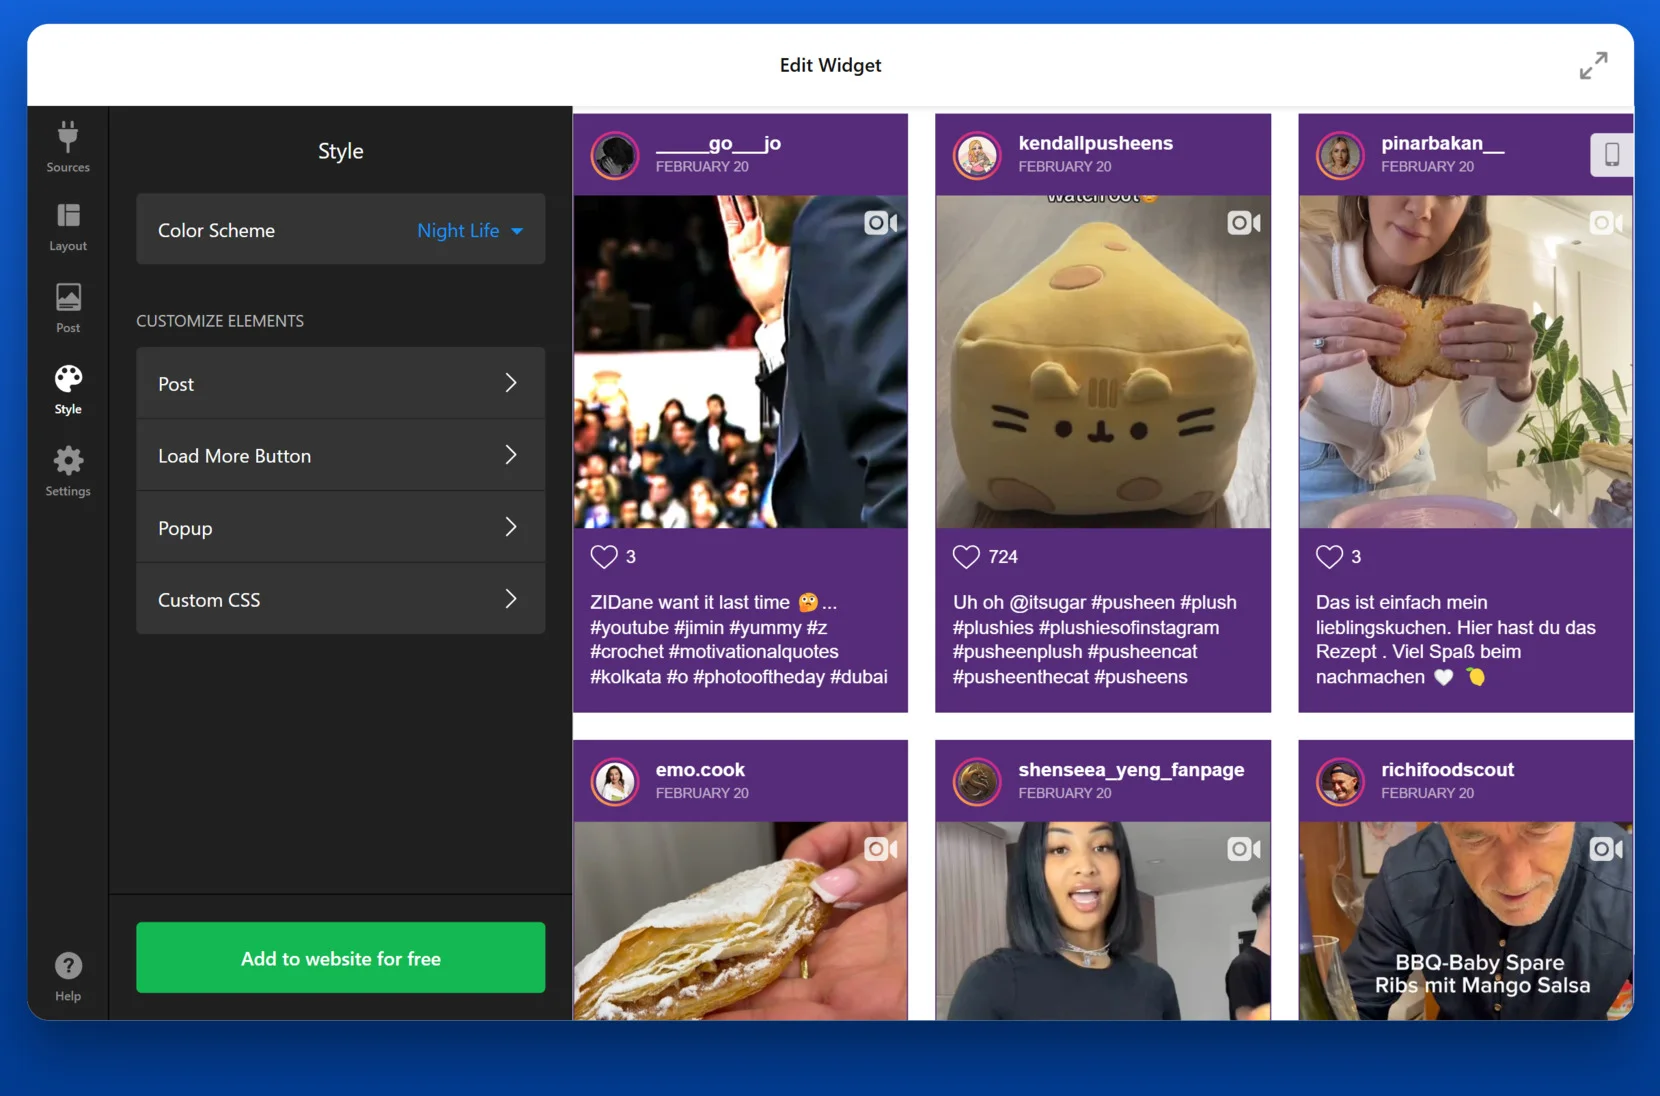
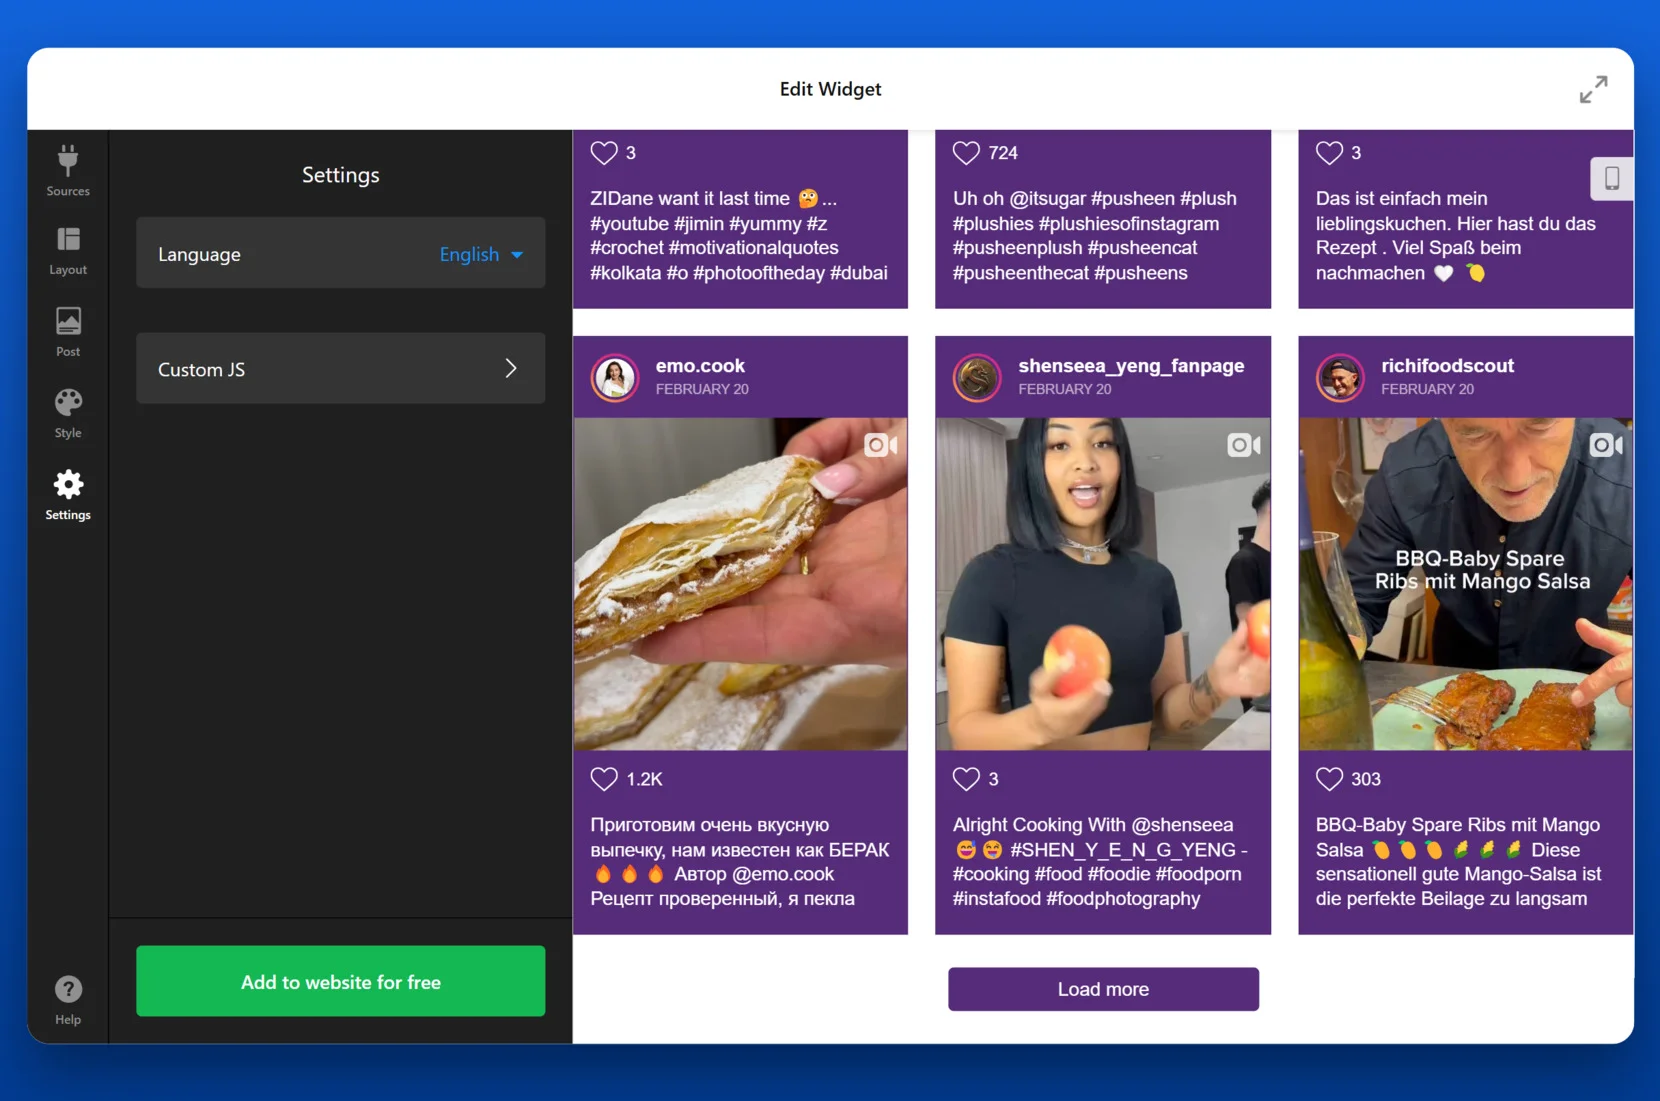
- Adjust appearance settings. Open the “Style” section to choose a color scheme (e.g., Night Life), modify the design of posts and popups, or add custom CSS for more advanced styling options.

- Finish widget setup. In the “Settings” tab, adjust the language and insert custom JavaScript if needed for tracking or advanced integrations.
- Embed the widget in Webflow. Click “Add to website for free” and copy the generated embed code. Open your Webflow project, add an “Embed” element, and paste the code inside it. Save your changes and publish the page.

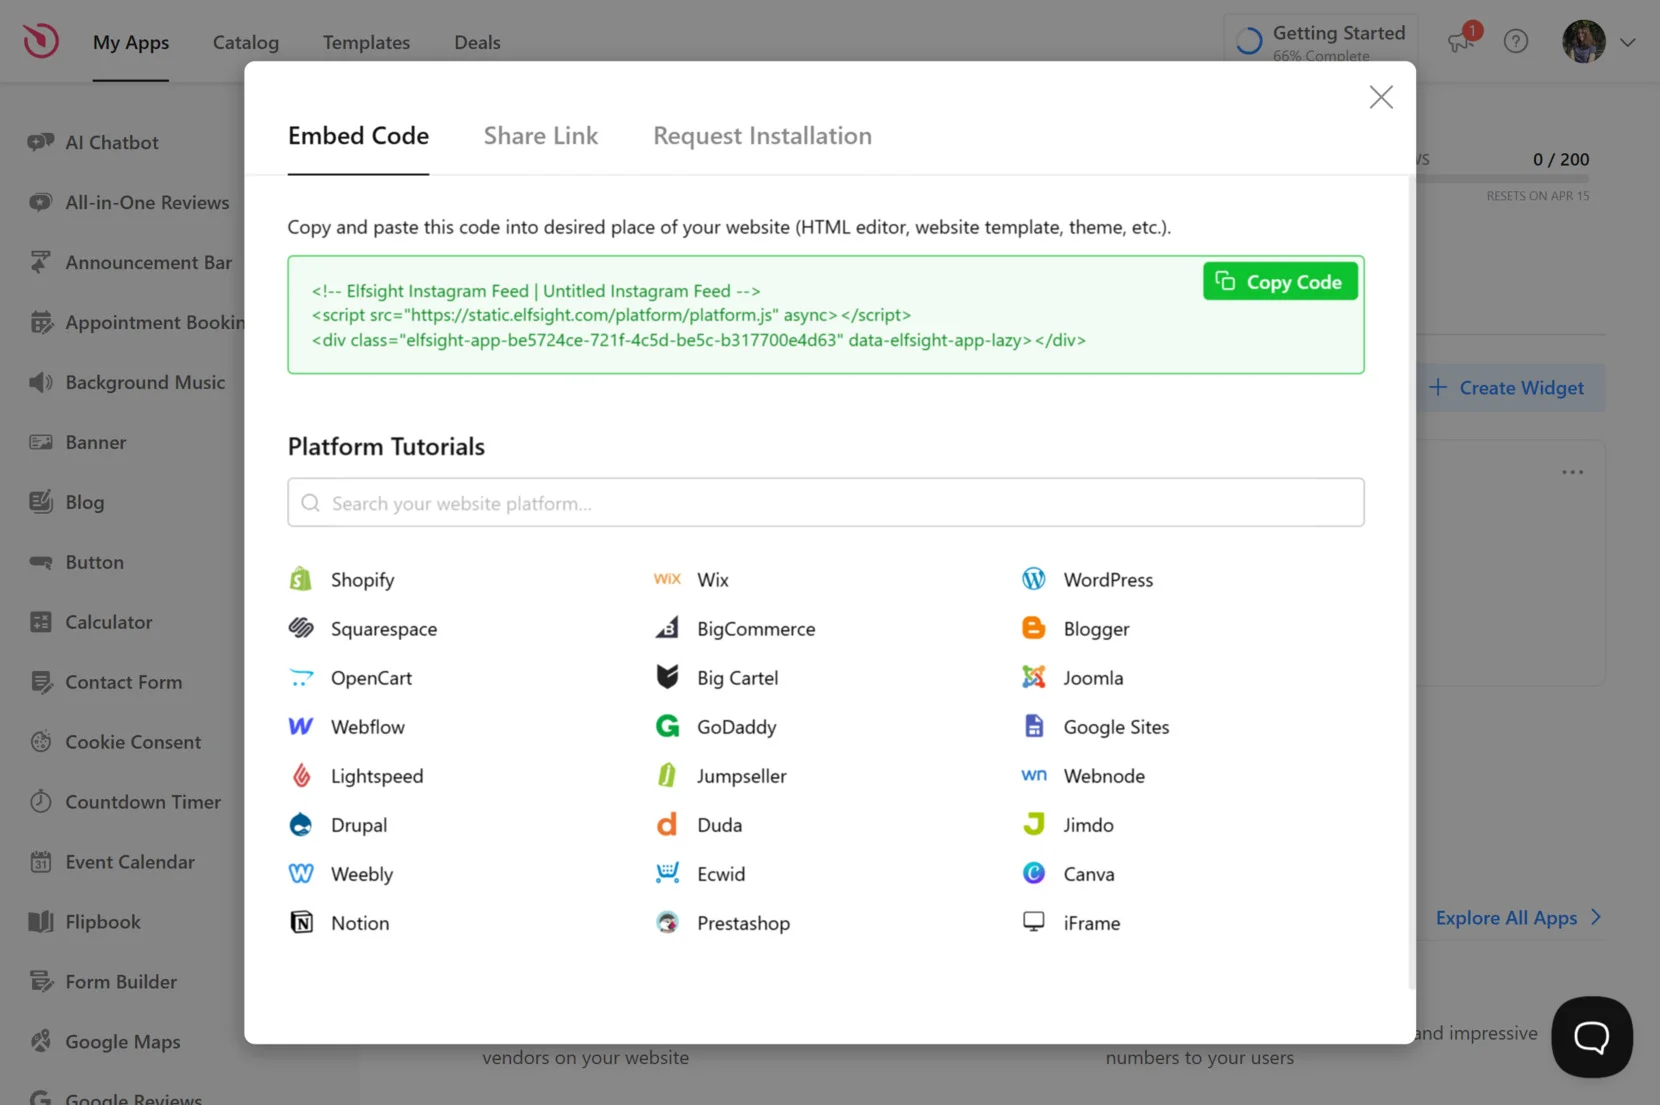
When it comes to Webflow Instagram integration, embedding the widget is especially straightforward thanks to its flexible builder. After copying the Elfsight embed code, simply drag the “Embed” element into your Webflow canvas where you want the feed to appear. Paste the code, save the changes, and publish the page — your feed showcase will appear instantly and adapt to your layout.
That’s it — your Instagram widget is now live and automatically synced with your content. It will continue to update as you post new photos or videos to Instagram, providing a smooth way to embed social content on your Webflow website.
Other Ways to Connect Instagram to Website
Besides using Elfsight, there are several other ways to connect Instagram to your Webflow website. Some are native solutions provided by Instagram, while others involve third-party integrations. Below we’ll explore the most practical alternatives, especially those that align well with Webflow’s no-code approach.
Here are two alternative methods you can try: the official Instagram embed and a code-based integration via Meta’s Graph API.
Native Instagram Embed (Manual Post Integration)
This is Instagram’s built-in way to let users embed individual posts manually. It’s simple, works without third-party tools, and integrates smoothly with Webflow’s Embed element.
- Go to the Instagram post you want to embed. Open Instagram in a desktop browser (not the app), log into your account if needed, and navigate to the public photo or video post you want to display.
- Click the three-dot icon in the top-right of the post. From the dropdown menu that appears, select “Embed”. This will open a window showing the embed code.
- Copy the embed code. In the popup, check the box if you want to include the caption. Then click “Copy Embed Code” to copy the HTML snippet to your clipboard.
- Open your Webflow project and go to the Designer. In your Webflow dashboard, open the project where you want to embed the post and launch the Designer mode.
- Insert an Embed element in your layout. From the left-side panel, drag the “Embed” block into the canvas and place it exactly where you want the Instagram post to appear — inside a section, container, or grid.
- Paste the code and save your changes. In the Embed Code editor, paste the HTML you copied from Instagram, click “Save & Close”, then publish your website to make the embed live.
Meta Graph API (Developer Method)
For more control and flexibility, developers can use the Meta Graph API to fetch Instagram data and render it on a website using custom code. This method is powerful but requires advanced setup.
- Create a Facebook Developer account. Go to the Facebook for Developers portal, log in, and set up a new app that will be used to access the Instagram Graph API.
- Connect your Instagram account. Link an Instagram Business or Creator account and associate it with a connected Facebook Page to authorize data access.
- Generate access tokens. Navigate to the Instagram Graph API section in your app settings, configure the required permissions (such as user_media), and generate a valid access token.
- Use the API to fetch media. Write a script that sends requests to Graph API endpoints (e.g., /me/media) to collect photo, video, and caption data from your connected Instagram account.
- Display the data in Webflow. Host the script externally (e.g., via a cloud function or backend), then use Webflow’s Embed element or custom code section to insert the output into your website layout.
Comparison of Instagram Integration Methods
The table below summarizes the main pros and cons of each method, helping you choose the most suitable option for your Webflow website.
| Method | Major Pro | Major Con |
|---|---|---|
| Elfsight Instagram Widget | Offers a fully customizable, responsive, and auto-updating Instagram feed with no coding required. | Requires creating a free Elfsight account to access the editor and widget code. |
| Native Instagram Embed | Simple and fast way to display a single post using official embed tools. | Only supports manual embedding of individual posts; no feed or auto-sync features. |
| Meta Graph API | Provides full control over Instagram data display and formatting for developers. | Complex setup process and requires ongoing token refreshes and hosting logic. |
While all these methods can be used to publish social feed content on a Webflow website, Elfsight clearly stands out in terms of simplicity, design flexibility, and automation.
Next, let’s go over best practices and tips to help you get the most out of your Instagram widget.
Tips to Optimize Your Instagram Embed
Once you embed Instagram on Webflow, there are several important things to consider to ensure your feed looks great, loads efficiently, and engages your visitors. Below are tips to help you get the most out of your visual social media gallery integration.
- Limit the number of posts displayed. A smaller number of posts helps maintain fast loading speeds and prevents overwhelming your layout with too much content at once.
- Use a grid layout for visual balance. Grid-based displays help organize images evenly across all screen sizes and provide a more consistent experience for mobile and desktop users.
- Always embed content from a public profile. If the source account or hashtag is private or restricted, the content won’t display, and your feed might appear empty.
- Prioritize responsive design settings. Make sure your photo gallery adjusts smoothly to different device widths by testing your embed on desktop, tablet, and phone viewports.
- Match the widget design to your brand. Choose fonts, colors, and spacing that align with your overall branding to ensure a seamless visual experience.
- Keep post captions short and focused. If using captions in your Instagram widget, avoid large blocks of text that might disrupt the visual flow of the display.
- Regularly check your embedded feed. Verify that it loads correctly, hasn’t been blocked, and continues syncing fresh content from Instagram.
- Use hashtags strategically. When pulling content via hashtags, ensure they are specific enough to avoid irrelevant or off-brand posts.
- Test positioning on your Webflow page. Placing your social media feed near calls-to-action or product highlights can help drive engagement and improve visibility.
- Track performance using analytics tools. While the embed doesn’t have native analytics, tools like Google Analytics or heatmaps can show how users interact with the widget.
These simple tips make it easier to integrate social media with your website while keeping your Instagram showcase effective and visually appealing. Next, let’s explore which types of businesses benefit most from using a dynamic social media feed on their Webflow websites.
Who Benefits from Instagram Widget: Use Cases
Using an Instagram feed on a Webflow website offers impactful benefits across a variety of industries. Below are the most effective areas of application and examples of how brands use social content to boost engagement, trust, and conversions.
🛒 Application in eCommerce and Retail
Retailers and eCommerce brands use Instagram feeds to display product galleries, highlight real customer photos, and drive social proof directly on product pages. A dynamic Instagram widget can serve as a visual post display that reinforces authenticity and motivates purchasing decisions.
🏝 Application in Hospitality and Tourism
Hotels, resorts, travel agencies, and tour companies use Instagram galleries to showcase real experiences. Embedding a curated visual media grid helps build aspiration and trust by letting visitors explore destinations or amenities through user-generated content.
🍱 Application in Food and Beverage
Restaurants, cafés, and food brands use Instagram feeds to showcase dishes, promotions, and behind-the-scenes moments. A photo gallery embedded on the homepage or menu section can instantly appeal to the senses and attract more foot traffic and online orders.
Whether it’s retail, travel, or food service, showcasing Instagram photos through a real-time media grid enhances brand credibility and emotional connection.
In the next section, we’ll cover common issues users face when integrating Instagram feeds — and how to solve them efficiently.
Fixing Common Embed Issues
Even though integrating an Instagram widget into a Webflow website is straightforward, users may still encounter technical issues or unexpected limitations. Below are frequently asked questions that address the most common problems and explain how to resolve them.
Why isn’t my Instagram feed showing up on Webflow?
Can I display content from multiple Instagram accounts?
Why are my Instagram posts not updating automatically?
Is it possible to filter out unwanted posts from my feed?
Does Instagram limit how much content I can display?
Why is the embedded Instagram widget not responsive?
These issues are usually easy to resolve once you know what to look for. By following best practices for Webflow Instagram integration and keeping sources properly connected, you can keep your social media feed running smoothly.
Conclusion
Embedding Instagram on Webflow is a powerful way to enrich your website with dynamic, social content that builds trust and engagement. Whether you’re showcasing customer photos, sharing product visuals, or simply keeping your design fresh, using an Instagram Feed widget allows you to highlight Instagram updates in real-time and keep your visitors connected with your brand.
With the right setup, you can publish a visual social media feed that looks great, updates automatically, and drives real value. For anyone managing a Webflow website, integrating a modern Instagram showcase is a simple, no-code way to elevate your brand presence online.
Need More Help?
We hope this walkthrough gave you the clarity and tools to confidently add Instagram to your Webflow website. If you’re ready to take your integration further, contact us — our team at Elfsight is here to support you with intuitive, code-free solutions tailored to your business needs.
Join our growing Community to exchange feedback, tips, and feature ideas. Got a suggestion for what we should build next? Add it to our Wishlist and help shape the future of our widgets.