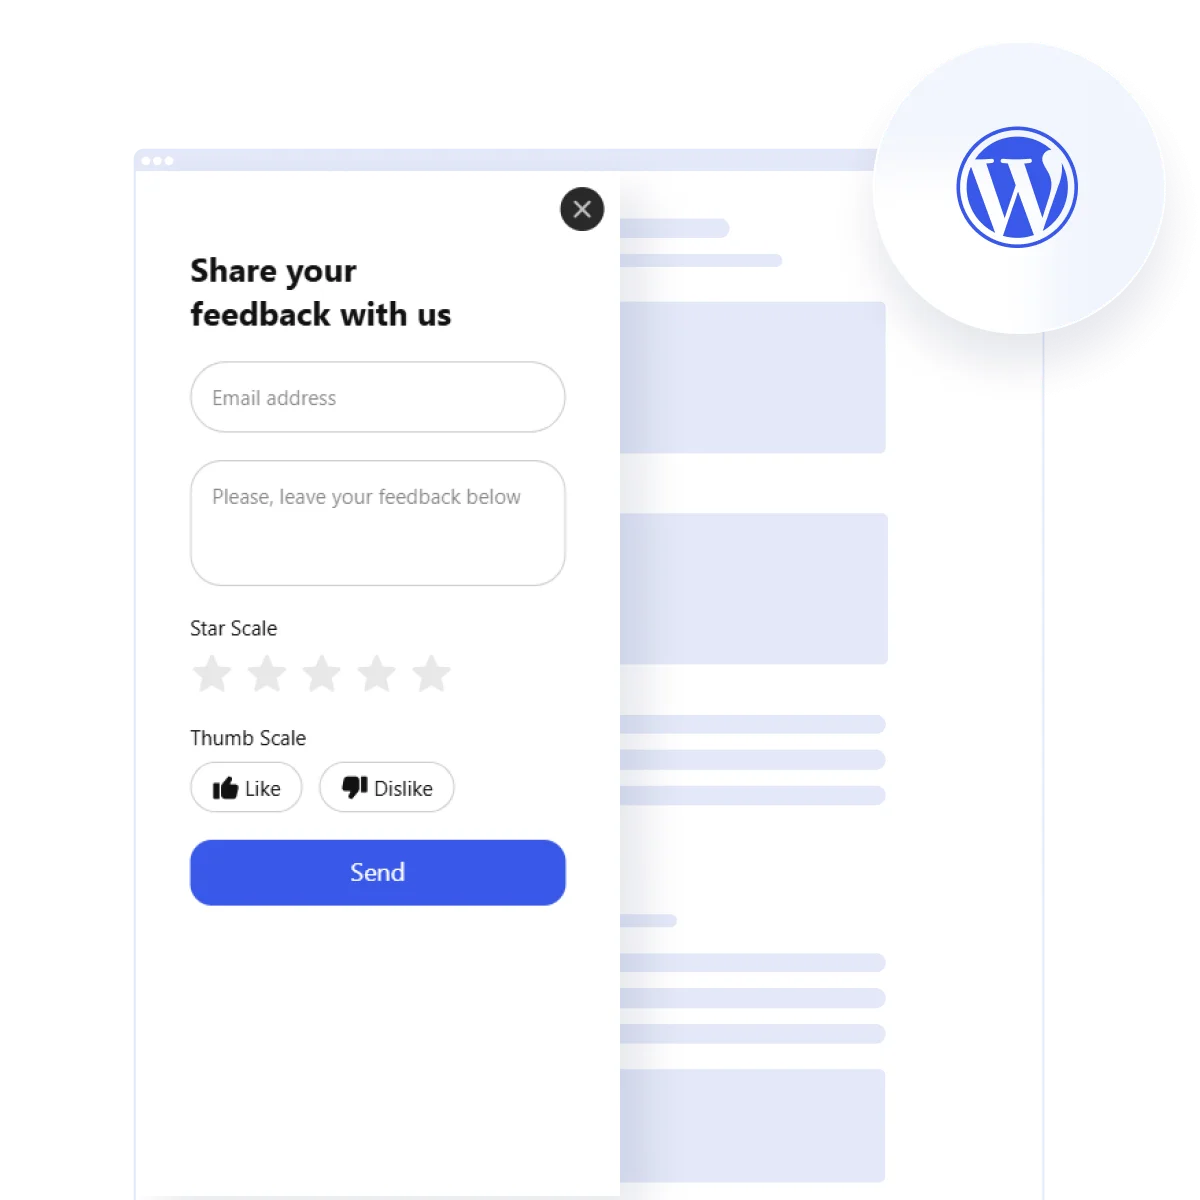
A feedback form is a simple but powerful tool that allows you to collect input, thoughts, and suggestions directly from your website visitors. It helps you understand user experiences, uncover issues, and improve your overall service quality.
If you’re looking to grow your WordPress website, a feedback form is exactly what you need. It gives your visitors a voice, builds trust, and provides valuable insights — all without requiring complex setup or coding.
- Boosts user engagement. Inviting visitors to share their thoughts encourages interaction and shows you care about their experience.
- Uncovers hidden problems. Visitors may report bugs or UX issues you haven’t noticed, helping you improve your website’s performance.
- Improves customer satisfaction. Feedback helps you make informed decisions that align with user needs and expectations.
- Strengthens brand loyalty. When users feel heard, they’re more likely to return and recommend your website to others.
- Supports continuous improvement. Direct input from real users becomes a source of constant optimization for your content and services.
Now that you know why feedback forms are essential, let’s explore how to set one up quickly and easily using Elfsight.
Embed a Feedback Form to WordPress: Quick Way
Adding a feedback form to your WordPress website doesn’t have to be complex or time-consuming. With Elfsight, you can build and publish a professional-looking form in just a few simple steps — no coding required.
- Open the Elfsight editor and choose the Feedback Form plugin template.
- Customize fields and texts to suit your goals and tone.
- Adjust layout settings like form width, alignment, and colors to fit your website design.
- Click “Add to website for free“, copy the generated code, and paste it into your WordPress backend.
It’s a fast and user-friendly way to add a fully functional feedback section to any page of your WordPress website.
Ready to collect insights? Create your own feedback form in minutes!
Features of the Elfsight Form Builder
Now that you know how easy it is to build a feedback form with Elfsight, let’s take a closer look at the key features and advantages that make it one of the best solutions for WordPress feedback form setup.
To use it, simply describe what you want your form to include and click “Generate”. Within seconds, the tool will build a complete form with the necessary elements such as text fields, dropdowns, checkboxes, and even file attachments.
The best part? It supports any language, so you can write your request naturally and get accurate results instantly.
Here are the main reasons to choose Elfsight’s Feedback Form for your website:
- Pre-made templates for fast setup. Start with ready-to-use designs that help you launch your form in minutes without needing technical knowledge.
- Drag-and-drop builder. Easily rearrange and customize form fields with a visual editor — no coding required at any stage.
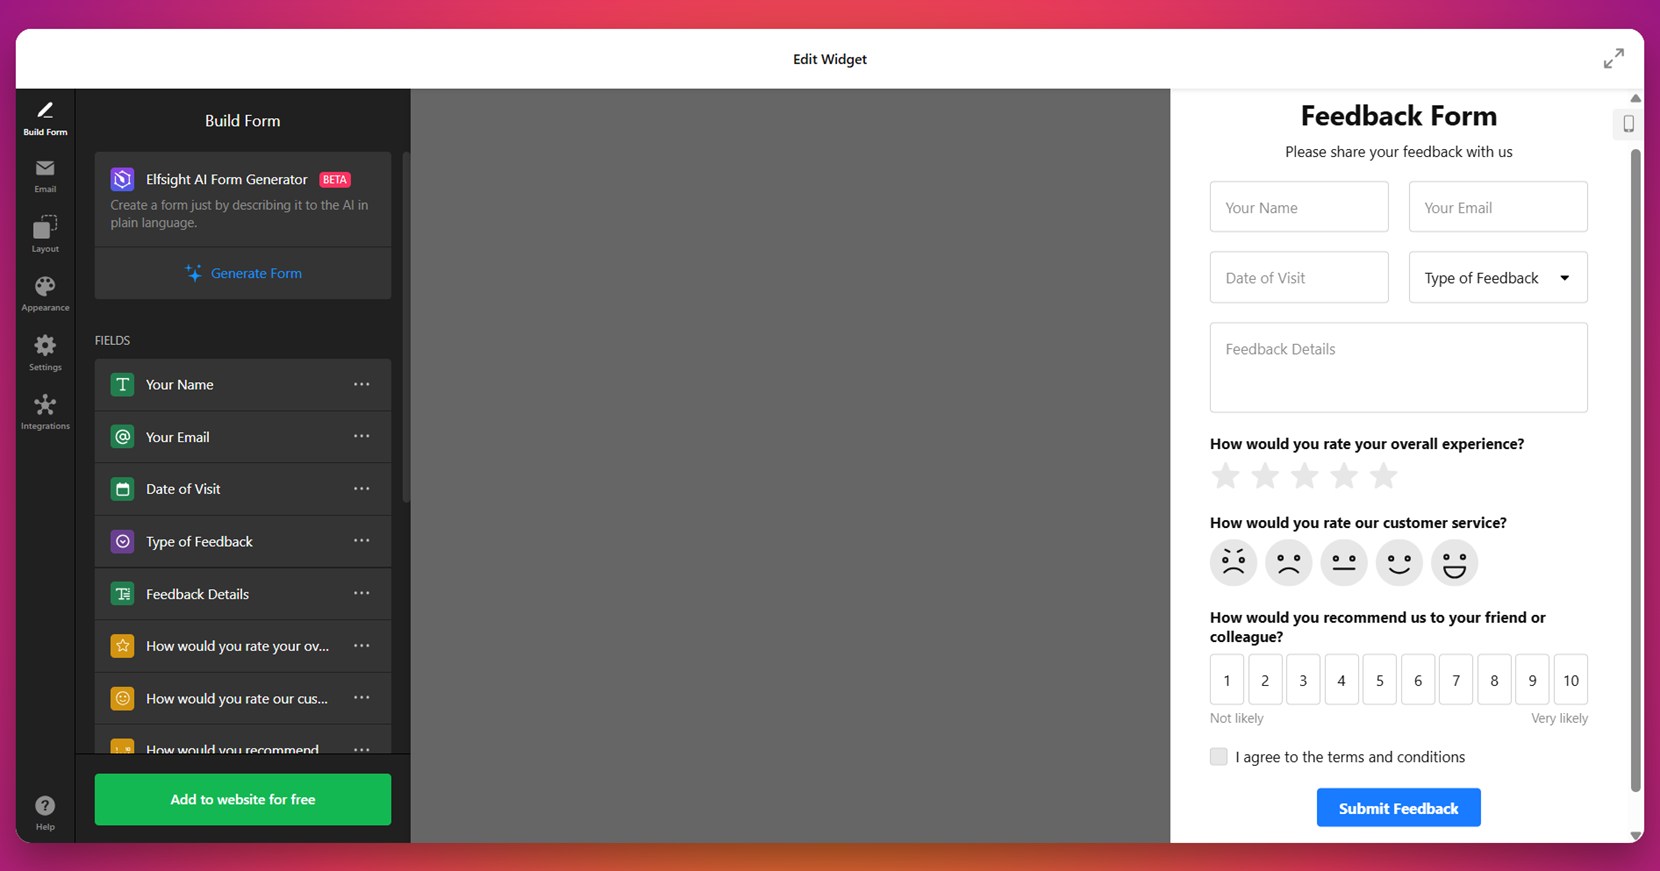
- Multiple field types. Add short text, ratings, dropdowns, emails, checkboxes, and more to gather detailed customer suggestions.
- Responsive design. Your form will look and work great on desktops, tablets, and mobile devices automatically.
- Custom success messages and redirects. Show a thank-you message or send users to another page after submission to enhance their experience.
- Email notifications. Instantly get notified whenever someone submits a response, so you never miss valuable feedback.
- Built-in spam protection. Use CAPTCHA and other anti-spam tools to ensure your form only receives valid submissions.
These features make Elfsight an ideal solution for anyone looking to capture testimonials online or collect meaningful feedback from visitors. Next, we’ll walk through a full step-by-step guide to creating and adding your form in WordPress.
Create a WordPress Feedback Form: Step-by-Step
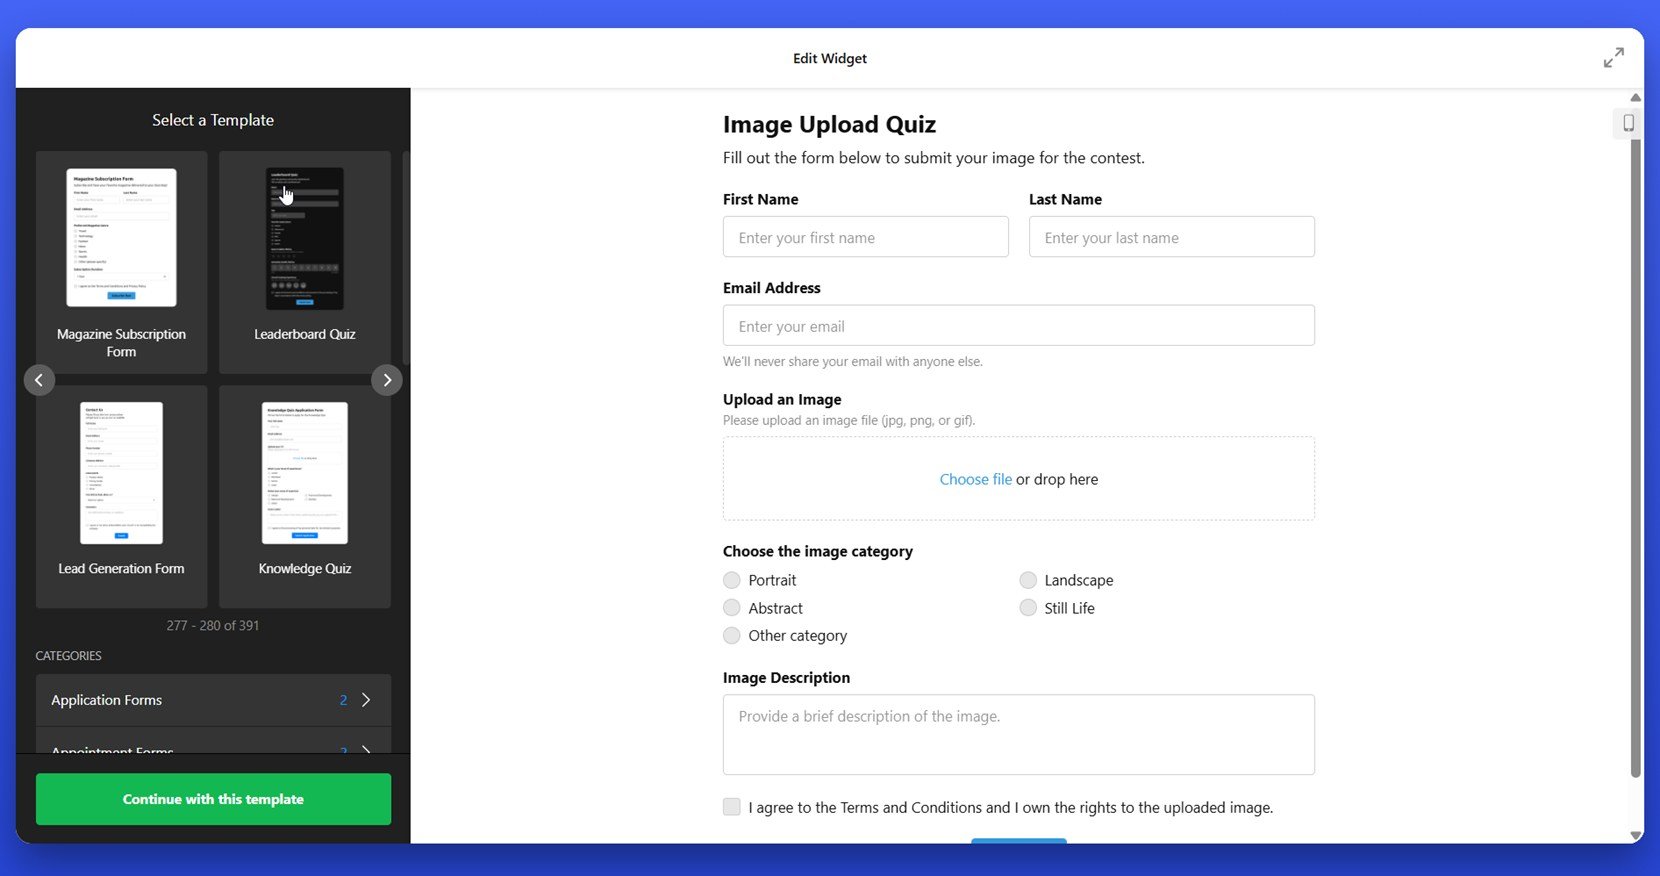
To build a fully customized feedback form with Elfsight, you don’t need any coding or third-party developers. Just follow these steps in the visual editor to create and embed the widget directly into your WordPress website.
- Select a Template. Open the Elfsight Form Builder and choose the feedback form layout that matches your purpose. Click “Continue with this template” to begin customizing it.

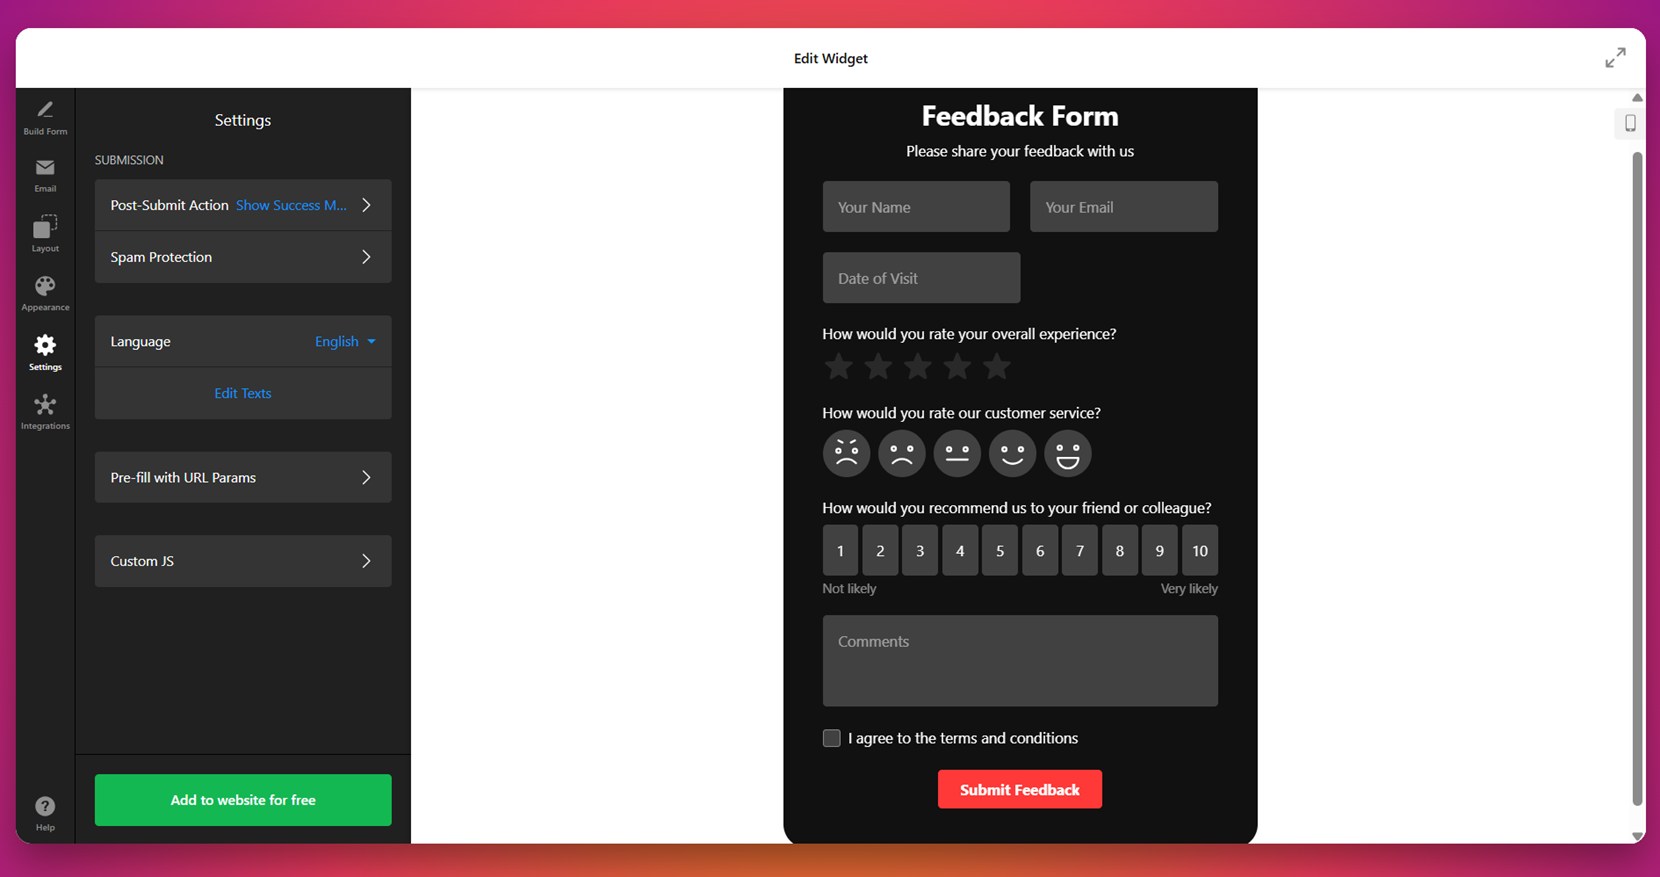
- Add and Customize Fields. Use the “Build Form” tab to add necessary fields like name, email, rating, date, or open text. You can remove or reorder blocks and adjust labels to suit your form logic.

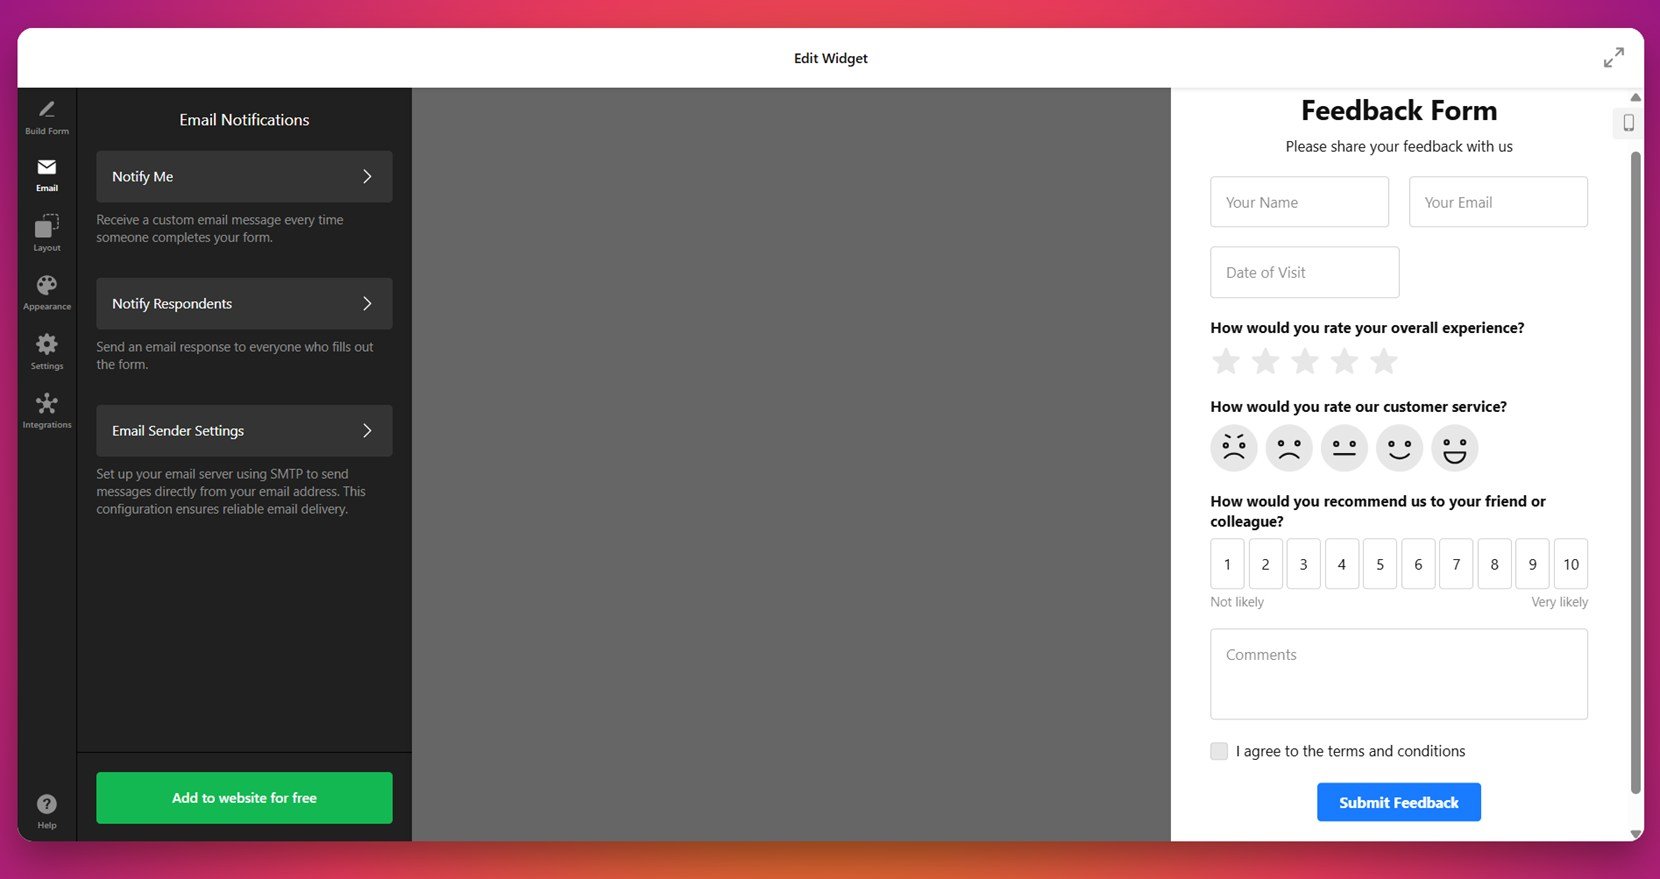
- Enable Email Notifications. Under the “Email” tab, activate admin alerts and choose whether to notify the visitor after submission. Configure SMTP settings for improved deliverability if needed.

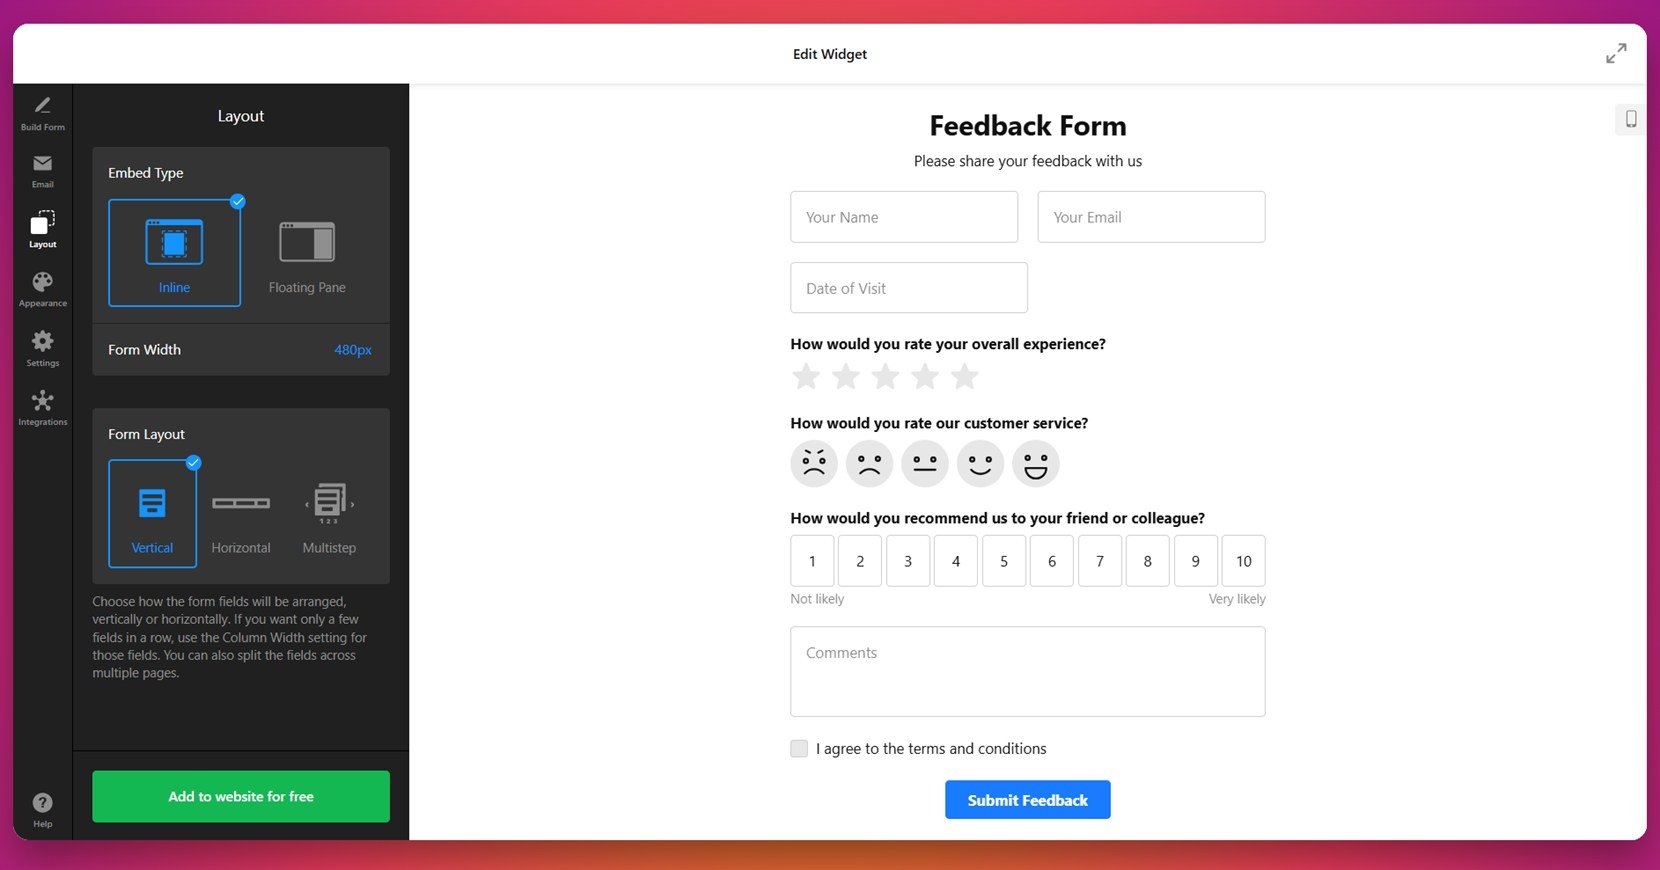
- Adjust the Layout Settings. In the “Layout” section, choose between Inline or Floating Pane embed types. Set the width and layout structure (Vertical, Horizontal, or Multistep) depending on your content flow.

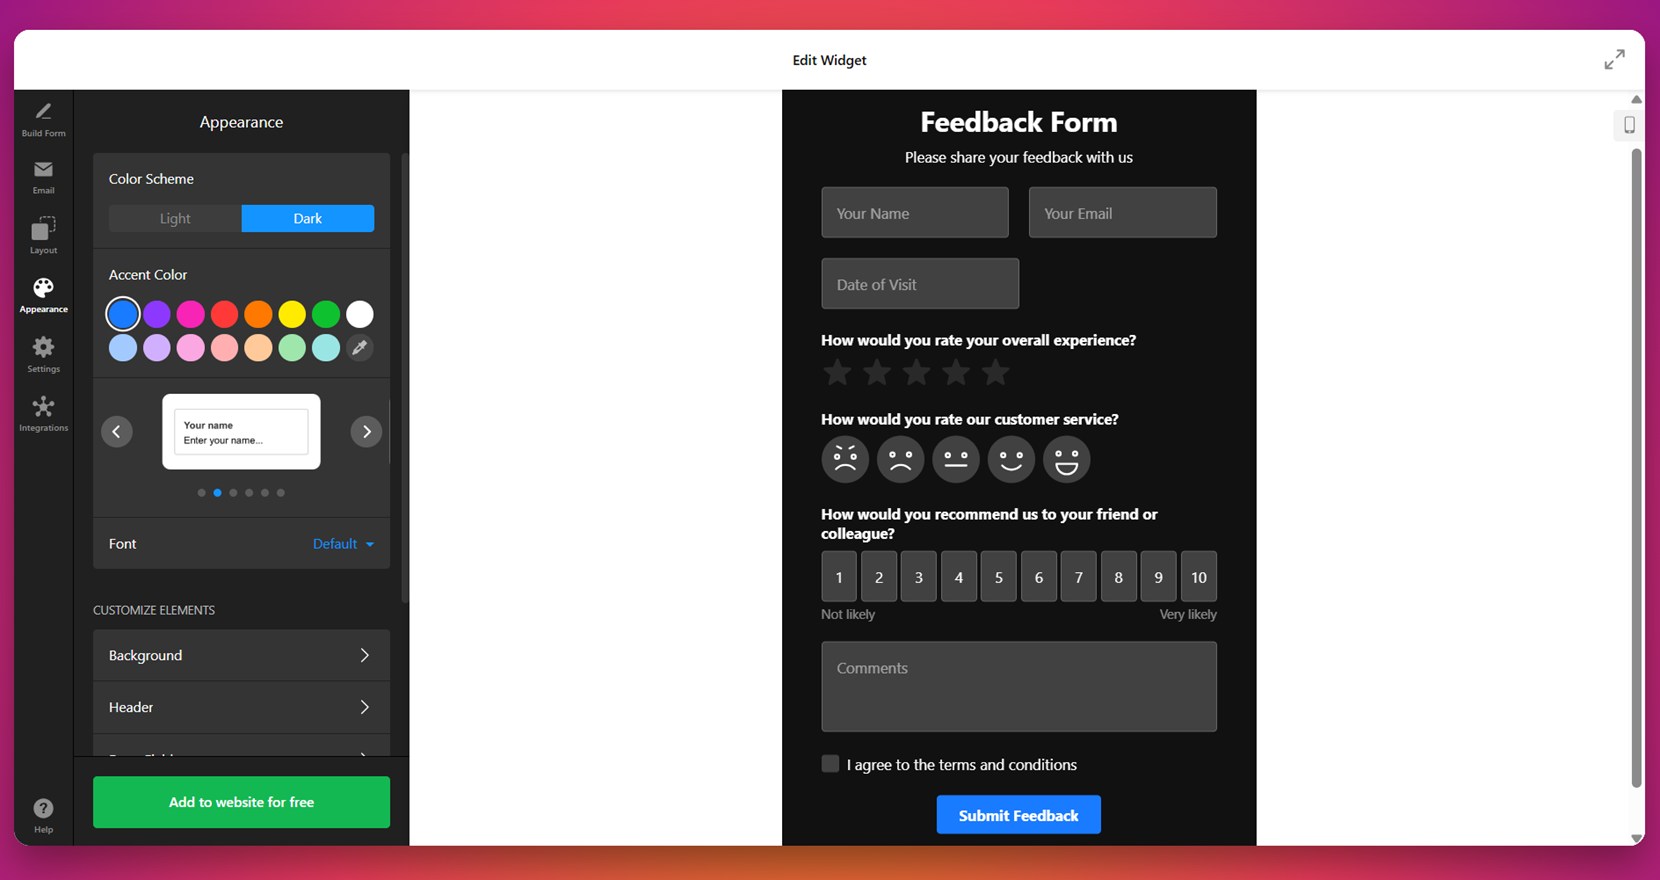
- Style the Form Appearance. Go to the “Appearance” tab and select a light or dark scheme. Pick brand-aligned accent colors, fonts, and fine-tune the header, background, and input styles.

- Tweak Behavior and Language. Open the “Settings” tab to define what happens after submission (e.g., show a thank-you message). Activate spam protection, set default language, and apply URL parameters if needed.

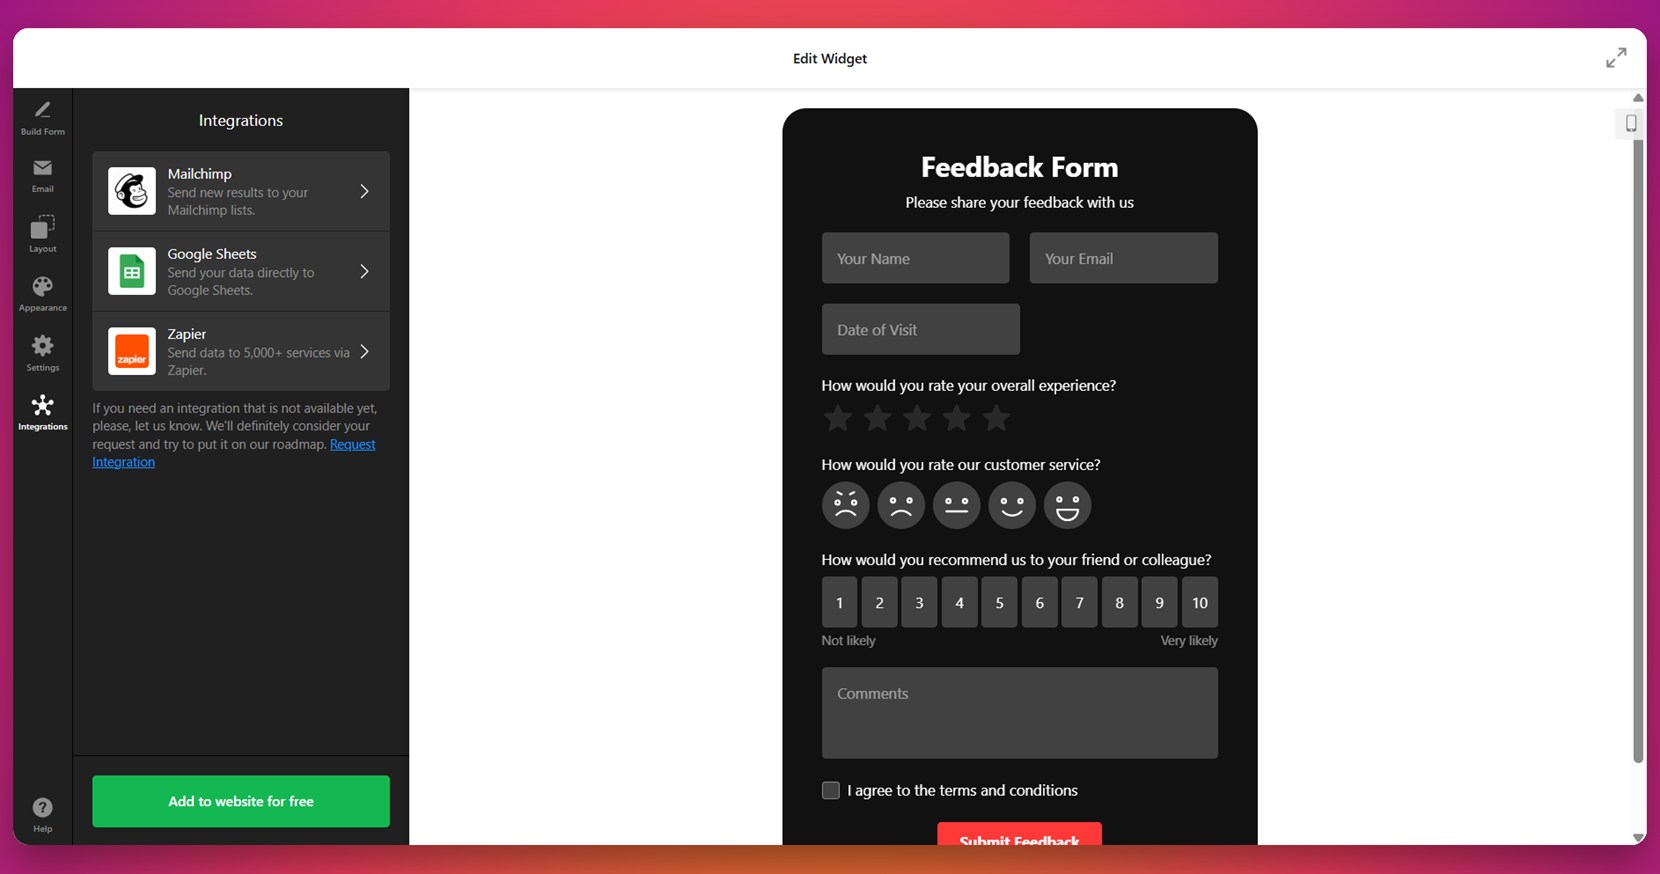
- Connect Integrations. Use the “Integrations” panel to link the form with Mailchimp, Google Sheets, or Zapier to automate data collection and email flows.

- Embed the Widget in WordPress. Click “Add to website for free”, copy the generated code, and paste it into your WordPress backend using a Custom HTML block or a plugin that allows custom embeds.

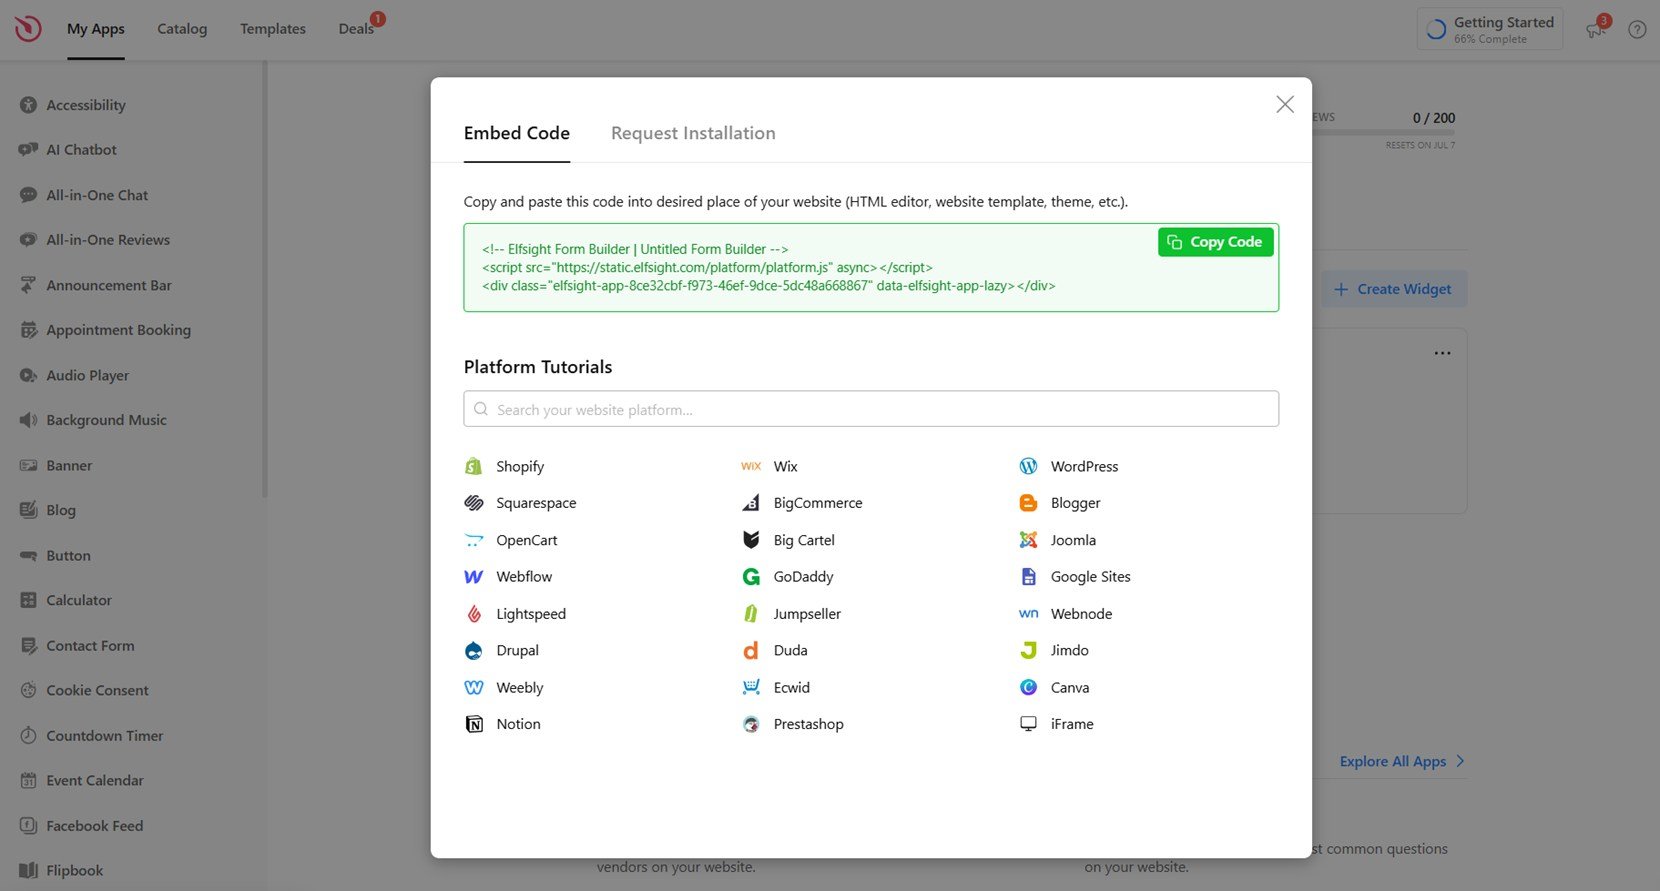
To add your Elfsight Feedback Form to WordPress, the process is quick and doesn’t require any plugins or technical skills. After copying the embed code, log into your WordPress admin panel, navigate to the page or post where you want the form to appear, and add a “Custom HTML” block. Paste the code there, update the page, and your form will instantly go live.
This allows you to place the form exactly where your visitors are most likely to engage with it — whether that’s on a contact page, support area, or at the bottom of key content sections.
With these simple steps, you’ll have a fully functional and brand-aligned feedback form live on your WordPress website in just a few minutes. If you’re exploring other ways to collect user input, let’s take a look at some alternative methods beyond Elfsight’s Feedback Form.
Other Ways to Add Feedback Forms to WordPress
If you’re not ready to use Elfsight or are exploring built-in alternatives, WordPress does offer other ways to collect feedback from your visitors. Below are the most common native or platform-compatible methods for adding a user feedback form to your website.
Each of these approaches allows you to receive user experience ratings or basic messages, though setup complexity and customization options may vary.
Using WordPress’s Built-in Form Block (via Jetpack)
Jetpack, a plugin developed by Automattic, includes a basic feedback form block that you can add directly in the Gutenberg editor. It’s ideal for quick forms with minimal styling needs.
- Go to your WordPress dashboard. Make sure Jetpack is installed and activated. If it’s not, install it from the Plugins section and connect your WordPress.com account.
- Create or edit a page/post. Open the page or post where you want to insert the feedback form using the block editor (Gutenberg).
- Add the “Form” block. Click the “+” icon, search for “Form,” and select “Feedback Form” or “Contact Form.”
- Customize your fields. Add or remove fields like name, email, message, and adjust labels or placeholders as needed.
- Configure notifications. You can set the email address that receives submissions and add a confirmation message for users after form completion.
- Publish or update the page. Once the form is configured, save your changes and the form will be live on your website.
While quick and accessible, Jetpack forms have limited design customization and offer no built-in rating or survey components.
Embedding a Feedback Form with HTML (Manual Method)
If you prefer full control over the form structure, you can build a feedback form manually using HTML and embed it in your content or template. This method works best for those comfortable editing code and managing data manually.
- Create the form code in HTML. Write a simple feedback form using input fields such as name, email, message, and rating (using radio buttons or select options).
- Add a form handler. You’ll need to create or link to a backend handler (e.g., PHP) that processes and sends the submitted data to your email or database.
- Make sure it includes form tags, action URLs, method definitions (POST), and input fields.
- Insert the code into your WordPress editor. Open the target page, switch to “Custom HTML” block, and paste your form code inside.
- Test the submission process. Ensure that the form works, sends data correctly, and shows a thank-you message or redirect upon submission.
This method gives you control over every element, but requires server-side handling, security measures, and time-consuming testing.
Comparing Elfsight and Other Feedback Form Methods
Here’s a comparison table that breaks down the major pros and cons of Elfsight and the two most common alternative methods for adding a feedback form to a WordPress website:
| Method | Pros | Cons |
|---|---|---|
| Elfsight Feedback Form | Offers a fully customizable, no-code editor with pre-built templates and drag-and-drop controls. | Requires embedding a code snippet into your WordPress backend (one-time setup). |
| Jetpack Form Block | Quick to deploy using the native WordPress block editor, without any external code. | Limited styling, no advanced input types like rating scales or integrations with third-party apps. |
| Manual HTML Embed | Gives full control over the form structure and behavior for custom use cases. | Requires manual coding, backend processing, and no built-in security or visual customization. |
Each method offers unique flexibility depending on your comfort with code and design tools. But if you want a fast, visually polished, and code-free option — Elfsight remains the most efficient and scalable solution.
Next, let’s go over a few smart ways to make the most of your feedback form and drive better results.
Smart Tips to Get The Most Of Your Web Form
Now that you’ve seen the different ways to add a feedback form to your WordPress website, let’s focus on how to use it effectively. These tips apply to any widget or form solution and will help increase engagement, improve form completion rates, and collect more actionable responses.
- Place the form where it’s most relevant. Embed the form near content where users are most likely to respond — like on a “Contact” page, in the footer, or after completing a purchase or article.
- Keep it short and focused. Only ask for essential information. Long forms may discourage users from completing them. Stick to 3–5 fields for optimal engagement.
- Use clear, friendly field labels. Labels like “How can we improve?” or “Your thoughts matter to us” feel more inviting than generic terms like “Comments.”
- Optimize for mobile responsiveness. Make sure the form adjusts properly on smartphones and tablets. Use vertical layouts and avoid tightly packed fields that can be hard to tap.
- Test your confirmation behavior. Whether it’s a thank-you message or a redirect, make sure the user knows their feedback was successfully submitted.
- Enable notifications to avoid missing submissions. Always activate email alerts to get notified instantly when someone leaves feedback.
- Review submissions regularly and take action. Feedback is only valuable if you act on it. Monitor responses and make updates to your content, product, or service accordingly.
With these simple practices in place, your feedback form can become a powerful tool for collecting real user insights. Next, let’s look at who benefits most from using a feedback form on their WordPress website and where it fits across different industries.
Who Benefits from Feedback Forms: Use Cases
Feedback forms are versatile tools that apply across many industries. From small service providers to large-scale e-commerce websites, they help collect valuable insights, improve user experience, and drive decision-making. Here’s how different types of businesses can use feedback forms effectively.
Application in E-commerce and Retail 💳
Online stores can use feedback forms to gather input on product satisfaction, delivery issues, and overall shopping experience. Placing a short form after checkout or within order confirmation emails helps retailers understand pain points and preferences directly from customers. Retailers can also gather suggestions for new products or categories.
Application in Education and Online Learning 📚
Educational platforms can collect learner feedback on course content, teaching effectiveness, and technical accessibility. Embedding feedback forms at the end of lessons or modules helps instructors fine-tune the learning journey based on direct input. It also encourages students to reflect on their experience and stay engaged.
Application in Hospitality and Events 🍽️
Hotels, restaurants, event planners, and travel services can use feedback forms to understand how guests felt about service, atmosphere, booking, and overall satisfaction. Placing a form in booking confirmations, thank-you emails, or on-room pages allows visitors to share their impressions immediately after their experience.
Whatever the industry, embedding a feedback form helps build trust, refine services, and foster continuous improvement. Let’s now review some common issues you might encounter and how to resolve them effectively.
Fixing Common Issues
Even with the right setup, feedback forms can occasionally run into display or delivery issues on WordPress websites. Below are common problems users face along with clear solutions to help you troubleshoot and maintain proper form functionality.
Why is my feedback form not showing on the page?
Why am I not receiving feedback form submissions?
How do I fix mobile responsiveness issues?
What causes submit buttons to stop working?
Can feedback forms be blocked by browsers?
How do I check for spam or bot activity?
By addressing these common issues early, you ensure that your feedback form runs smoothly and consistently delivers submissions. Let’s wrap up with a short summary of what we’ve covered and why adding a feedback form is a smart move for your WordPress website.
Conclusion
Adding a feedback form to your WordPress website is one of the simplest and most effective ways to gather insights, improve user experience, and build lasting relationships with your audience. Whether you choose a no-code tool like Elfsight, a native block, or a manual solution, having a channel for real-time feedback is essential for understanding your visitors’ needs and expectations.
We’ve walked through different setup methods, industry use cases, optimization tips, and common troubleshooting steps. With the right form in place, you’ll not only increase engagement but also unlock data that can drive meaningful improvements across your content and services. Now is the perfect time to put your feedback strategy into action.
Need More Info?
We hope you found this guide useful and inspiring. If you’re looking for support or want to learn more about adding custom widgets to your WordPress website, reach out to us — our team at Elfsight is here to help. We’re dedicated to offering flexible, no-code solutions that help your business grow.
Join our vibrant Community to exchange ideas, get answers, and contribute your feature suggestions to our Wishlist. We’d love to hear from you and learn how we can make your experience even better.