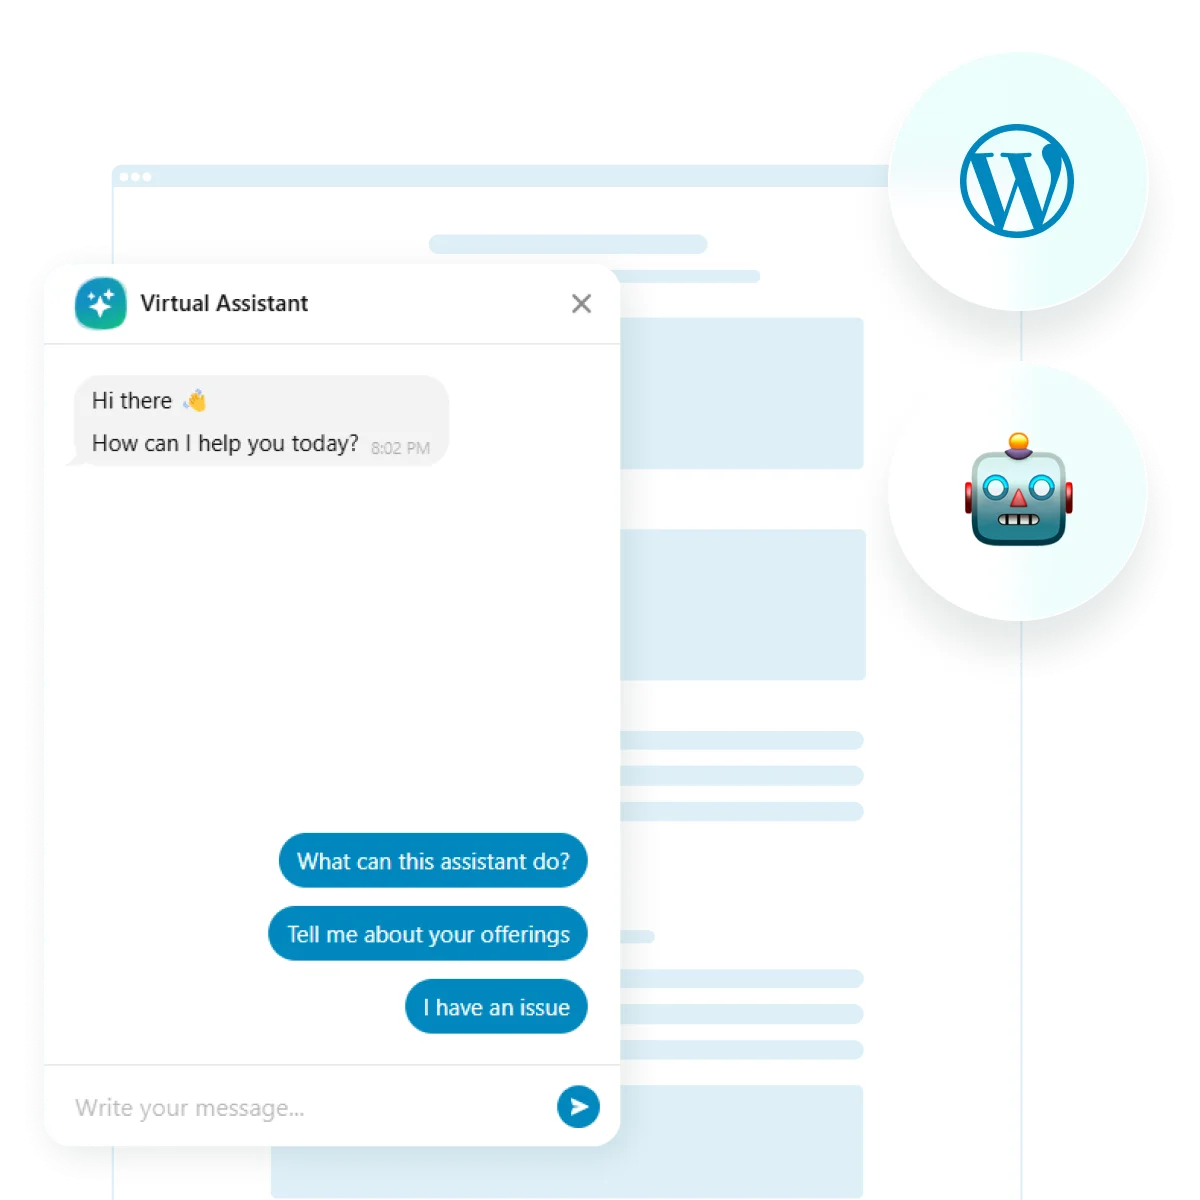
As businesses strive to enhance customer experience, AI chatbots have become essential tools for automating interactions. These smart assistants provide instant responses, guide users through websites, and handle inquiries efficiently.
Adding an AI chatbot to WordPress is a game-changer for businesses looking to streamline communication, boost engagement, and reduce support workload. Whether you’re running an ecommerce store, a service-based website, or a content platform, a chatbot can enhance user satisfaction while saving time and resources.
✅ 24/7 AI-driven website support. Ensure visitors always receive immediate assistance, even outside business hours.
✅ Improved engagement and conversions. AI-powered interactions keep users engaged, leading to higher retention and sales.
✅ Seamless WordPress chatbot integration. Easily add a chatbot without complex coding, making automation accessible to all.
With growing expectations for fast and efficient customer support, chatbots are no longer an option but a necessity. Now, let’s explore how you can quickly embed an AI Chatbot to your WordPress website in just a few minutes!
Quick Guide: Chatbot WordPress Integration
Adding an AI chatbot WordPress plugin doesn’t have to be complicated. With Elfsight, you can quickly embed a chatbot on your website without coding. The intuitive editor allows you to customize the chatbot’s appearance and functionality to match your needs, ensuring a seamless integration.
- Open the editor and select a chatbot template that fits your business goals.
- Customize the bot’s messages, responses, and knowledge base.
- Adjust design elements such as chat window style, colors, and positioning on the page.
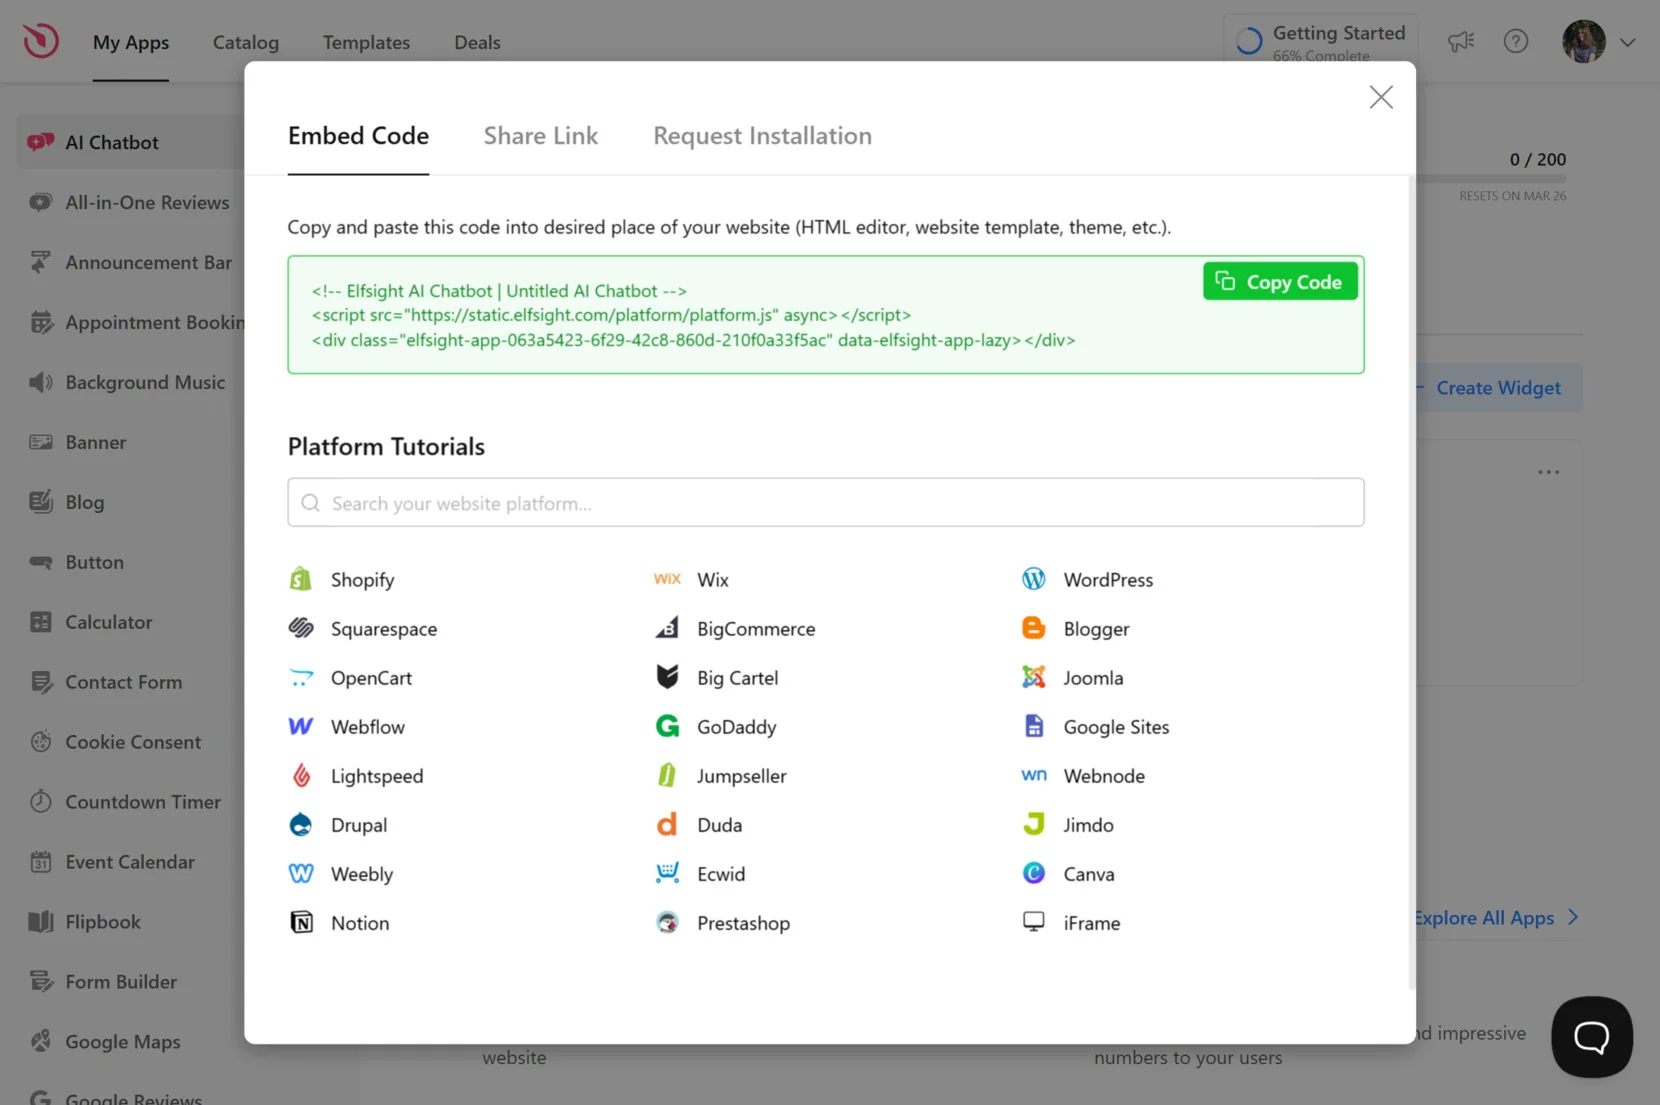
- Click “Add to website for free“, copy the generated code, and paste it into your WordPress backend.
With just a few simple steps, your smart chatbot will be live, engaging visitors, and handling inquiries effortlessly.
Ready to enhance your website right now? Create your AI Chatbot in minutes!
Why Add a Chatbot to WordPress: Benefits
Elfsight’s AI chatbot offers a suite of features designed to enhance your website’s functionality and user engagement. By integrating this plugin, you can automate customer interactions and provide personalized support, both contributing to a superior user experience.
Here are the standout features and benefits that provide:
- Advanced AI Automation. Leverage cutting-edge AI technology to handle customer interactions with remarkable accuracy and context, ensuring users receive relevant responses promptly.
- Effortless Onboarding. Utilize the intuitive instruction generator by sharing your website link or company details, enabling the chatbot to deliver precise and context-aware recommendations.
- Unlimited Scalability. Engage with an unlimited number of users and handle countless chats simultaneously, ensuring exceptional service during high-demand periods without additional costs.
- Quick and Easy Setup. Embed the AI Chatbot into your website within minutes using the user-friendly installation process, requiring no technical expertise.
- Personalized User Experience. Customize the chatbot’s behavior, appearance, and responses to align with your brand, providing users with a tailored and engaging interaction.
By integrating Elfsight’s AI chatbot, you not only enhance customer satisfaction but also streamline your operations, allowing your team to focus on more strategic tasks. Next, let’s delve into a detailed guide on creating and installing your AI chatbot to your WordPress website.
Adding an AI Chatbot to WordPress” Step-by-Step
Creating an AI chatbot is a quick and user-friendly process. With Elfsight’s intuitive editor, you can fully customize your chatbot’s design, responses, and behavior to match your business needs. Follow the steps below to create, configure, and embed your AI Chatbot seamlessly.
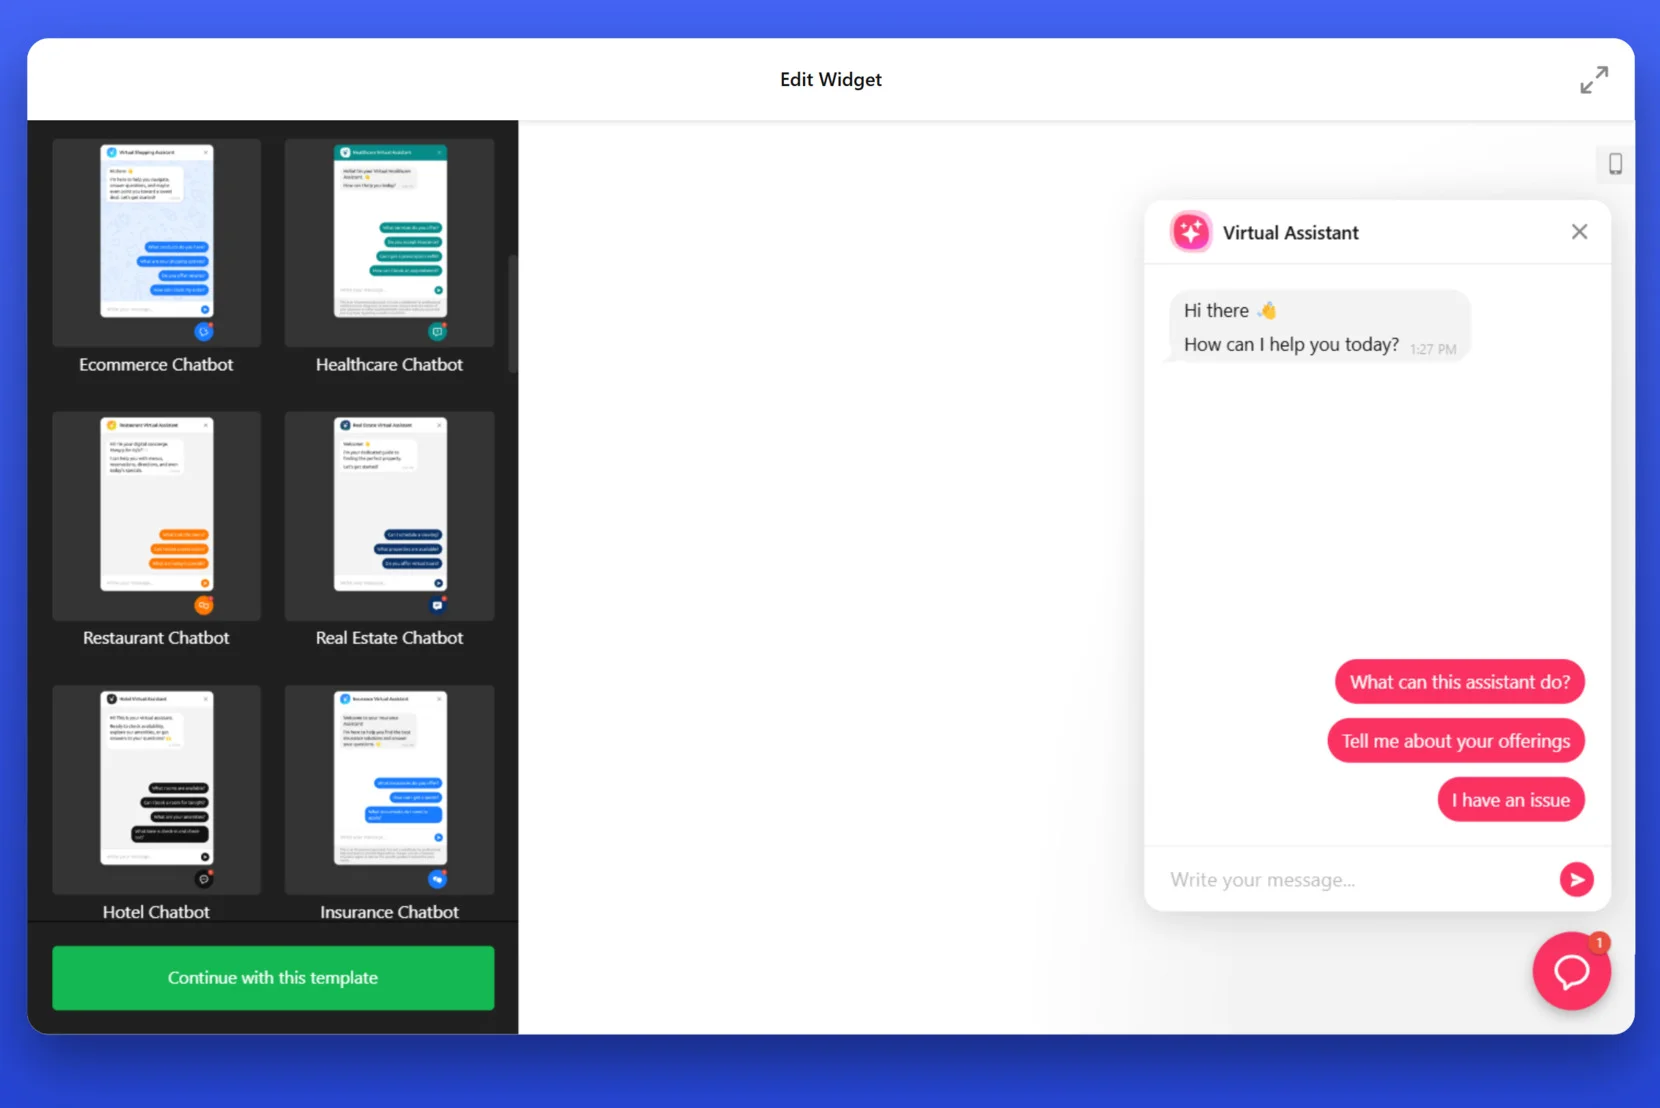
- Select a Chatbot Template. Open the plugin editor and choose a pre-designed chatbot template that suits your business. Click “Continue with this template” to proceed.

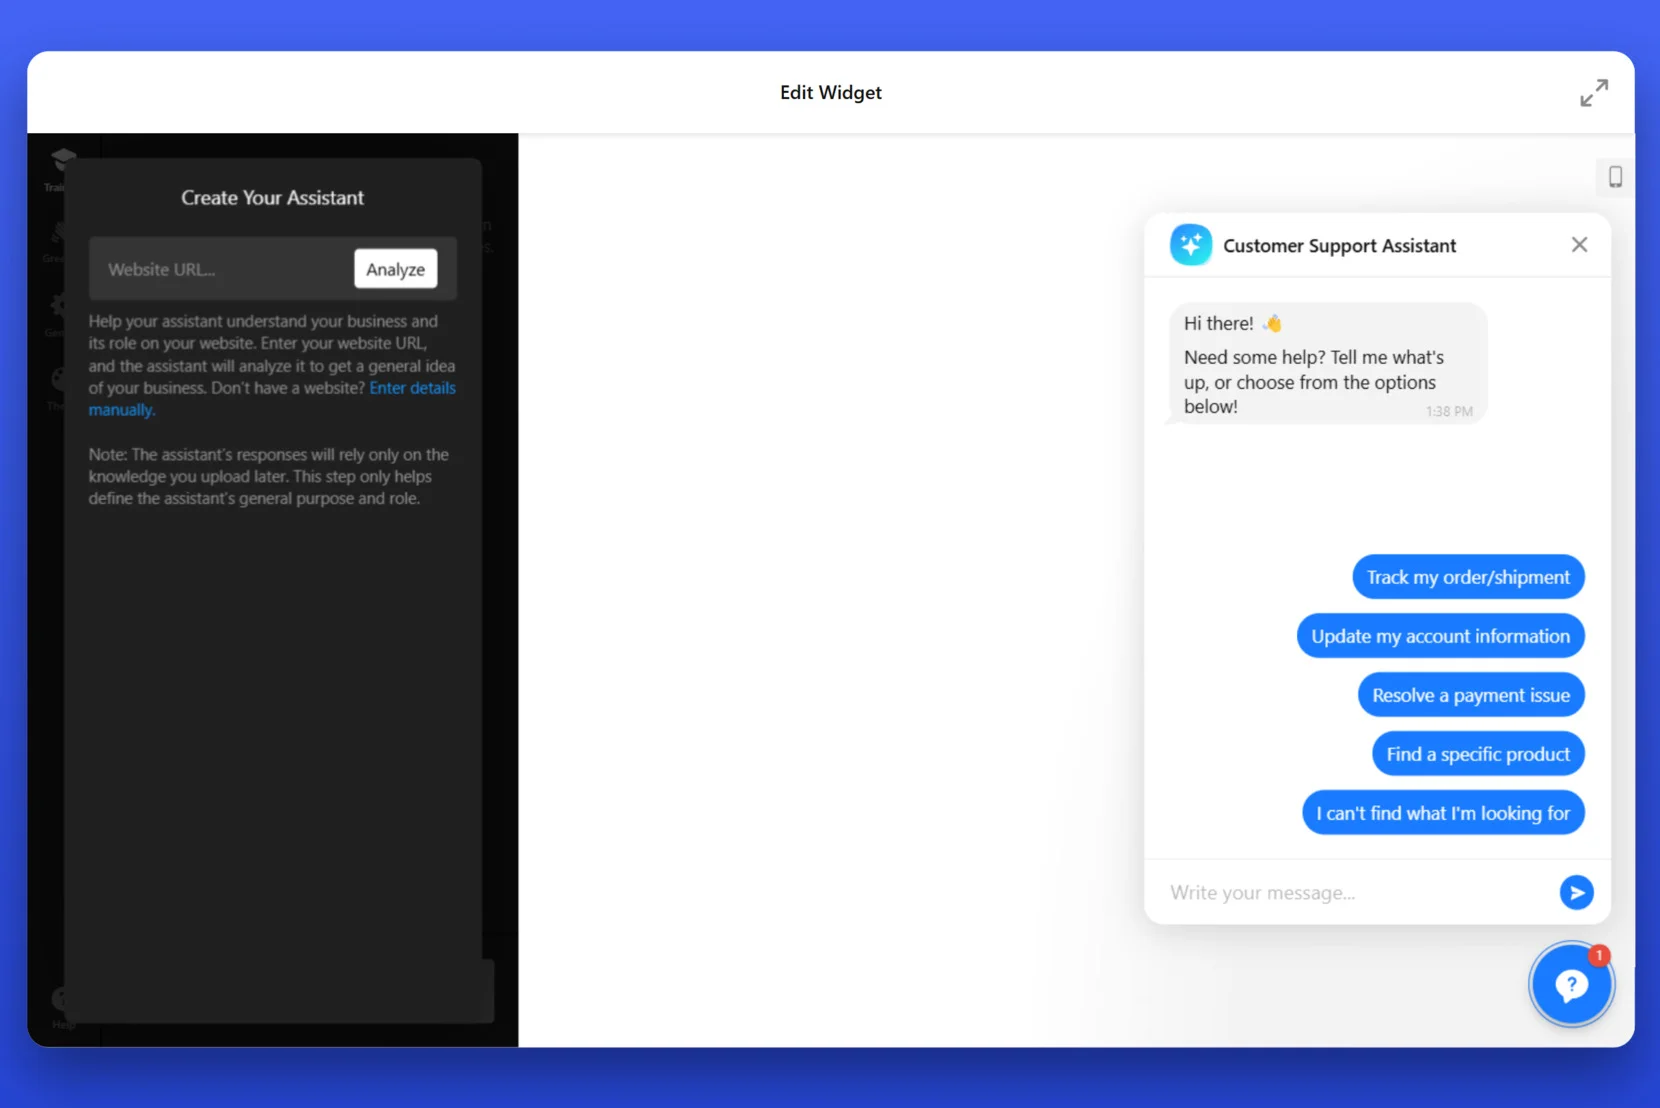
- Provide Your Website’s URL. You’ll be prompted to enter your website address and let the chatbot analyze its content. If you don’t have a website or need to provide additional details, manually add knowledge sources that the chatbot will reference when responding to users.
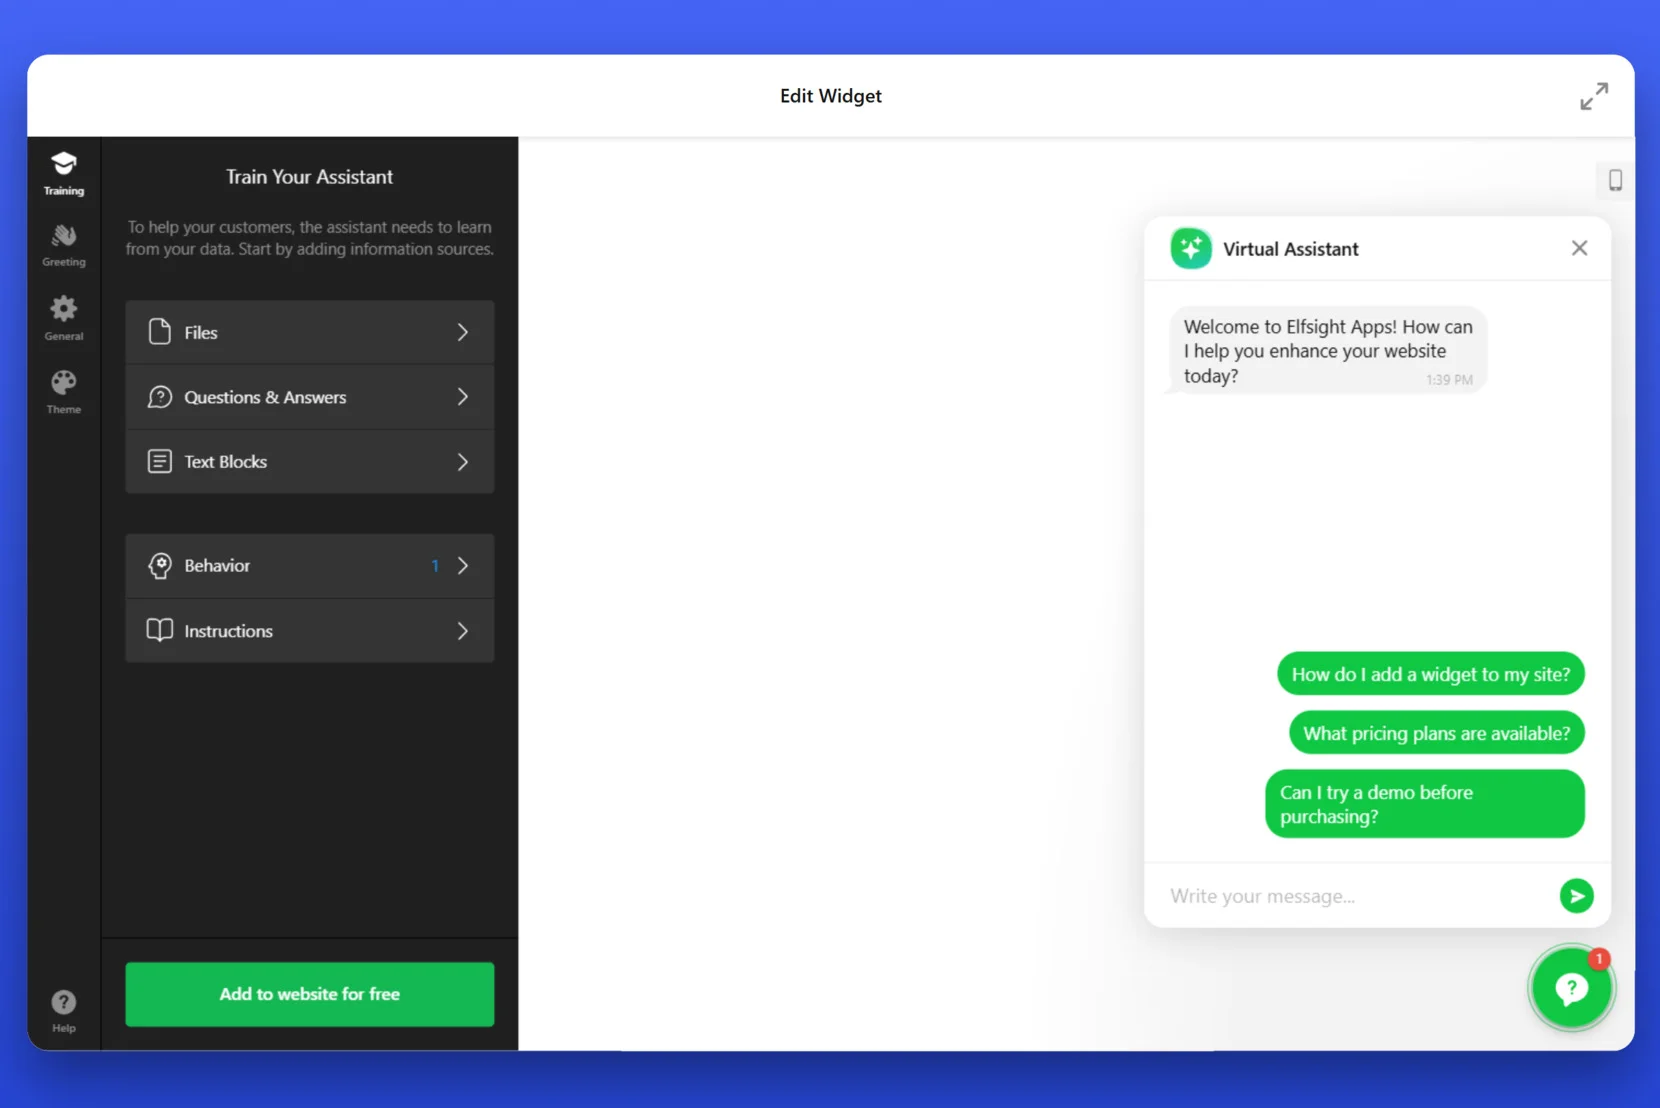
- Set Up Your AI Chatbot’s Knowledge Base. In the Training section, you can upload Files, Q&A, or Text Blocks to teach your AI assistant what you need it to know. You can also customize its Behavior and Interactions on specific customer responses.
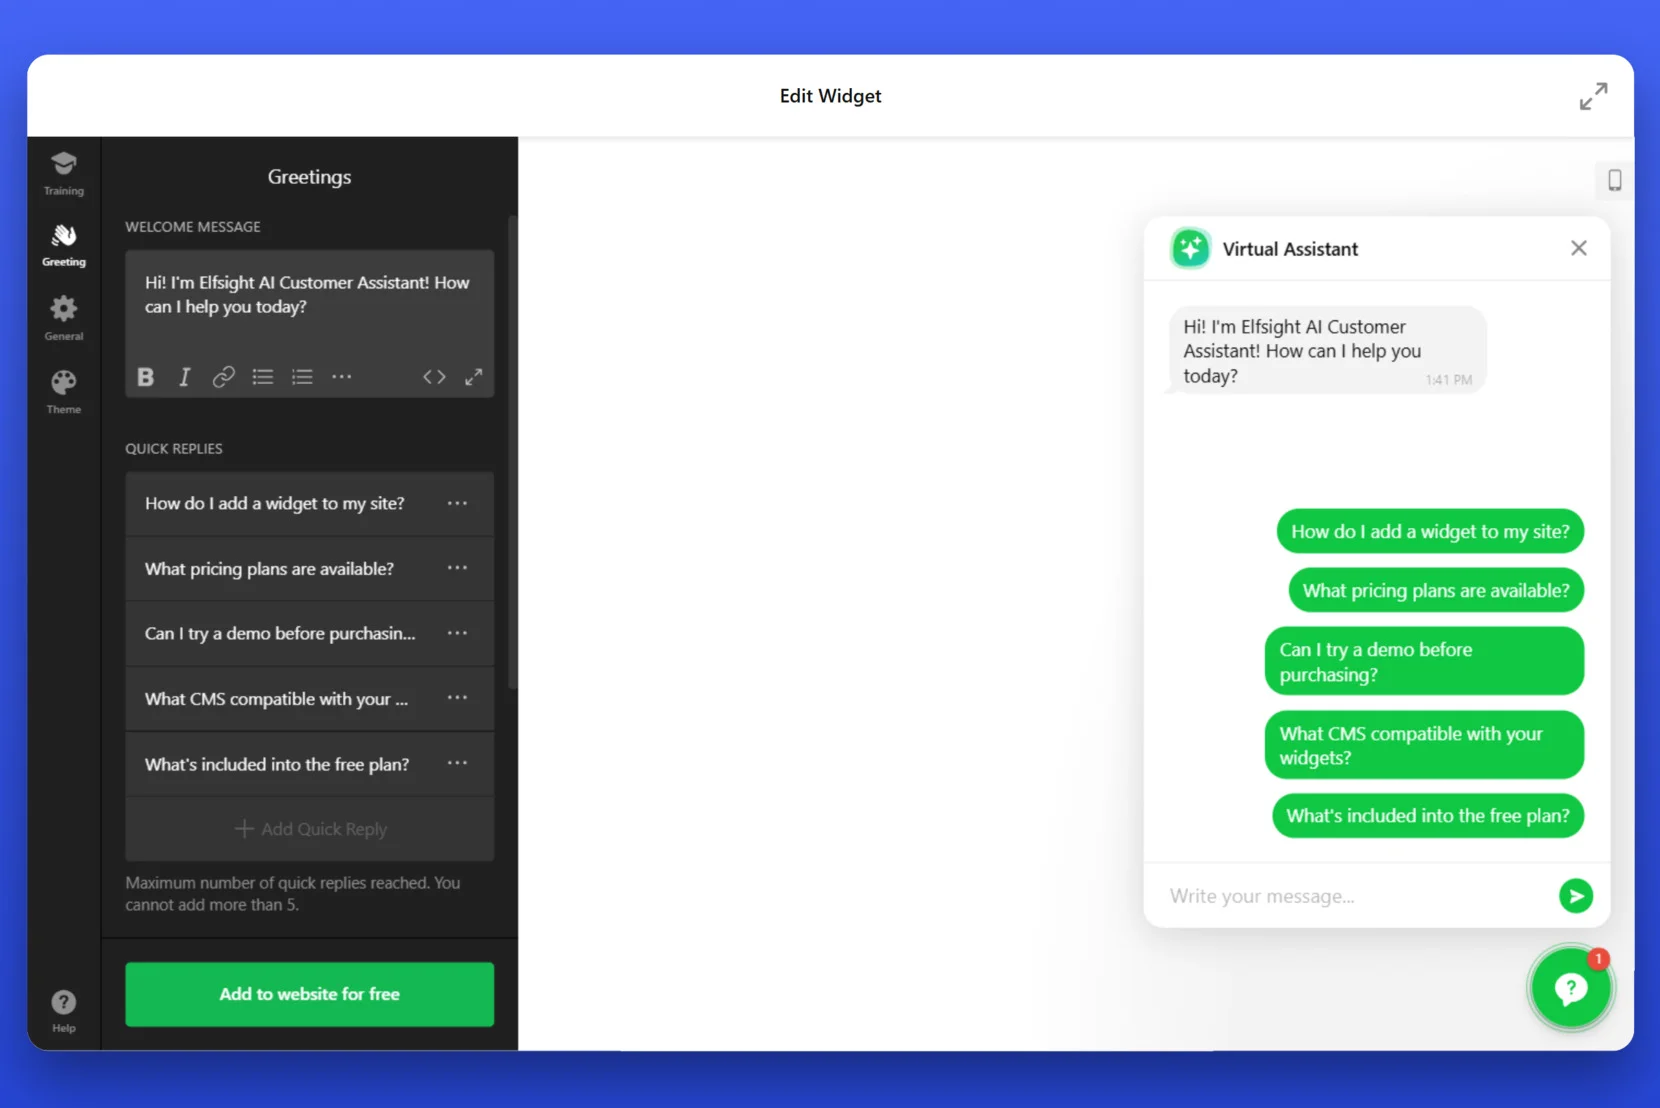
- Customize the Chatbot’s Greeting Messages. Navigate to the Greeting tab to set up the chatbot’s welcome message and quick replies. Here, you can define how the chatbot greets users and the first set of responses it suggests to visitors for a smooth interaction experience.
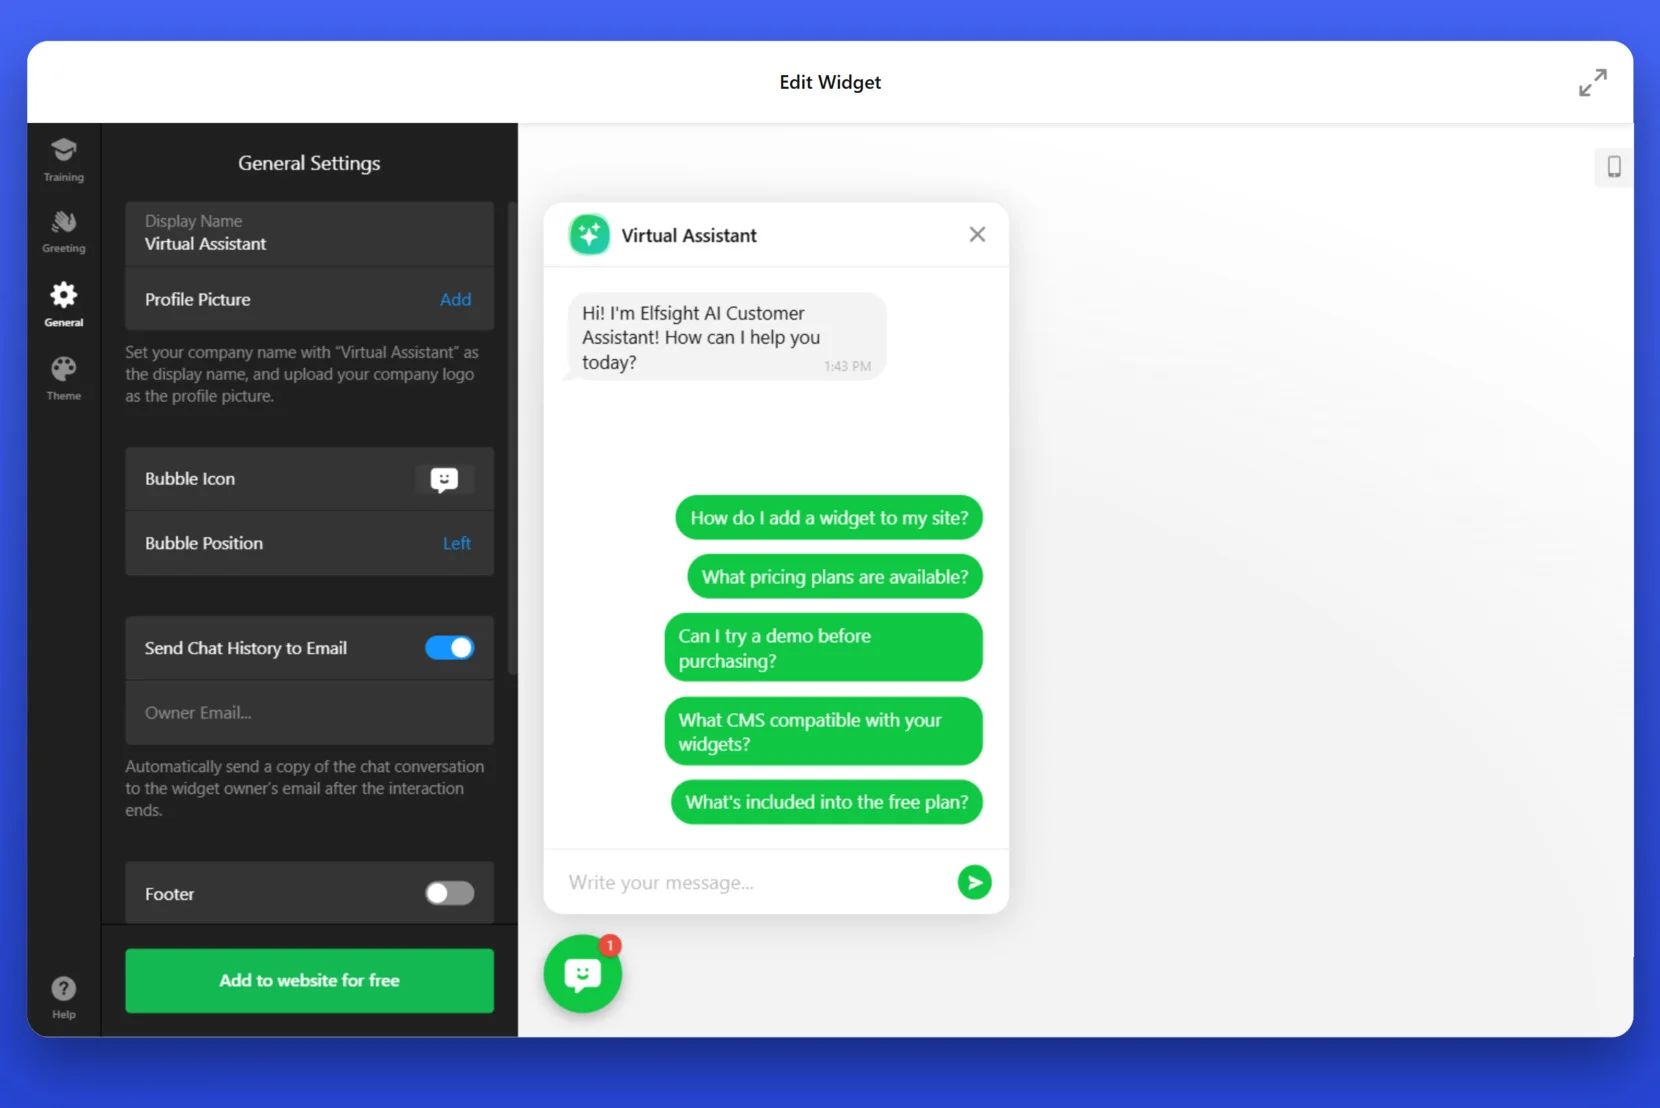
- Adjust General Settings. In the General tab, customize the chatbot’s name, profile picture, and button behavior. You can also choose whether to send chat histories to an email address for record-keeping and enable or disable additional chatbot functionalities.
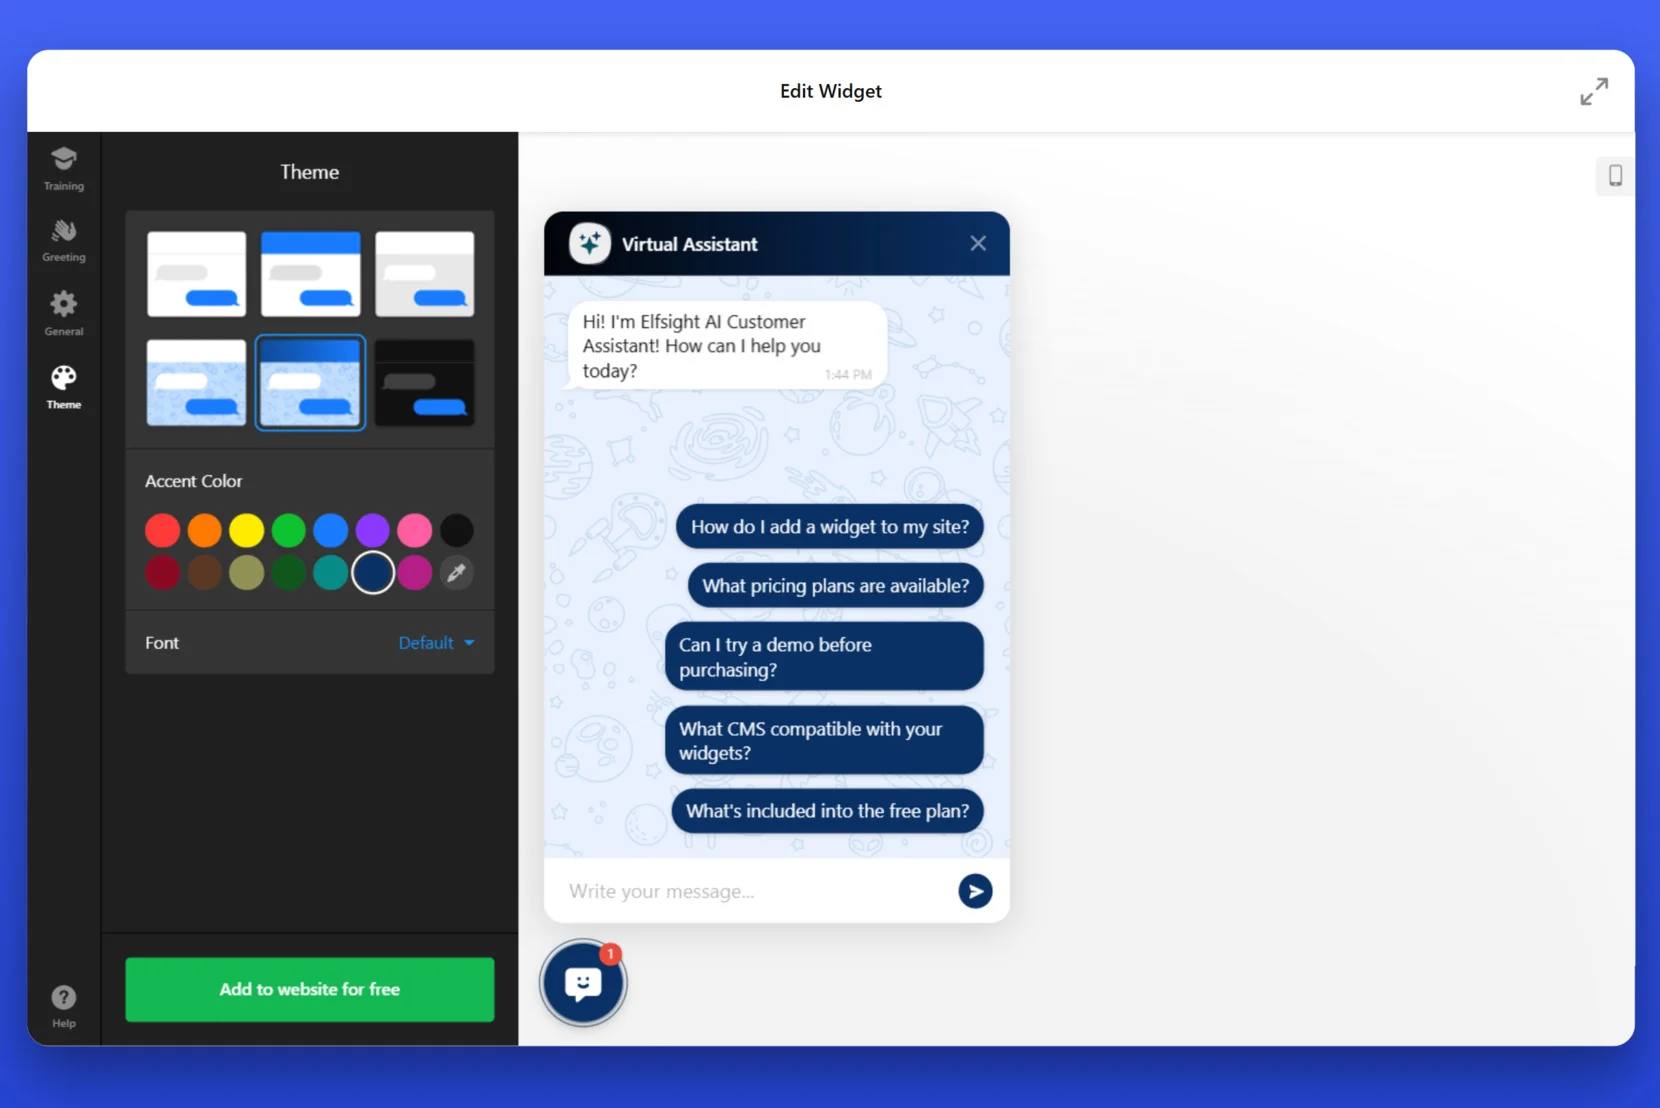
- Modify the Chatbot’s Theme and Appearance. Under the Theme section, adjust the chatbot’s visual style. Choose from different pre-set themes, select an Accent Color to match your brand, and pick a suitable Font Style for the chatbot’s text.
- Embed the AI Chatbot on Your Website. Click “Add to website for free” and copy the generated code. Open your WordPress editor, go to the copied snippet. Save and publish to make your chatbot live.

Now, your website visitors can enjoy real-time support, automated assistance, and seamless interactions. If needed, return to the Elfsight editor anytime to update responses, tweak the design, or improve chatbot functionality.
Other Chatbot Solutions to Consider
While Elfsight provides a simple and efficient way to integrate an AI Chatbot into your WordPress website, there are other methods available. Some of these solutions involve direct integration using an official API, while others rely on third-party chatbot platforms. Below, we explore two alternative methods in detail.
OpenAI API
For those who want full control over chatbot functionality, integrating an AI-powered chatbot directly using the OpenAI API is a viable option. This method allows you to create a fully customized chatbot with advanced capabilities.
Steps to integrate an AI Chatbot via OpenAI API:
- Sign Up for an OpenAI API Key. Go to the OpenAI API website and sign up for an account if you haven’t already. Navigate to the API key section and generate a new secret API key. Copy and store the API key securely, as you’ll need it to authenticate requests from your chatbot.
- Install a Custom Code Plugin on WordPress. Since WordPress doesn’t allow direct editing of core files, you need a way to insert custom scripts. The best method is using a plugin like WPCode.
Log into your WordPress dashboard and go to Plugins → Add New.
Search for WPCode – Insert Headers and Footers + Custom Code Snippets and install it.
Activate the plugin and open it from the left-hand menu under Code Snippets. - Create a Server-Side Script for Processing Chatbot Queries. You need a server-side script to handle communication between your chatbot and OpenAI’s API. Below is an example of a Python-based script you can use on your server:
import openai from flask import Flask, request, jsonify app = Flask(__name__) # OpenAI API Key openai.api_key = "your-api-key-here" @app.route("/chatbot", methods=["POST"]) def chatbot(): user_message = request.json.get("message") response = openai.ChatCompletion.create( model="gpt-4", messages=[{"role": "user", "content": user_message}] ) return jsonify({"response": response["choices"][0]["message"]["content"]}) if __name__ == "__main__": app.run(port=5000)
Save this script as app.py. Install dependencies using “pip install flask openai“. Run the script using
python app.py. This will start a local server on port 5000, which can now process chatbot queries. - Embed the Chatbot UI in WordPress. Now that your chatbot backend is working, you need to create a simple UI and embed it in WordPress. Inside WordPress, go to Appearance → Theme Editor or use a Custom HTML widget. Add the following HTML and JavaScript to create a chatbot interface that sends requests to your server:
<div id="chatbox"> <div id="chatlog"></div> <input type="text" id="userInput" placeholder="Ask me anything..."> <button onclick="sendMessage()">Send</button> </div> <script> function sendMessage() { let userMessage = document.getElementById("userInput").value; document.getElementById("chatlog").innerHTML += "<p><strong>You:</strong> " + userMessage + "</p>"; fetch("http://your-server-ip:5000/chatbot", { method: "POST", headers: { "Content-Type": "application/json" }, body: JSON.stringify({ message: userMessage }) }) .then(response => response.json()) .then(data => { document.getElementById("chatlog").innerHTML += "<p><strong>Bot:</strong> " + data.response + "</p>"; }); } </script>
Replace “http://your-server-ip:5000/chatbot” with your actual server’s URL. Save and update your WordPress site to see the chatbot in action.
Pro tip: Open your WordPress page where the chatbot is embedded and test different queries. Ensure the chatbot provides accurate responses and handles user inputs efficiently. If you experience slow responses, check your OpenAI API rate limits or optimize server performance. Debug any issues by checking the developer console (press F12 in Chrome) for errors.
Comparison of AI Chatbot Integration Methods
Each chatbot integration method has its advantages and disadvantages. The table below compares these methods to help you choose the best solution for your needs.
| Method | Pros | Cons |
|---|---|---|
| Elfsight | Provides a no-code, easy-to-use chatbot with full customization and seamless WordPress integration. | Some advanced capabilities require a paid subscription. |
| OpenAI API | Allows full customization and access to powerful AI models for highly advanced chatbot responses. | Requires coding knowledge, API management, and additional hosting resources. |
When choosing a chatbot solution for your WordPress website, consider your technical skills and customization needs. For most users, Elfsight’s AI Chatbot is the best choice for a quick, reliable, and customizable chatbot solution. If you require full control and advanced AI capabilities, OpenAI API integration is a powerful alternative.
Now, let’s move on to useful tips for optimizing chatbot performance on your website.
Best Practices for WordPress Chatbot Success
To maximize the effectiveness of your AI assistant, it’s essential to optimize its functionality and user interactions. A well-configured chatbot can improve engagement, streamline support, and create a more seamless website experience.
💬 Adjust Responses for a Natural Conversation Flow
Chatbots should feel conversational, not robotic. Personalize greetings, set up relevant responses, and fine-tune chatbot behavior based on user intent. This enhances user experience, builds trust, and encourages engagement.
📊 Use AI-Powered Analytics to Improve Performance
Regularly analyze chatbot interactions to understand how visitors engage with it. Identify frequently asked questions, refine response accuracy, and adjust workflows based on real user interactions to enhance chatbot efficiency.
🔗 Ensure Seamless Website Integration
Positioning and visibility matter. Embed the chatbot on your website in locations where users frequently seek assistance, such as the homepage, contact page, or checkout process, to ensure accessibility and usability.
🔧 Optimize Chatbot Speed and Responsiveness
Slow chatbot responses can frustrate users. Reduce lag by optimizing API calls, caching frequent responses, and ensuring your hosting server runs efficiently.
💡 Leverage Multimedia for Engaging Conversations
Enhance user experience by integrating GIFs, videos, and images into chatbot responses where appropriate. This makes conversations more interactive and engaging.
💻 Test Across Devices and Platforms
Ensure your chatbot performs well on mobile, tablet, and desktop devices. Regularly test its functionality on different browsers and screen sizes to avoid usability issues.
🔑 Keep Your Chatbot Secure
Protect user data by encrypting chatbot conversations, following GDPR compliance, and avoiding storing sensitive personal information unless necessary.
Real-World AI Chatbot Examples
AI chatbots are transforming customer interactions across various industries, helping businesses automate processes, improve customer service, and drive conversions. From ecommerce to healthcare, leading brands have successfully implemented chatbot technology to enhance user experience and efficiency.
AI Chatbots in ecommerce
Online stores use AI-powered chatbots to provide instant customer support, assist with product recommendations, and facilitate seamless transactions. These chatbots enhance shopping experiences by offering personalized assistance and reducing cart abandonment rates.
H&M uses an AI chatbot to guide customers through product selection based on their style preferences. The chatbot offers outfit suggestions, locates items, and directs users to checkout, streamlining the shopping experience.
AI Chatbots in Healthcare
Chatbots in healthcare assist patients with appointment scheduling, symptom checking, and medical information delivery. They help streamline operations while providing users with instant access to essential healthcare services.
Babylon Health uses a conversational AI chatbot to analyze patient symptoms and provide preliminary medical advice. The chatbot assists in triaging patients, reducing the burden on healthcare professionals and improving patient care.
AI Chatbots in Finance
Financial institutions leverage AI chatbots to assist users with account management, fraud detection, and financial planning. These chatbots offer instant support, reducing wait times and enhancing customer trust.
Bank of America’s AI chatbot, Erica, helps customers track spending, pay bills, and receive financial insights. By using AI-driven support, Erica improves customer engagement and simplifies banking tasks.
AI chatbots are making interactions faster, smarter, and more efficient. Look at our collection of chatbot templates and pick the one that fits your company!
Common Issues and Fixes
While integrating a chatbot with WordPress is generally straightforward, some challenges may arise during setup and operation. Below are common problems businesses encounter and their solutions to ensure a smooth chatbot experience.
Why is my chatbot not appearing on my WordPress site?
How can I improve my chatbot's response accuracy?
What should I do if my chatbot is slowing down my website?
How do I make my chatbot more engaging for users?
Can I use a chatbot on multiple pages of my website?
By addressing these common issues, you can ensure that your AI assistant operates efficiently and provides a seamless user experience.
Conclusion
Integrating an AI chatbot into your WordPress website is a powerful way to enhance customer support, automate interactions, and improve user engagement. With the right setup and ongoing optimizations, the assistant can become an invaluable tool for streamlining operations and driving conversions.
Whether you choose a no-code solution like Elfsight or build a custom chatbot using an API, the key is to select a method that aligns with your business goals. A well-configured chatbot provides 24/7 AI-driven website support, making it easier for visitors to find information, complete actions, and interact with your brand in a meaningful way.
Need More Info?
We hope this guide has provided you with the insights needed to successfully integrate an AI Chatbot into your website. If you have any questions or want to explore how to create a custom chatbot, reach out to us. At Elfsight, we offer an intuitive, no-code solution designed to make chatbot integration effortless for businesses of all sizes.
Join our growing Community to exchange ideas, share feedback, and stay updated on the latest improvements. Your input matters — feel free to suggest new features or enhancements by adding them to our Wishlist. Let’s build smarter, more engaging chatbot experiences together!