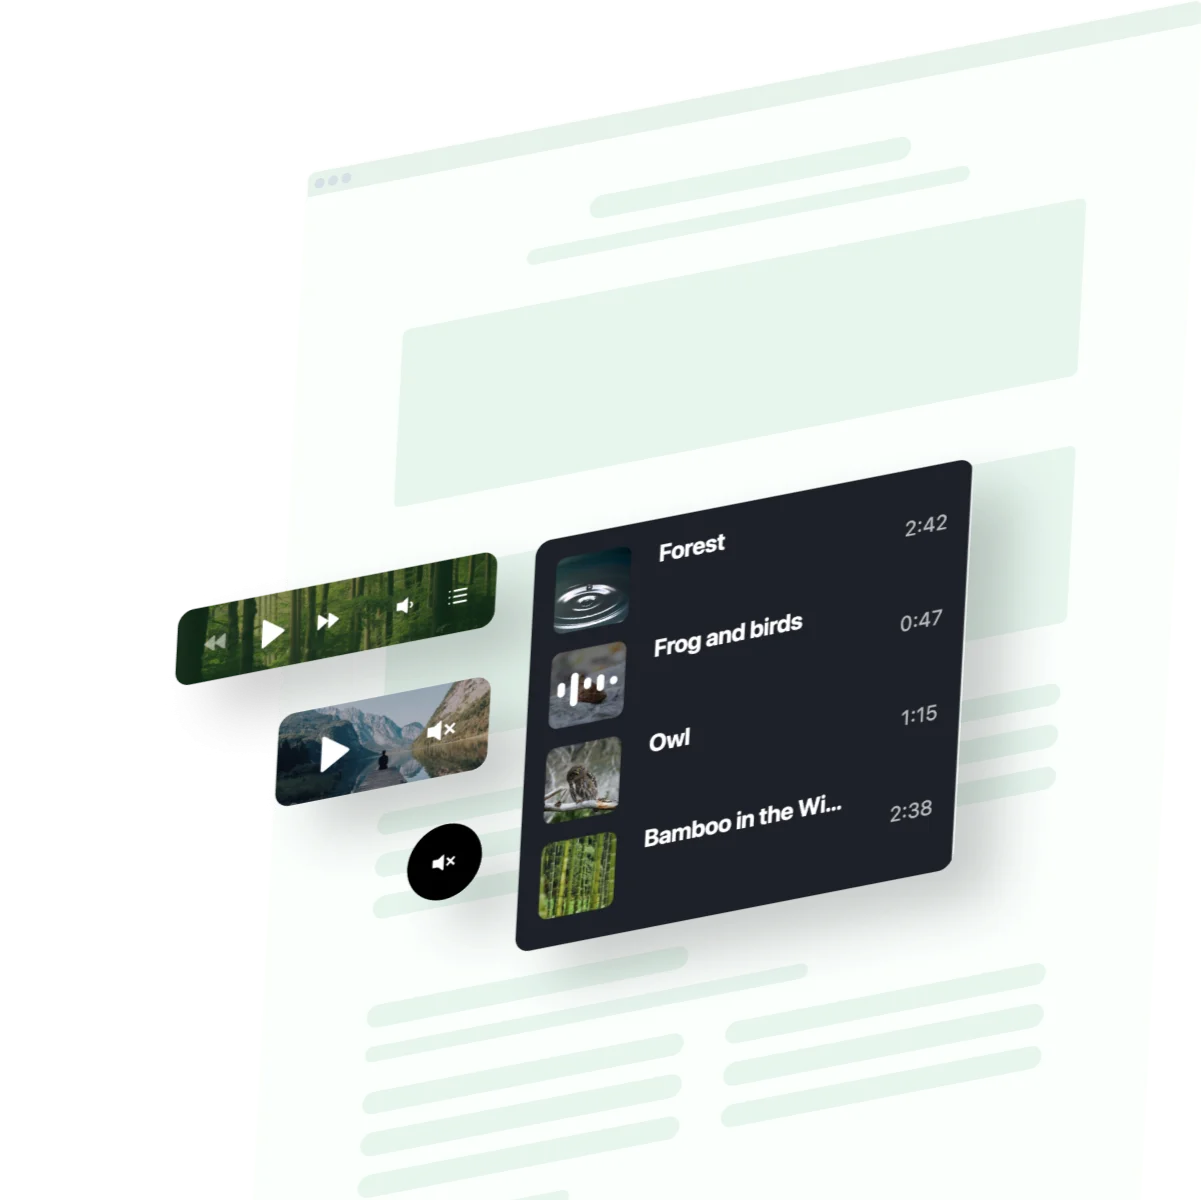
Add Background Music to Your Website: Let’s Get Started
Driven by the psychological influence that music holds over people, the Background Music widget from Elfsight has the full potential to draw attention, set the tone, and stimulate behavior-centered actions right on your website.
Based on a few studies made throughout the years, favorite songs and tracks prolong users’ average time spent on a website page, leading to higher opportunities for better sales. Coupled with another real pinch in this story—music differentiates your branding from others and builds a new perception of quality standards—you can achieve a customer’s willingness to come back for more and stay true to your community.
No matter what kind of industry you work with—e-commerce, music, fitness, hospitality, media, etc.—or being an independent content creator, this HTML code-free audio plugin gives freedom in customization and functionality with advanced design features. In addition, the installation process of music takes seconds: create, get the embed code, copy, and add it to your website editor.
Here’s the editor of the widget. Check out everything right on the page!
How to Create and Embed Background Music Widget on Websites: Easy Tutorials
With some briefly outlined simple steps to embed the HTML code-free Background Music plugin to your website page above, we would like to add a little bit more depth to that point. Despite the intuitive interface and user-friendly settings, there are some hidden setup tips & tricks that we would like to share with you!
Step 1: Open the online configurator for the Music plugin
You can use one mentioned in this article or log in to your Elfsight admin panel. If you opt for the second option, here’s an easy effort you need to put in to get to the music plugin:
- Log in to your existing account or sign up for a free profile by clicking the top button on the right side of the screen.
- Go to the Apps Catalog menu and type in “Background Music.”
- Open the audio widget.
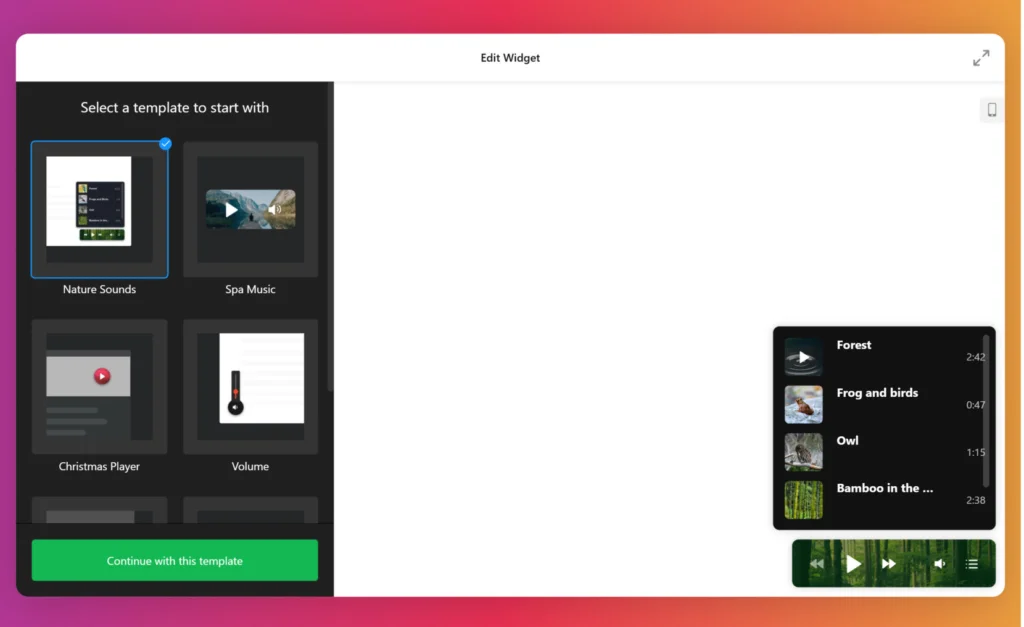
Step 2: Select the Background Music widget’s type
The Background Music plugin offers a few different template versions to choose from: Nature Sounds, Spa Music, Christmas Player, Volume, Halloween, and Embeddable Player. With a versatile collection, you can easily match the website style and resonate with your visual identity.
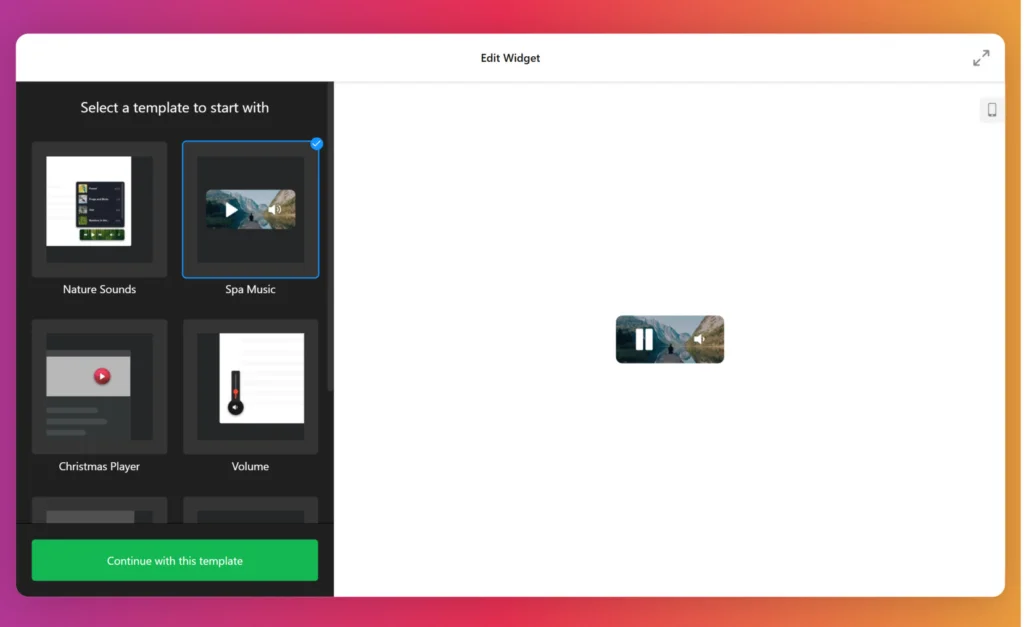
Step 3: Upload audio tracks and songs—all your music!
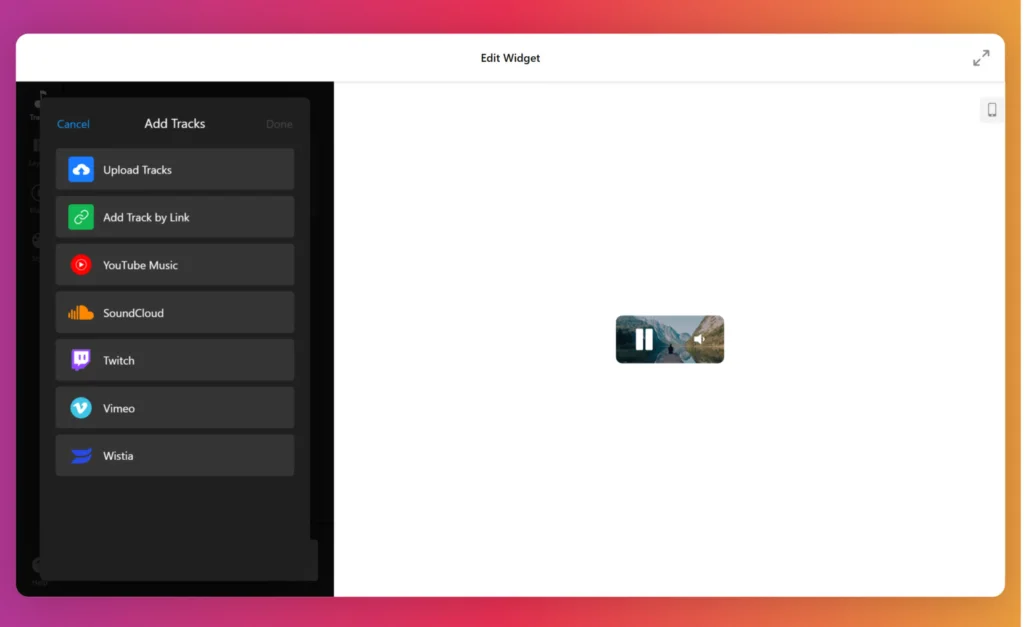
Take your atmosphere mantra to a whole new level by drag-and-dropping background songs and audio tracks to the music widget. To do so, follow these steps:
- Navigate to the “Tracks” menu option.
- Hit the “+ Add Tracks.”
- Drag-and-drop files or browse files on your computer.
Step 4: Customize audio and music details
Specify the details of your audio and add track names, artists, and images to help your website users find likable songs across multiple channels—like Spotify, SoundCloud, and many others—and skyrocket stream numbers up to the sky.
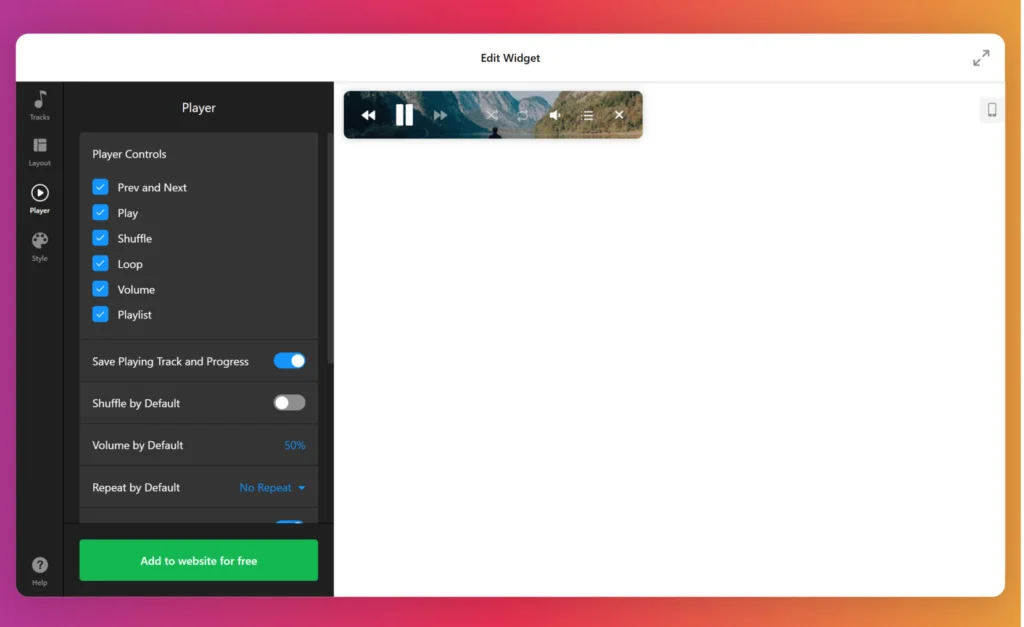
Step 5: Set up the music player’s controls, shuffle, repeat, loop, and autoplay
Provide the proper user experience for your website visitors. Display or hide the specific music player controls, like previous, next, shuffle, loop, volume, and playlist buttons. Make it available or not to save the audio song progress. Let the default settings remain the same, or turn them off. And even set up an autoplay if you want to.
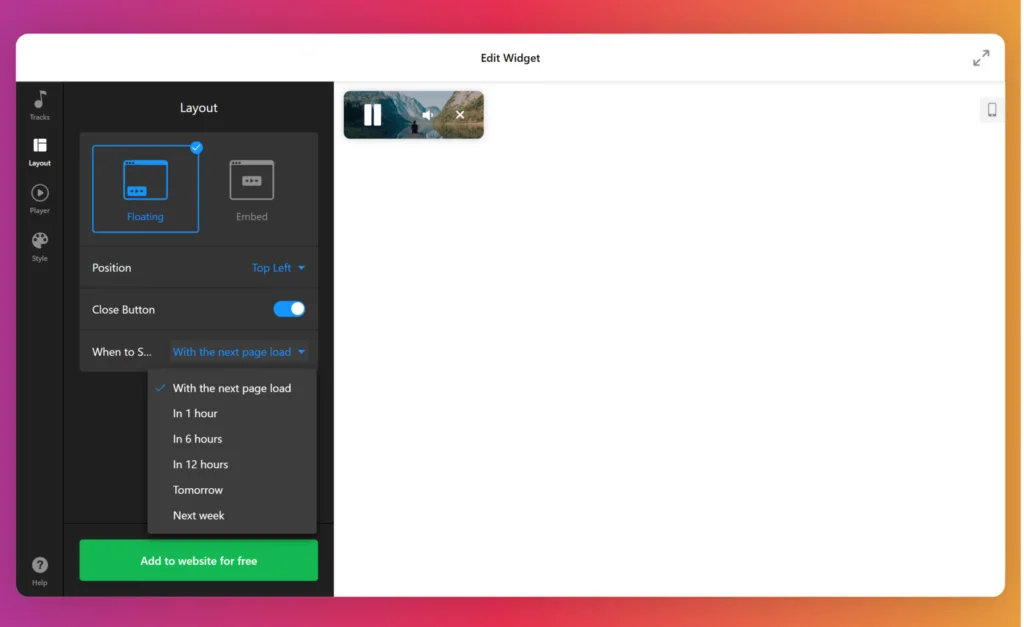
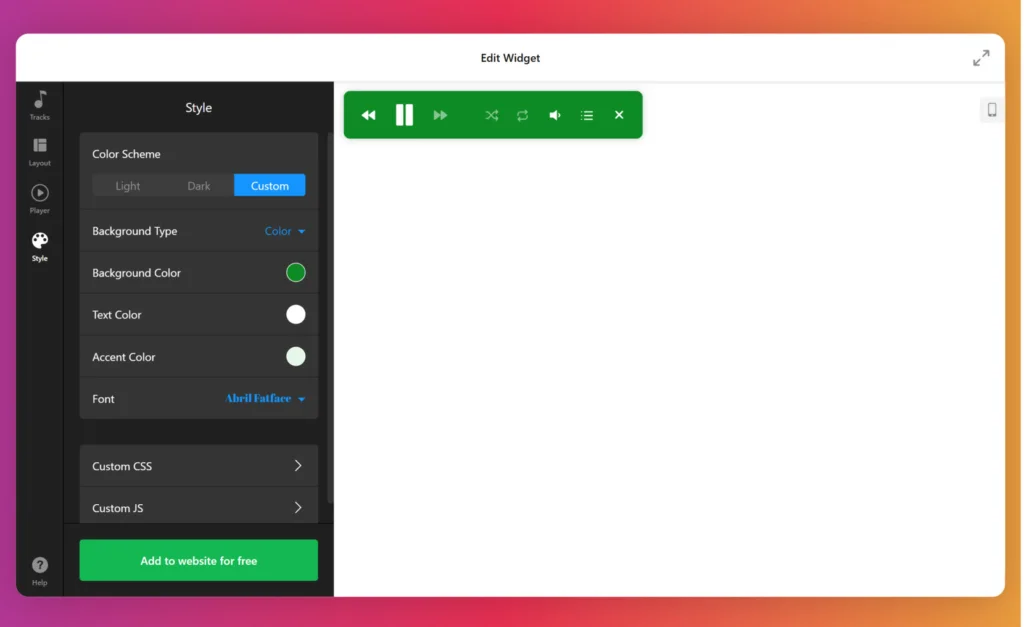
Step 6: Bring colors and think about the music player’s position on a website page
Raise branding awareness, add custom colors, integrate images as a background, and specify the layout for your website page to make the HTML code-free Background Music plugin completely your own.
Step 7: Generate custom embed code to add the background music
After creating and personalizing your HTML code-free audio widget, click on the “Publish” button provided by the online configurator. It will generate an embed code specific to your background music player.
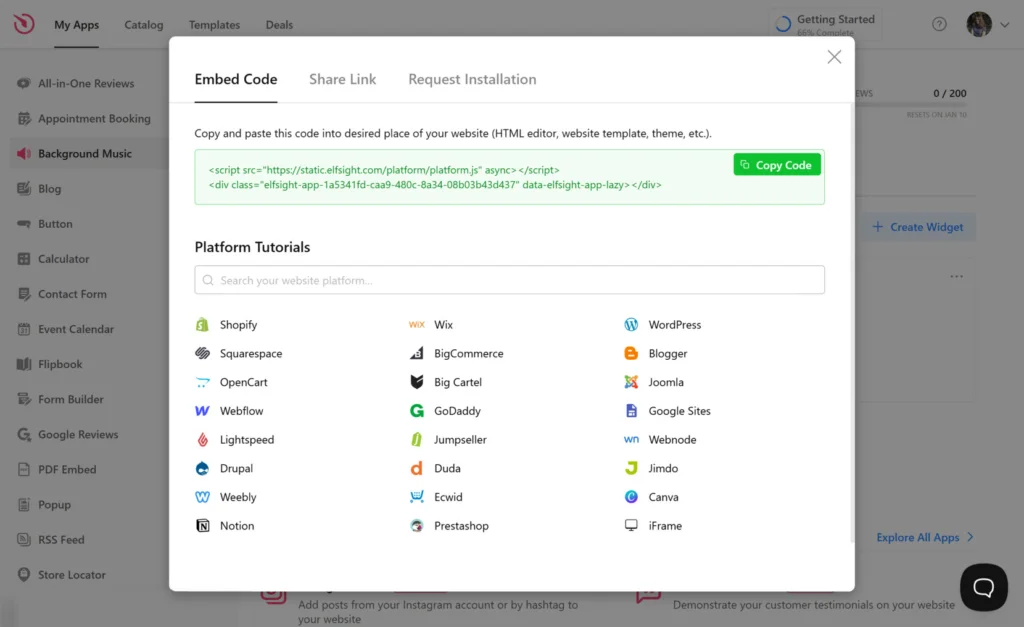
Step 8: Install the Background Music widget on your website
Copy and paste the generated embed code into the desired section of your website page or content management system to display the music plugin. Ensure that it’s done correctly without missing any symbols!
Now that you understand the general process and can create a personalized Background Music plugin for your business, let’s take a closer look at how to add it to popular website platforms and get clear tutorials with step-by-step guides:
Can I embed a Background Music plugin on the WordPress website?
Yes, absolutely! The Background Music widget from Elfsight works seamlessly with WordPress, allowing you to effortlessly add it to your website page. Follow our free guide to learn how to embed it using an auto-generated HTML code snippet:
- Personalize the widget to your liking, then simply hit the “Publish” button.
- Once you’ve saved the changes, copy the HTML code snippet provided for the Background Music widget.
- Access your WordPress admin dashboard and log in.
- Select the desired page and click on “Edit.”
- Put the Custom HTML block in the chosen content area and insert the installation code.
- Publish or update the page.
Congratulations! You now have the knowledge to successfully embed the Background Music widget into your WordPress website.
Can I add a Background Music widget to Squarespace website?
Yes, you can! Squarespace fully supports the Background Music widget, giving you an opportunity to add it to your website. Follow these easy steps to never get lost:
- Create the music plugin and customize it according to your preferences.
- Obtain the free HTML code to install the Background Music.
- Sign in to your Squarespace profile and select the website.
- Navigate to the editor and add the “Code” block from the settings menu.
- Embed the HTML code snippet of your Background Music widget into the popup window on the Squarespace website.
- Apply the changes, save them, and publish the website page.
Your HTML code-free plugin will be up and running in no time—start enjoying the best sounds!
Can I embed a Background Music on the Wix website?
Yes, certainly! You can embed the Background Music plugin into your Wix website page with just a few simple steps. To assist and guide you through the process, we offer a complimentary tutorial—feel free to give it a glance.
- Customize your own plugin to align it with your brand’s identity and preferences.
- Receive the HTML installation code generated for the Background Music and make a copy of it.
- Log in to your Wix admin account.
- Choose the website you want to work on and click the “Edit” button.
- Locate the specific area where you wish to embed the audio plugin and click the Plus (+) icon.
- Browse through and select the “Embed” section.
- Opt for the “HTML iframe” and drag it onto your website page, adjusting its size and position as needed.
- Press the “Enter Code” option and paste the HTML code for the music plugin in the popup.
- Hit “Apply” and publish your changes.
Imagine how incredibly easy it is to add the Background Music widget to your Wix website. We can!
Can I add a Background Music to the Webflow website?
Yes, absolutely! It’s actually not that complicated at all. So you spend so little time and embed the Background Music widget on your Webflow website in seconds. Just follow this step-by-step instructions:
- Create the Background Music widget within the Elfsight panel and receive the installation HTML code snippet to add to your Webflow website.
- Sign in to your Webflow admin dashboard.
- Locate and click on the “Edit Website” button.
- Drag and drop the “Embed” element to the desired location on the page where you want to add the audio player.
- Select the added block and select “Edit Custom HTML.”
- Paste the provided HTML code snippet and save your changes to publish it.
Can I embed a Background Music on the Shopify website?
Yes, of course! You can smoothly add the Background Music widget to your Shopify website. Just simply follow this step-by-step guide:
- Customize the Background Music plugin to your liking, then acquire the installation HTML code to embed it onto your Shopify website page.
- Sign in to your Shopify admin dashboard.
- Proceed to the “Online Store” section in the left-hand sidebar and select “Themes.”
- Choose the desired theme to edit, and then click on the “Customize” option to access the code editor.
- Locate the “Add section” menu and find the “Custom Content” option.
- Click on “Add.”
- Select the “Custom HTML” block and paste the embedding code snippet of your audio plugin.
- Save your modifications, and you’re all set!
Background Music Best Practices for Websites
Background audio can be that needed power to enhance the user experience on your website and drive more traffic. However, it’s highly requested to keep in mind some best practices to ensure that the music or songs don’t become a distraction or annoyance for your visitors. Here’s some to remember:
Choose the right background music that aligns with your brand
Select background audio that aligns with your website’s theme, brand, and target audience. Consider the mood you want to create and the emotions you want to evoke. Choose music that complements the overall user experience and enhances the content of your website.
For example, if you have a fitness website, you may want to choose upbeat audios and energetic music. On the other hand, if you have a meditation website, you may want to choose to display calming and relaxing music.
So this is what you can look for while picking the audio songs:
- Define purpose. Is it a professional website, an e-commerce web page, a creative portfolio, or a blog?
- Get the atmosphere. Do you want it to be uplifting, soothing, energetic, or calming?
- Keep in mind the genre and style. For instance, classical music may suit a formal website, while electronic or indie music may work better for a creative or modern web page.
Keep the background music subtle
The purpose of background music is to put the user experience upfront, not overpower it. Opt for soothing and non-distracting songs that blend seamlessly with your website’s design and content. The music should be noticeable but not overpowering, allowing visitors to focus on your content without distractions.
So bear these vital points in mind:
- Avoid distraction. Subtle background music ensures that it doesn’t distract visitors from the website’s main content or purpose. It should enhance the user experience rather than competing for attention.
- Maintain usability. Websites are primarily here to provide information or services to visitors. If the background music becomes too loud or intrusive, it can hinder the usability of the website page, making it difficult for visitors to concentrate or navigate.
- Cater to diverse preferences. We all have different preferences when it comes to music. Keeping the background audio subtle, you create an inclusive browsing experience that accommodates individuals with varying tastes and sensitivities.
Use royal-free or licensed music
Ensure that the music you select is free from copyright restrictions or acquire necessary licenses. There are various platforms and libraries available with royalty-free music that offer a wide range of genres to choose from.
To find websites offering royalty-free or licensed background music for commercial use, you can explore the following platforms:
- Premium music libraries. Websites like Epidemic Sound, Artlist, AudioJungle, and PremiumBeat offer a wide range of high-quality royalty-free music tracks catering to various genres and moods. These libraries often require a subscription or the purchase of licenses for specific songs.
- Creative Commons platforms. Websites such as Jamendo, Free Music Archive, and SoundCloud have sections dedicated to Creative Commons-licensed music. These platforms allow artists to share their work under specific Creative Commons licenses, which might require attribution or have certain usage restrictions.
- Free music archives. Websites like FreeSound, Pixabay, and Bensound offer free music tracks that are available under various licenses that allow for commercial use. However, it’s essential to check the specific licensing terms for each background audio song you choose.
Consider looped songs and audio tracks
Decide whether the background music should loop continuously or play one song at a time. Looping the music ensures that there are no abrupt interruptions in the background. It creates a seamless listening experience for your visitors and prevents the jarring pauses when the music audio ends.
Also, think about autoplay options, such as starting the music automatically when the page loads or letting users manually initiate the playback. Take into account user preferences and the nature of your website’s content.
Allow visitors to control the music
Give your visitors the ability to control the background audio playback. Include options to pause, stop, or adjust the volume of the background music. It allows users to tailor their experience based on their preferences and ensures that the music doesn’t become an annoyance for those who prefer silence.
Consider mobile compatibility
Ensure your music is compatible and optimized for mobile platforms. It’s crucial to test the playback on different devices and browsers to ensure a consistent and pleasant background experience for all users.
Keep the volume at an appropriate level
Ensure that the volume of the background music is balanced with the other audio elements on your website. The music should enhance the browsing experience without overwhelming or distracting the visitors. Provide volume controls to allow users to adjust the song’s sound according to their preferences.
Benefits of Embedding Background Music Widget on Website
Now that you understand the best practices for incorporating background music on your website, let’s explore the benefits of the embed process of the HTML-free Background Music widget:
| Enhanced user experience | Background music can create a pleasant and immersive environment for your website visitors. It sets the mood, evokes emotions, and engages users on a deeper level. It helps establish a unique and emotional connection. |
| Boost brand recognition | Background audio that aligns with your brand’s personality and core message can help reinforce your brand identity. When visitors hear the same music on your website consistently, it creates a sense of familiarity and strengthens brand recognition. |
| Differentiation from competitors | Adding background music sets your website apart from competitors and helps create a unique selling point. Creating this type of experience for your visitors can add some points and make you stand out in a crowded digital landscape. |
| Increased time spent on the website page | Engaging background music encourages visitors to spend more time on your website, exploring your content and offerings. The longer visitors stay on your website, the more opportunities you have to convert them into customers or clients. |
| Versatility for various websites | The HTML code-free Background Music widget is suitable for a wide range of websites, including e-commerce stores, portfolios, personal blogs, and more. It offers versatility to suit the unique needs of different industries and businesses. |
| Create exclusivity | Background music can create a more immersive experience for visitors. Songs can transport visitors to a different world and make them feel like they are part of something special. |
| Positive emotional impact | Well-chosen background music can evoke positive emotions, making visitors feel more connected, excited, or relaxed. Music has the power to create an emotional connection and leave a lasting impact on your audience. |
FAQ about Background Music Plugin
Is the Background Music widget free?
Yes. There is no chase to jump right into the paid options right away to add background songs. Elfsight uses a tiered subscription model that includes Free, Basic, Pro, Premium, and Enterprise plans. Take your own time and explore all the features without limitations with our Free tier. But you can always upgrade to gain access to extra benefits!
Where can I add the Background Music on my website?
It’s up to you to decide where to add the HTML code-free audio plugin. There are no fixed guidelines to adhere to. However, ensure that it makes sense and is positioned in a high-traffic zone, like the homepage, contact page, or product page.
Do I need to know how to code to add the Background Music widget on my website?
No, not at all! With Elfsight, there’s no requirement for HTML-code knowledge, design expertise, or a third-party app to set up the widget. It means that you can embed the Background Music widget with the auto-generated HTML code provided by our team.
Can I use my own audio files with the Background Music widget?
Yes, the HTML-free Background Music widget from Elfsight allows you to upload your own audio files, providing you with lots of flexibility in the customization process.
How do I choose the right background music for my website?
Consider your brand image, the audience you target, and the emotions you want to evoke. Choose music that aligns with your brand and complements the overall theme and atmosphere of your website.
Can I use any background music I want on my website page?
It’s better to say no for safety reasons. At least try to use music that is licensed for commercial use or royalty-free to avoid any legal issues with the labels or massive companies.
Conclusion on Adding Music Player
Adding background music to your website can elevate the user experience, engage your visitors, and create a memorable browsing journey. By following the steps outlined in this guide, you can seamlessly integrate the Background Music widget from Elfsight into your website, creating an immersive atmosphere and enhancing your brand presence.
Consider the compatibility of the widget with your website platform, choose the right music that aligns with your brand, and provide your visitors with an enjoyable and captivating experience. Harness the power of background music today and create an unforgettable experience.
For more information about the embed process of the Background Music widget, feel free to check out the following sources:
Happy website building with our background audio widget!


