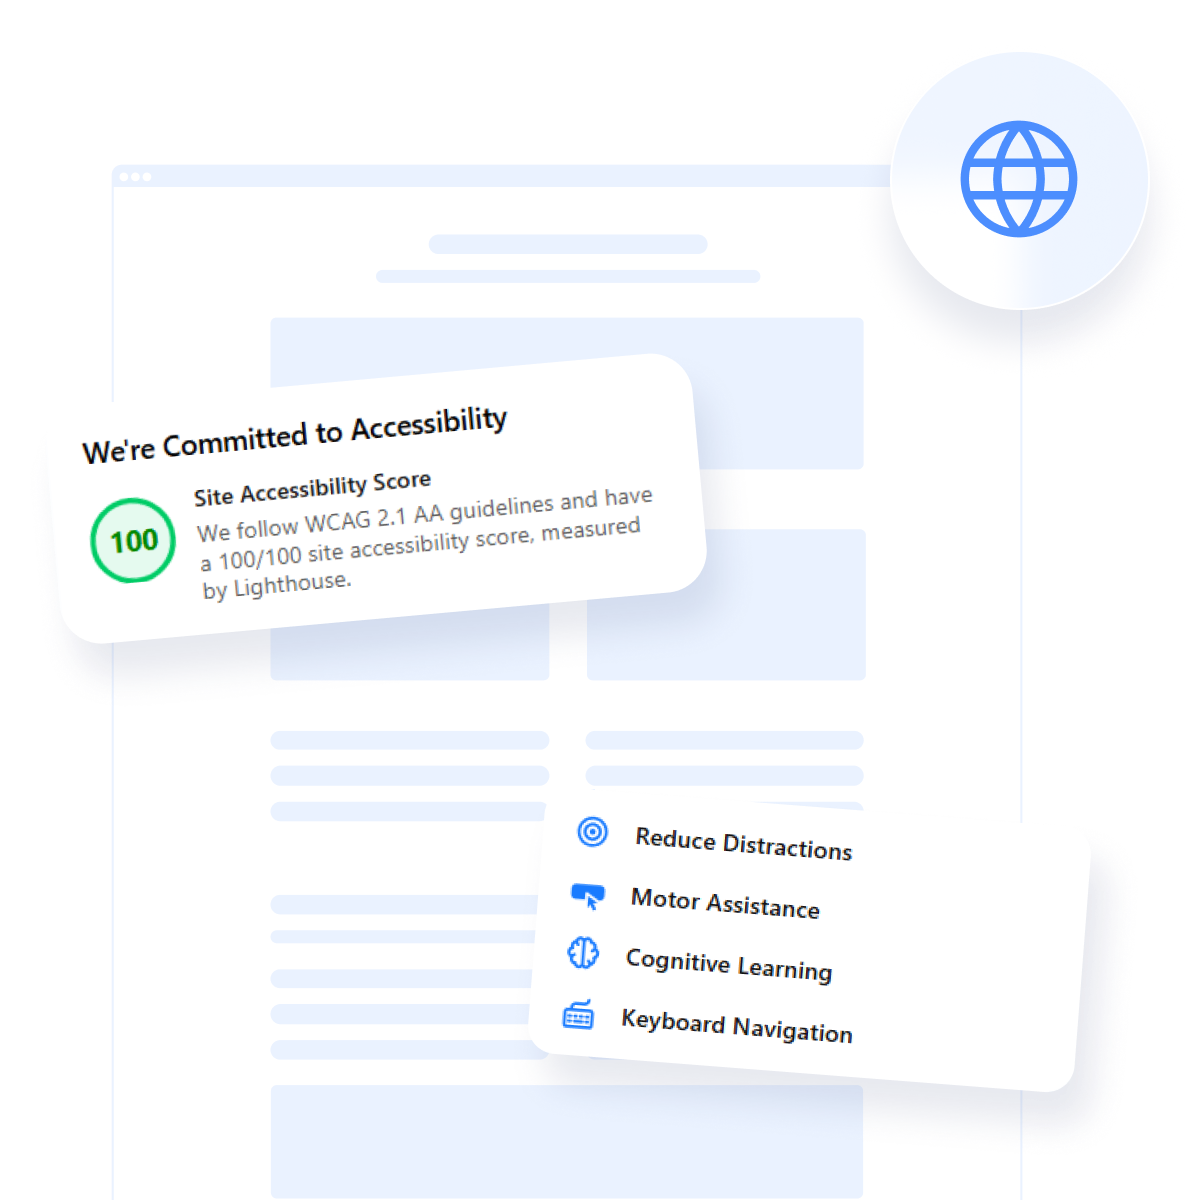
Adding accessibility to your website is not only a best practice — it’s a necessity. With evolving web accessibility standards like ADA and EAA compliance, businesses are expected to provide a digital experience that’s inclusive for all users, including those with disabilities.
- ADA (Americans with Disabilities Act) is a U.S. law that requires public spaces, including websites, to be accessible to individuals with disabilities.
- EAA (European Accessibility Act) is an EU directive that mandates digital accessibility across websites and services to ensure equal access for all users, including those with impairments.
- WCAG (Web Content Accessibility Guidelines) is a globally recognized set of standards that provide recommendations for making web content more accessible to people with disabilities.
Web accessibility ensures that people with various disabilities — including visual, auditory, motor, and cognitive impairments — can navigate, understand, and interact with a website effectively and independently.
If you want your website to meet these regulations and offer a seamless user experience to every visitor, an ADA Compliance widget is exactly what you need. It integrates easily, works automatically, and saves time while protecting your business legally.
- Ensures ADA and EAA compliance. The widget helps your website conform to major international standards, reducing legal risks.
- Improves usability for all users. It adds features like keyboard navigation, contrast adjustments, and screen reader support, making your website easier to use for everyone.
- Boosts trust and professionalism. Showing that you care about accessibility builds credibility and a positive brand image.
- Optimizes your reach. A more accessible website can lead to better SEO performance and reach a broader audience.
Now that you know why accessibility matters and how the disability compliance widget can help, let’s look at how you can quickly create one using Elfsight.
Quick Guide to Adding Accessibility to Website
After understanding the importance of digital inclusion, the next step is putting it into action. With Elfsight, adding accessibility to a website is straightforward and requires no coding. You can create a fully functional accessibility widget in just a few clicks.
- Open the Elfsight editor. Choose the ADA Compliance widget template.
- Run the accessibility check for your website if you wish.
- Customize the settings of the widget such as position, language, and other.
- Click “Add to website for free”, copy the generated code, and paste it into your website’s backend.
Try it yourself – build your accessibility widget in minutes!
Features of Elfsight’s Widget
Once you’ve created your accessibility widget, it’s time to explore the built-in features that make Elfsight’s solution a powerful choice for adding EAA and ADA compliance to your website. These functionalities are designed to meet accessibility needs while keeping everything easy to use and fully customizable.
- Text size adjustment. Allows visitors to increase or decrease font size for improved readability.
- Readable font toggle. Replaces decorative or complex fonts with a more legible typeface for better comprehension.
- Color contrast control. Offers high-contrast and grayscale modes to meet color contrast recommendations and assist visually impaired users.
- Image alt text recognition. Ensures compatibility with screen readers by reinforcing the use of alternative text for images.
- Keyboard navigation. Enables full navigation of your website using only the keyboard, supporting best practices for accessibility.
- Custom position and icon. Lets you place the widget anywhere and choose the display icon to align with your website’s design.
- Session-based settings. Remembers user accessibility preferences throughout their session for a consistent experience.
These features not only help your website meet accessibility standards but also create a more inclusive experience for all users. Let’s now go through the complete setup and installation process step-by-step.
Add ADA Compliance Widget: Step-by-Step
If you’re looking for a way to make your website accessible and compliant with ADA, WCAG, and EAA standards, Elfsight’s accessibility widget is a quick and powerful solution.
This tool is designed to provide support for users with disabilities by offering customizable accessibility modes, keyboard navigation, color contrast enhancements, and more — all without the need for complex coding.
Below is a full walkthrough on how to embed this accessibility solution and activate key features for a compliant and inclusive website experience.
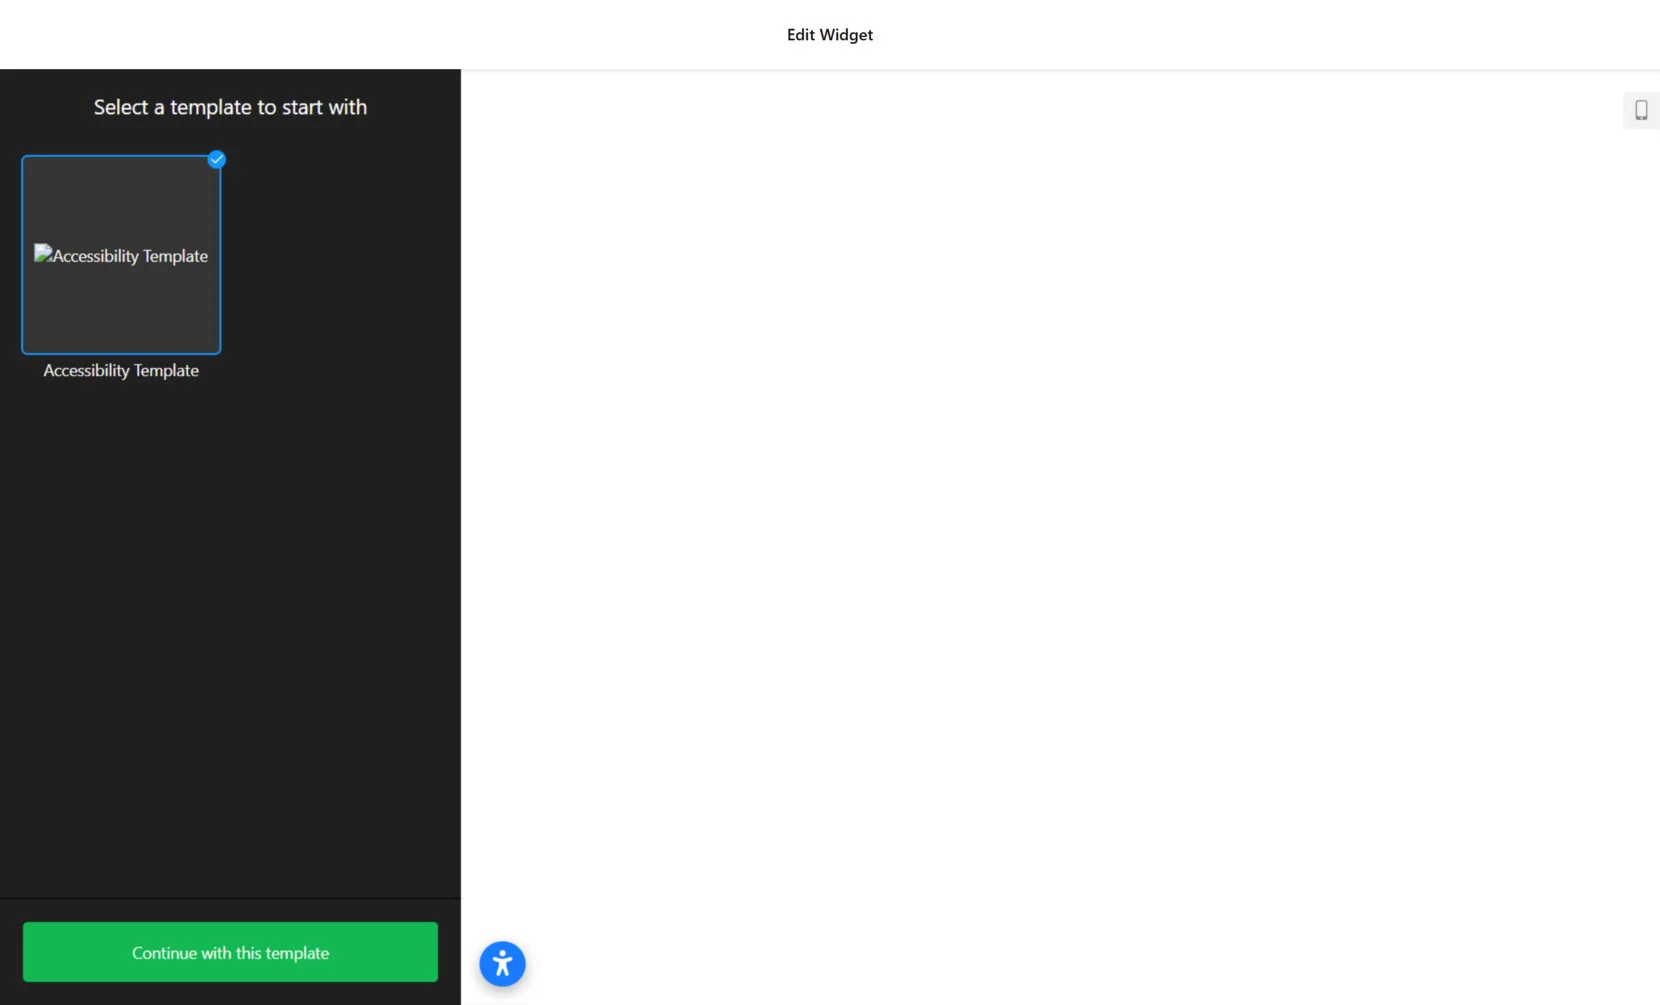
- Select a Template. When you enter the Accessibility widget editor, you’ll be prompted to choose a template. Click “Continue with this template” to proceed with.

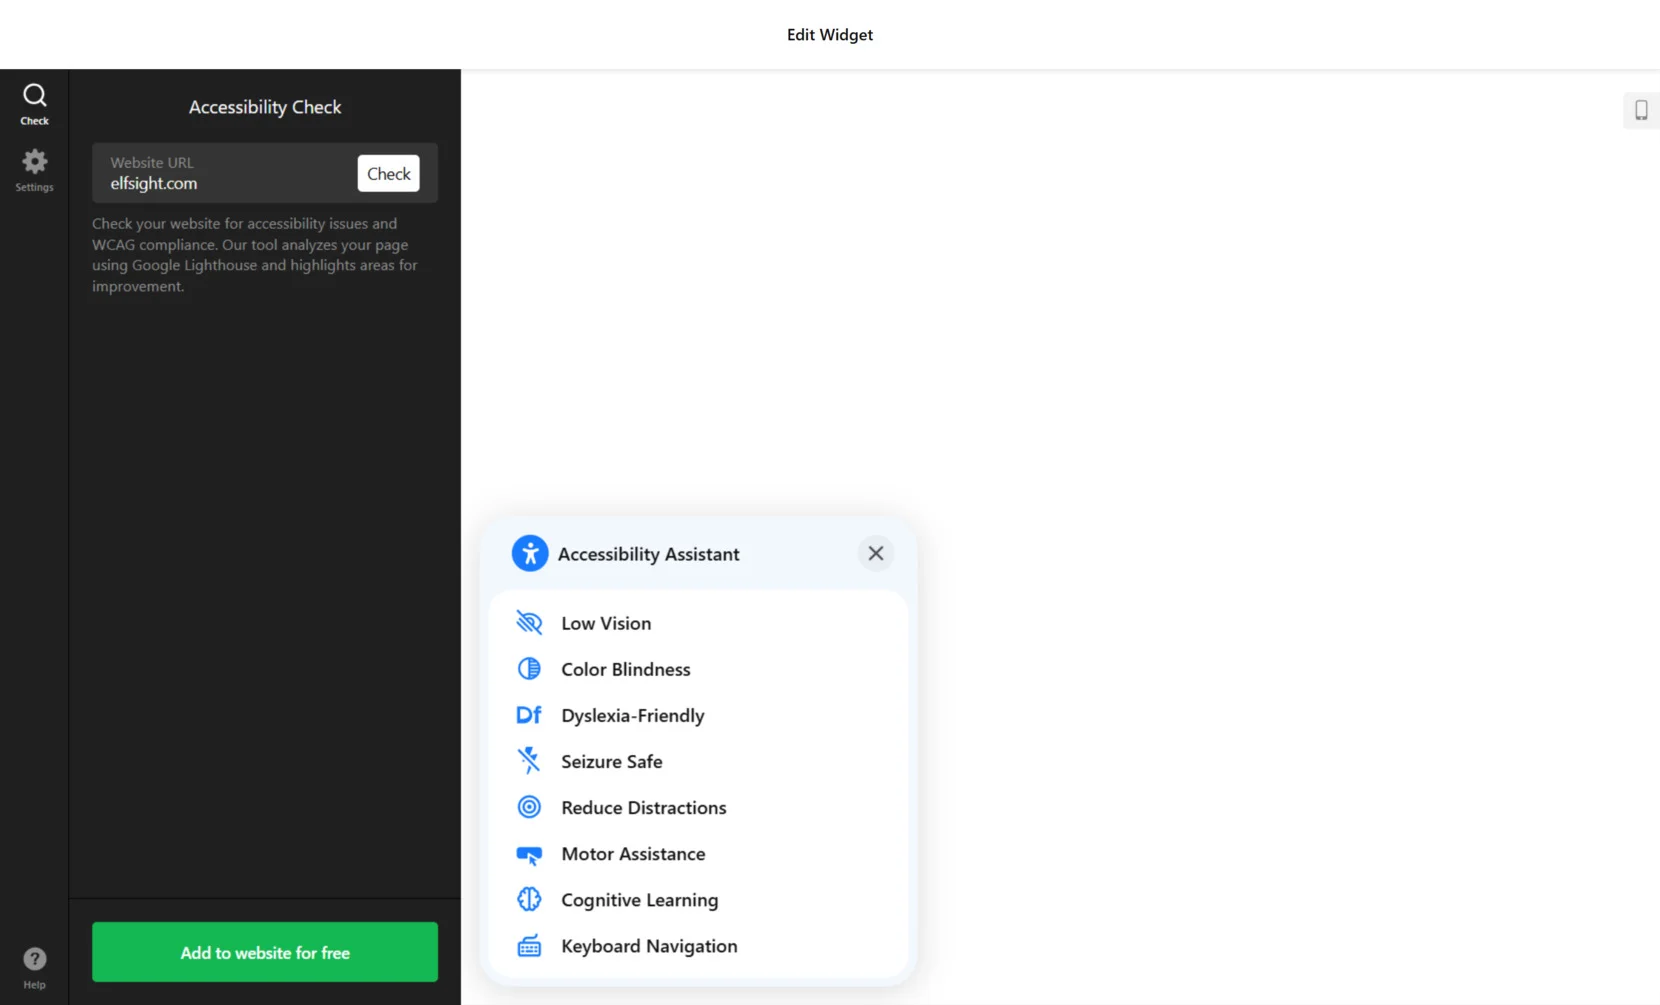
- Run an Accessibility Check. In the “Check” tab, enter your website URL to scan it for accessibility issues. The built-in tool will analyze your page and flags areas that may require improvement. Note: the check is only available for users with pro plans and higher.
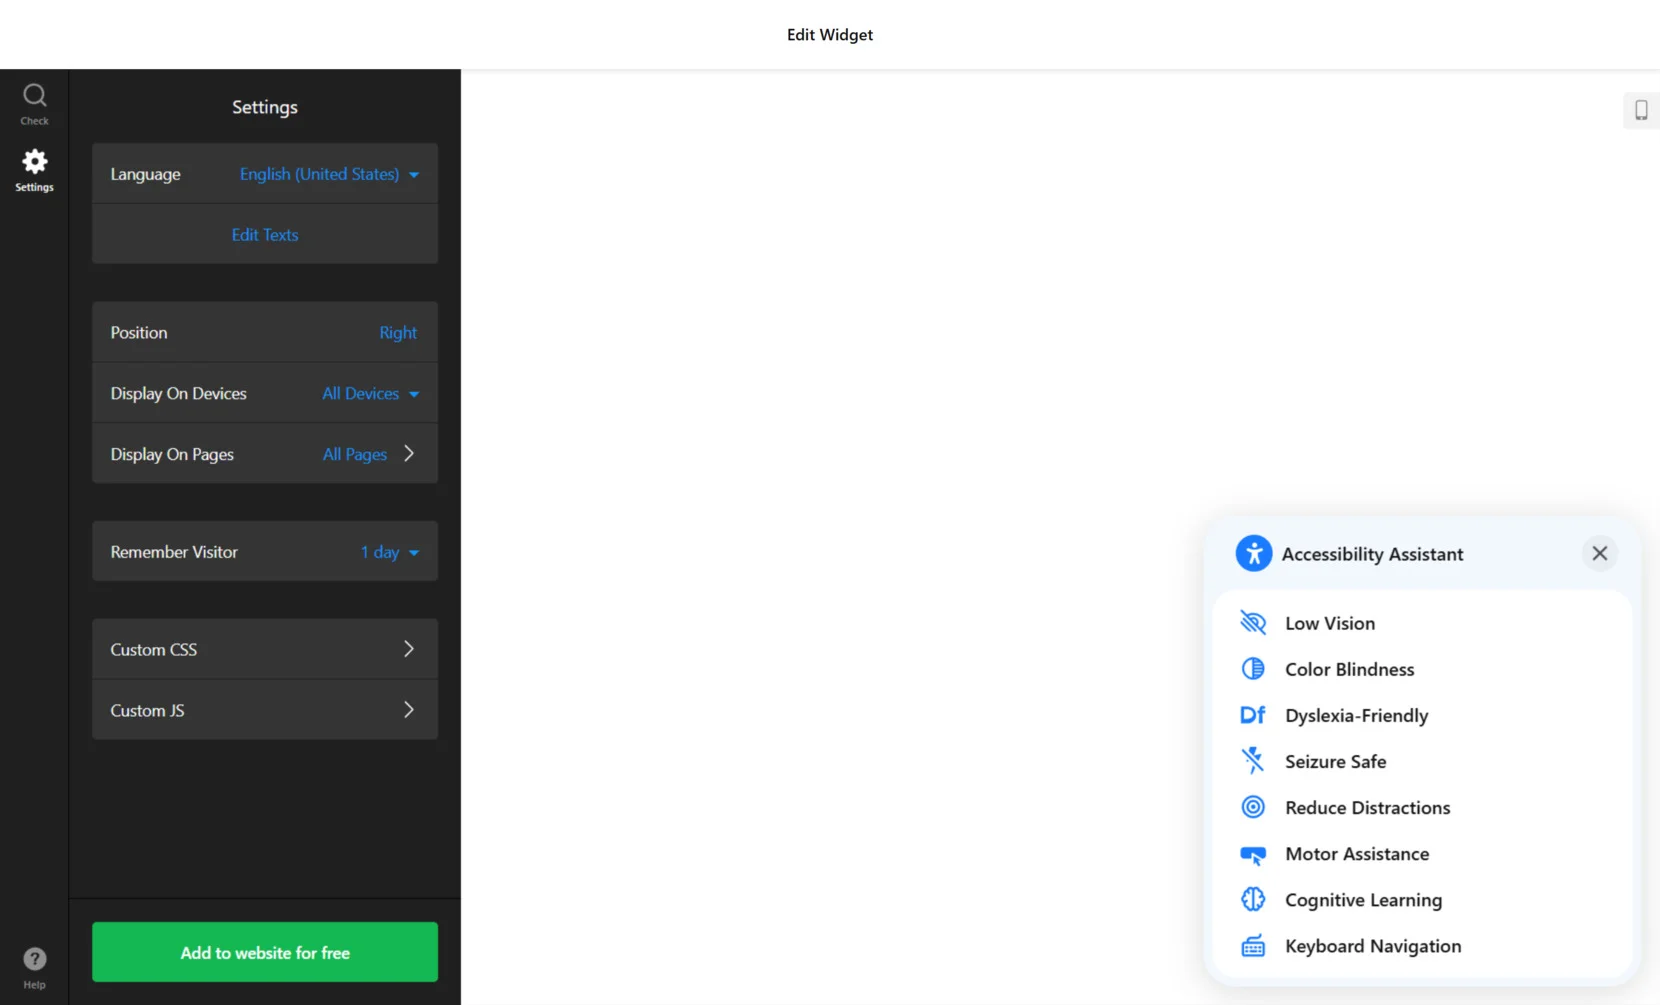
- Adjust Widget Settings. Switch to the “Settings” tab where you can choose the display language, modify visibility for specific devices and pages, select widget position (left or right), and enable memory duration for returning visitors. You can also inject custom CSS and JavaScript if needed.
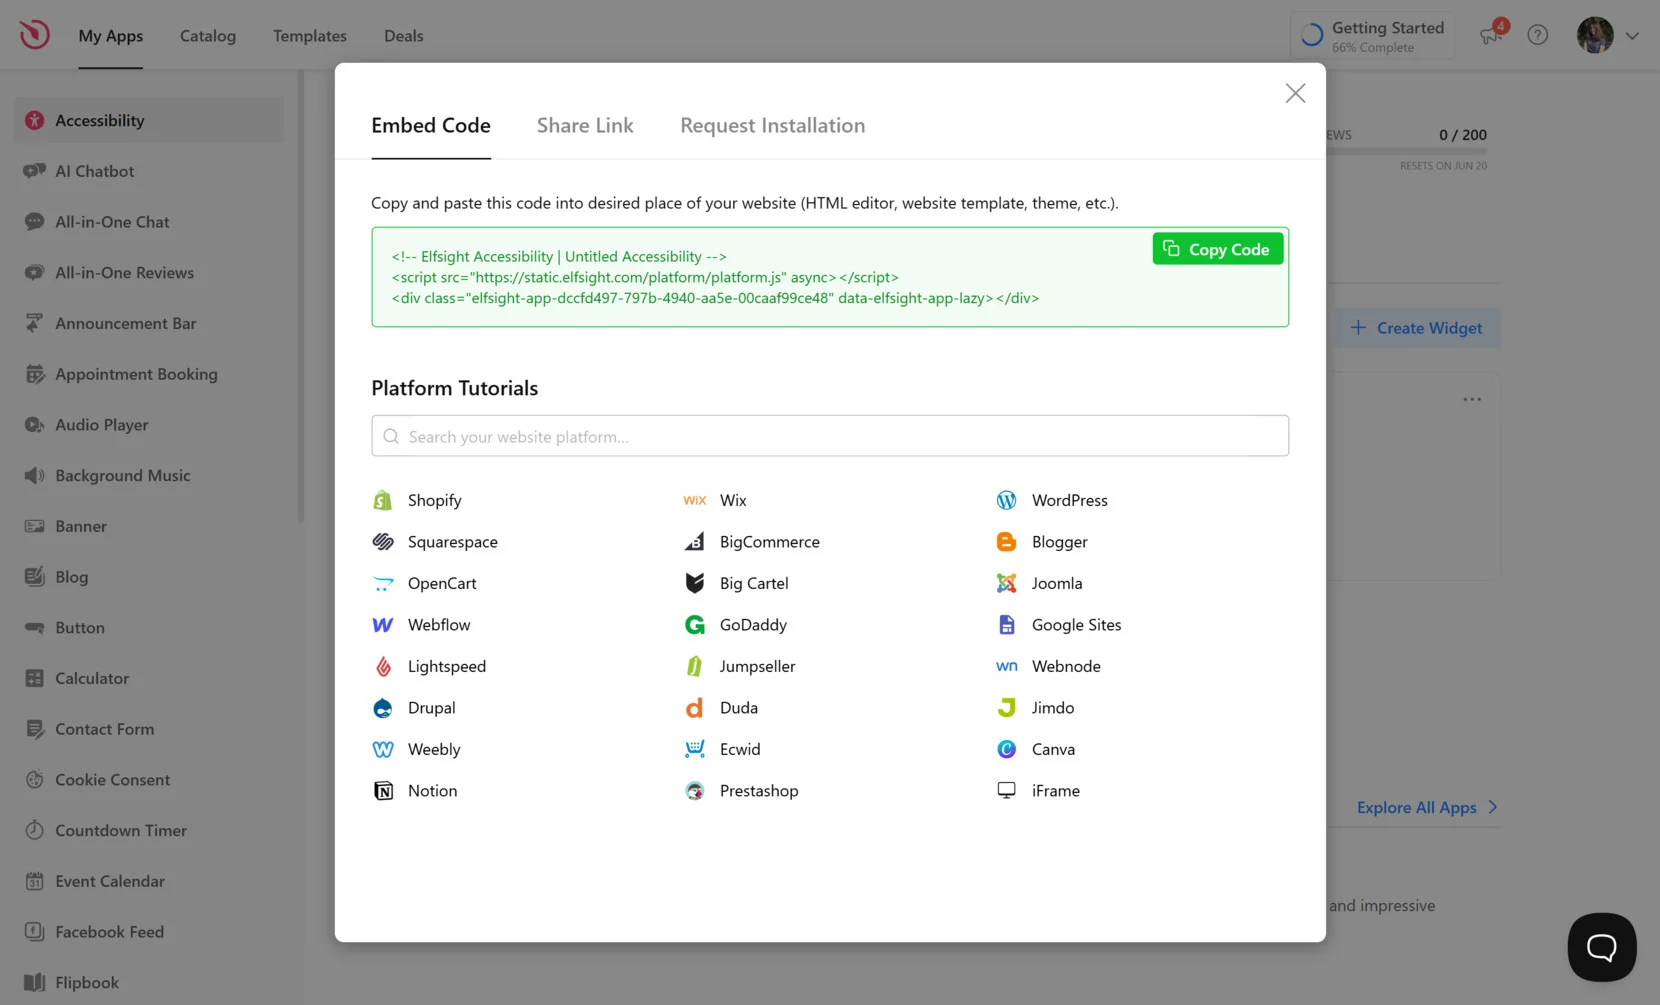
- Embed the Code on Your Website. Click “Add to website for free” in the bottom-left corner. Copy the generated embed code from the “Embed Code” tab. Then, go to your website backend and paste the code into the HTML or embed section where you want the widget to appear.
Once installed, the widget will instantly provide accessibility enhancements to all your website visitors, helping you stay compliant and inclusive.
Other Ways to Make Your Website Accessible
Elfsight’s ADA compliance widget is a fast and intuitive solution, but there are also more technical alternatives for embedding accessibility features. Below, you’ll find descriptions of two common methods. These approaches provide more control, but come with greater complexity.
Manually coding accessibility enhancements
The manual solution is ideal for developers or teams managing a custom-coded website. It involves directly applying web accessibility standards through semantic HTML structure, CSS design practices, and ARIA attributes.
Here’s what you need to do to make your website more accessible:
- Use semantic HTML tags. Implement elements like <header>, <nav>, <main>, <footer>, and <section> to create meaningful page structure.
- Apply ARIA roles and labels. Use attributes like aria-label, aria-hidden, and role=”navigation” to aid screen readers and assistive tech.
- Enable keyboard navigation. Test all interactive elements and apply CSS focus styles using :focus to make keyboard use intuitive and visible.
- Ensure proper color contrast and scalable fonts. Use WCAG guidelines to define text visibility and ensure that all fonts remain readable on zoom.
- Write descriptive alt text for images. Include alt attributes in all <img> tags for better compatibility with screen readers.
- Label form inputs clearly. Use paired <label> elements or associate fields with aria-labelledby to improve form accessibility.
Using the UserWay API integration
UserWay offers a code-based widget that can be added to your website by inserting a script. It includes adjustable features like font scaling and contrast, but its customization depends on working through a dashboard interface and developer input.
- Create an account with UserWay. Register and access the admin dashboard where you’ll configure widget options.
- Generate your custom accessibility script. Choose icon style, placement, and active features like highlight links or larger text.
- Copy the JavaScript embed code. This will include your account ID and selected configuration.
- Paste the script into your website’s code. Insert it before the closing </body> tag using your platform’s code editor or CMS tools.
- Test your changes. Reload your website and verify that the widget appears and functions correctly across key areas.
Comparing Elfsight and Other Methods
Below is a direct comparison of the Elfsight solution, UserWay API, and manual implementation to help you weigh convenience, control, and complexity.
| Method | Pros | Cons |
|---|---|---|
| Elfsight Widget | Quick to install and fully customizable with no coding required. | Users need to create an account with Elfsight in order to get the installation code, but a free plan is offered |
| UserWay API | Script-based solution that supports multiple accessibility tools in one widget. | Requires manual code embedding and offers limited design control. |
| Manual Implementation | Provides full control over accessibility and compliance with strict standards. | Highly technical and time-consuming, with constant need for updates and testing. |
While both alternatives serve their purpose, Elfsight clearly offers the fastest and most user-friendly route to embed accessibility features without compromising control or flexibility.
Next, we’ll go over usage tips to help you make the most of your accessibility features.
Tips for ADA Compliant Website
To make your website truly accessible and compliant with ADA and EAA standards, it’s not enough to just install a widget. Whether you’re using a plugin, a third-party integration, or manual coding, you must follow practical accessibility principles that cover a wide range of user needs, including those with visual, auditory, cognitive, and motor disabilities.
- Use clear, simple language throughout your website. Avoid jargon and long sentences to support users with cognitive disabilities or limited reading comprehension.
- Ensure all text meets minimum contrast ratios. Use color combinations that comply with WCAG 2.1 standards — at least 4.5:1 for normal text. This is critical for users with low vision or color blindness.
- Make all interactive elements keyboard-accessible. Users with motor impairments or those who rely on assistive technology must be able to navigate your entire website using the keyboard alone. Test tab order and use :focus styles to highlight active elements.
- Label all form fields clearly. Use <label> tags or aria-label attributes to associate input fields with their descriptions so that screen readers can interpret them correctly.
- Include descriptive alt text for every image. This benefits screen reader users and ensures visual content is understood even if it’s not visible or loadable. Alt text should be accurate but not overly detailed.
- Provide captions and transcripts for multimedia. Videos must include closed captions for users who are deaf or hard of hearing, and transcripts help users who prefer reading or use text-to-speech tools.
- Use headings to structure your content logically. Apply <h1> through <h4> tags to break content into clear sections, improving readability for everyone and helping screen readers convey structure properly.
- Design for screen magnification and zoom. Ensure content reflows properly when zoomed to 200%, without horizontal scrolling or cut-off elements. This helps users with low vision or temporary impairments.
With these tips in place, your accessibility solution — whether embedded or custom — will function more effectively. Let’s now explore which industries and businesses benefit the most from implementing accessibility features.
Who Should Add Accessibility Widget to Website?
Web accessibility is not just a legal requirement — it’s a competitive advantage. Businesses across multiple industries can enhance user experience, expand their audience, and ensure ADA and EAA compliance by using an accessibility integration.
Application in Healthcare and Medical Services 💊
Hospitals, private practices, and health portals must provide equal access to vital health information. Adding ADA and EAA compliance to a healthcare website ensures that patients with disabilities can schedule appointments, read content, and access emergency info without barriers.
Accessibility features like keyboard navigation, readable fonts, and screen reader support are essential for users with motor or visual impairments navigating medical resources. Improving accessibility in healthcare directly supports inclusive care and builds trust with patients from all backgrounds.
Application in Education and Online Learning 🎓
Universities, e-learning platforms, and training providers serve a diverse audience — including students with cognitive, visual, and hearing impairments. Adding accessibility features ensures compliance with academic standards and provides a more inclusive digital learning environment.
Educational websites are legally obligated to meet accessibility standards — especially those receiving public funding or offering certifications. Accessible form fields for registration, high-contrast text for reading materials, and closed captions on lectures all contribute to equal access.
Application in Government and Public Services 📋
Public sector websites must prioritize accessibility due to strict regulatory requirements. Whether it’s city services, licensing applications, or public safety info, government platforms must meet WCAG and EAA guidelines to be usable by all citizens.
Government websites are often audited for compliance — ensuring accessibility from the start prevents costly rebuilds later. Features like keyboard-only navigation, enlarged text, and readable structure improve public access and avoid non-compliance penalties.
These industries show how accessibility isn’t just optional — it’s essential for legal compliance, user satisfaction, and reputation.
In the next section, we’ll address potential problems you might face when implementing accessibility solutions and how to solve them efficiently.
Fixing Common Issues
While adding accessibility to a website is essential, the process can come with challenges — technical, structural, or design-related. Below, we’ve answered the most common questions to help you troubleshoot and improve your accessibility implementation effectively.
Why doesn't the accessibility widget appear on the website after installation?
How can I make sure the widget works on mobile?
Why do some accessibility features not work with my custom design?
What if screen readers are not interpreting elements correctly?
Do I need to update the widget regularly?
Can a widget alone make my website fully compliant?
How do I reduce cognitive overload for users?
By understanding and preparing for these challenges, you can ensure that your accessibility solution functions smoothly and serves all users.
Conclusion
Adding accessibility to your website is not just about meeting legal requirements — it’s about creating a welcoming, usable experience for every visitor. Features like keyboard navigation, alt text, color contrast tools, and ARIA roles contribute to a design that works for everyone, including users with visual, motor, cognitive, or hearing impairments.
Solutions like Elfsight’s ADA Compliance widget simplify this process, offering a quick and customizable way to meet both ADA and EAA standards. When embedded correctly and paired with best practices, accessibility tools enhance UX, extend your reach, and show commitment to digital equality.
Need Help or Want to Learn More?
We hope this article gave you the clarity and confidence to start your accessibility journey. If you have any questions or want expert support in adding accessibility to your website, don’t hesitate to reach out. At Elfsight, our goal is to offer a smooth, no-code widget experience that empowers businesses of all sizes.