Complemento del botón de clic para llamar de WooCommerce

Crea tu aplicación Click to Call
Descripción
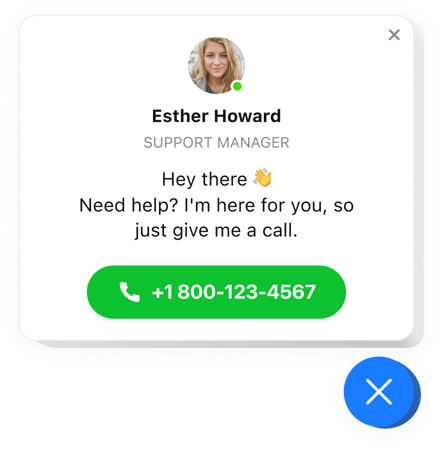
El widget Click To Call de Elfsight para WooCommerce es una herramienta fácil de usar que le permite llegar a su audiencia más rápidamente. Sus visitantes pueden llamarlo presionando la imagen del contacto en los teléfonos inteligentes y, en cuanto al escritorio, su número aparece llamativo para un acceso telefónico simplificado. La burbuja en sí y la ventana de llamada son absolutamente personalizables y le permiten crear un diseño absolutamente único del complemento. También eres libre de modificar todos los elementos de tu widget para que combine completamente con la gama de colores del sitio web.
Con el botón de llamada, inicia el crecimiento del negocio y aumenta las ventas
¿De qué manera incrusto un botón de clic para llamar en el sitio web de WooCommerce?
La base del widget se realiza en las páginas de Elfsight y no es necesario codificar. Abra nuestra demostración activa para personalizar su aplicación, obtener el código e implementarlo en su sitio web.
Las mejores formas de utilizar la integración del botón Llámanos
Tenemos muchas oportunidades de ajuste: widgets de tamaño completo para agregar en el área de contenido, complementos flotantes con opciones de desplazamiento, diseños para el pie de página, encabezado y todo tipo de opciones verticales para barras laterales y menús.
¿Existe una opción para crear un botón de soporte o llamada flotante a través de la agencia del editor?
Puedes crear cualquier variación del widget. Hay toneladas de diseños aplicables en el editor y todos ellos se pueden personalizar rápidamente de la forma que necesites.
Explora la lista de las funciones más destacadas:
- Marcación inmediata en dispositivos móviles;
- Seleccione una de las variantes de posición del widget: flotante a la izquierda, flotante a la derecha o personalizado;
- La opción de mostrar el widget en páginas particulares o excluir páginas;
- Tres variantes de usuarios para quienes aparecerá el widget: todos, nuevos o solo recurrentes;
- 4 activadores de widgets: tiempo en la página, tiempo en el sitio, posición de desplazamiento e intención de salida.
Simplemente consulte esta demostración para ver cómo funciona
¿Cómo agrego Click to Call en mi página web de WooCommerce?
Simplemente siga los pasos que se indican a continuación para integrar el widget.
- Inicie nuestro widget gratuito editor y comience a crear su complemento personalizado.
Elija el diseño y las características preferibles del complemento y aplique las correcciones. - Adquiera su código individual que se muestra en el formulario especial en Elfsight Apps.
Una vez completada la creación de su widget personal, copie el código personal de la ventana que aparece y guárdelo para futuras ocasiones. - Comience a utilizar la herramienta en el sitio web de WooCommerce.
Implemente el código copiado recientemente en su sitio web y aplique las ediciones. - ¡Listo! La integración ha terminado por completo.
Vaya a su sitio para inspeccionar cómo funciona el complemento.
En caso de tener preguntas o encontrar dificultades, no dude en escribir a nuestro equipo de soporte. Nuestra gente está deseando resolver todos los problemas que puedas tener con el widget.


